[ad_1]
On Saturday, I lastly tackled the mission that I’ve been terrified to do and have delay for months now. I wasn’t afraid of this mission as a result of it was tough, or as a result of it required abilities that I believed had been past my ability stage. Nope, I used to be terrified as a result of the final time I did this mission, it completely destroyed my pores and skin for months.
Should you’ve been round for some time, you realize that the mission I’m speaking about is the DIY countertop that I made out of laminate flooring. I don’t know why my pores and skin reacted prefer it did to the mud created from slicing and sawing these laminate flooring boards, nevertheless it was terrible. I shared extra particulars right here.
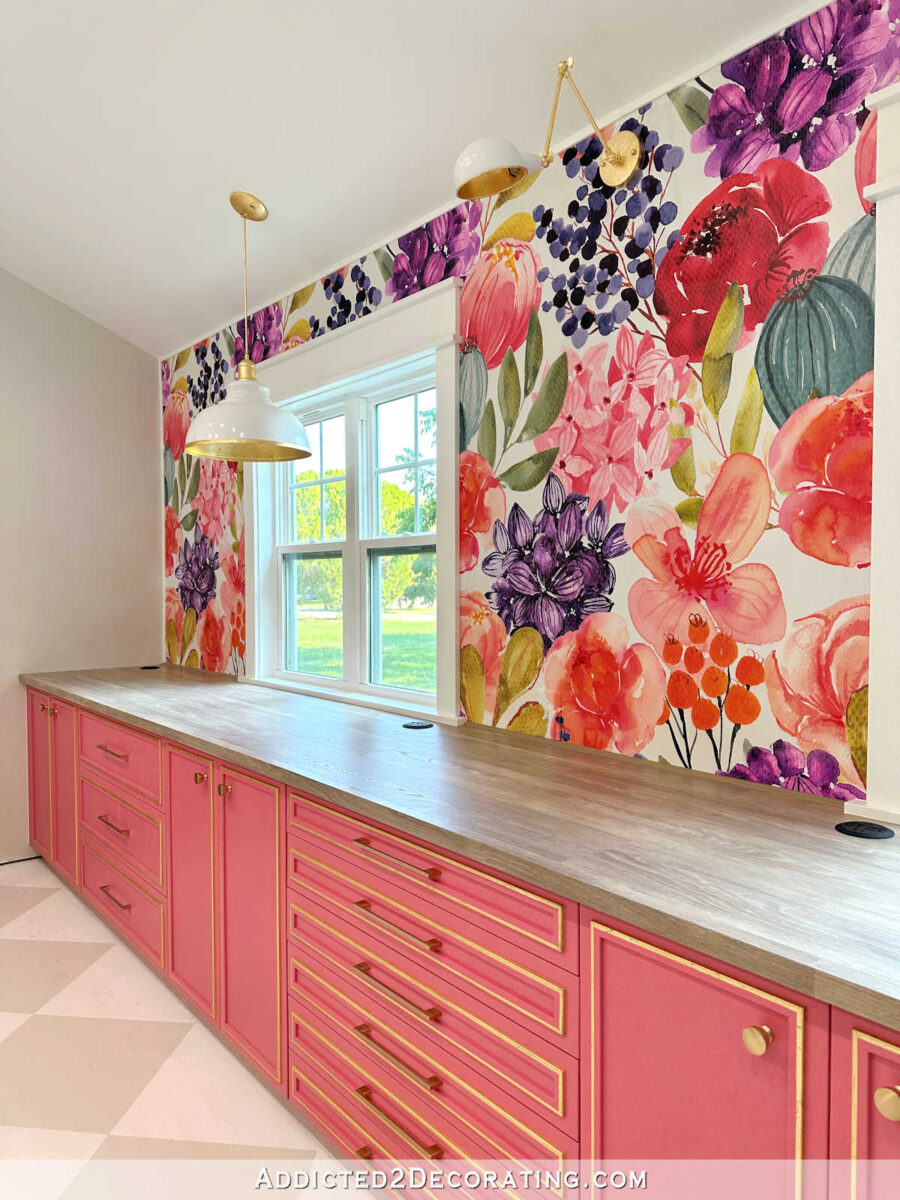
The countertop turned out nice, although, and after doing the 20-foot countertop on the mural wall, I had simply sufficient laminate flooring left to do the countertop within the workplace space of the studio. Right here’s how the 20-foot countertop turned out…
So naturally, for the reason that cupboards in each sections are the identical, I needed the counter tops to be the identical additionally. However I dreaded this mission a lot due to the worry that I’d get the mud on my pores and skin once more, and must undergo that distress once more. All of my security precautions appear to have labored, although. I haven’t had any ache or itching to this point. I don’t really feel like I’ve glass shards imbedded in my pores and skin. In order that’s good!
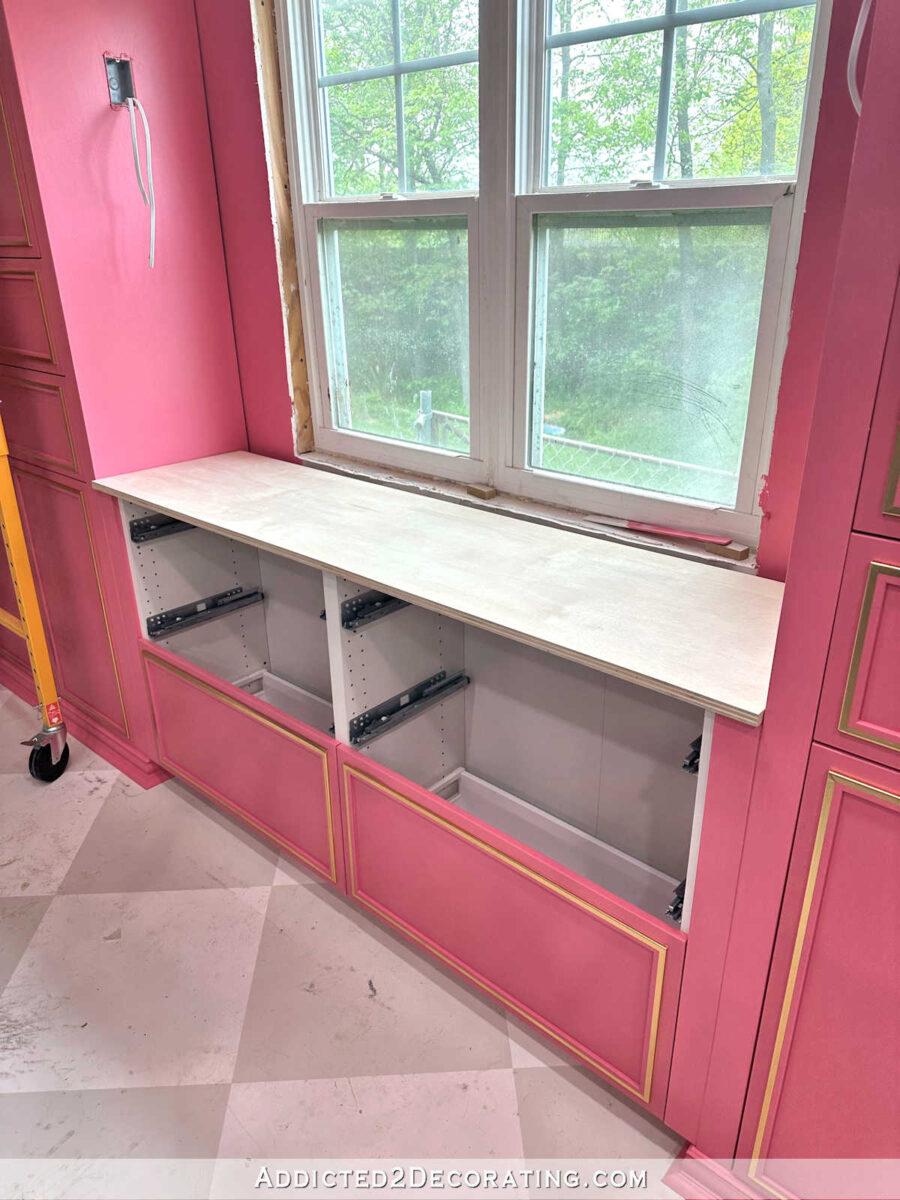
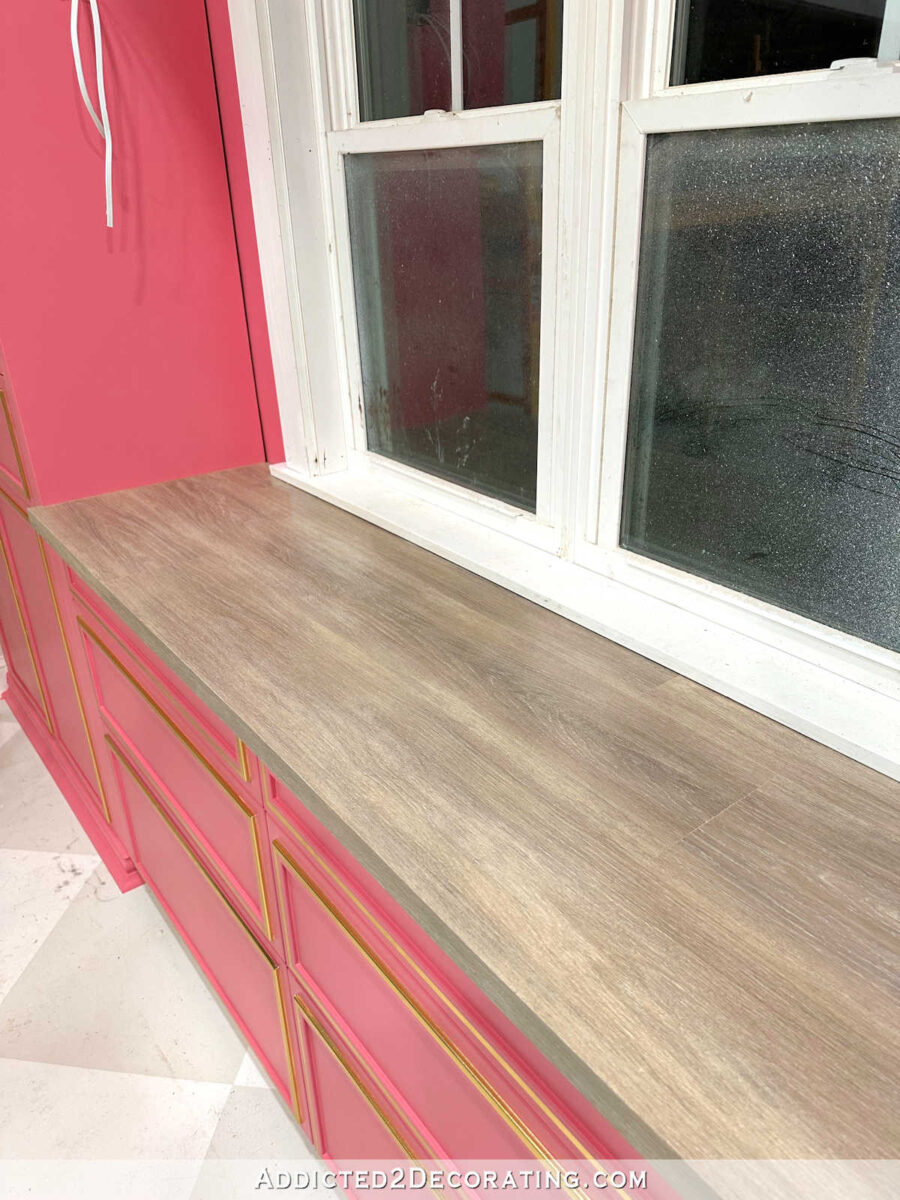
This countertop posed one other little problem. The countertop wanted to increase 1.25 inches past the entrance of the cupboards, which meant that I had this very small return on either side.
With the intention to make the countertop as seamless as attainable, the items connected to the entrance fringe of the plywood wanted to be mitered on the highest edge, and the highest items of laminate that sat towards the entrance edge items additionally wanted to be mitered to suit towards the entrance edge items.
This countertop was totally different from the primary one in a single small method. The opposite countertop sat between two partitions perpendicular to the countertop wall, so the mission was very simple. However as a result of this countertop sits between two tall cupboards on both finish, the plywood base for this countertop caught out previous the cupboards 3/4-inch. Which means that I needed to reduce the ends of the highest entrance items in order that the entrance 1/2-inch would accommodate the mitered edge items that may wrap round that little nook, whereas the remainder of the facet fringe of the entrance prime items would match inside the 2 cupboards.

I’ll admit that it took me a really very long time to determine this out. Most of my time was spend making an attempt to determine a better method to do that, however I lastly realized that there was just one option to do it. The nerve-racking factor is that I didn’t have any boards to spare. I had simply sufficient to cowl this countertop with nothing to spare. So if I made a mistake, I’d be up a creek.
I managed to get it proper. Utilizing my desk noticed, I reduce the entrance edge and one facet at a 45-degree angle, after which went again with my desk noticed blade set at 90 levels and reduce off all however the entrance 1/2-inch of the mitered edge on the facet of the board.
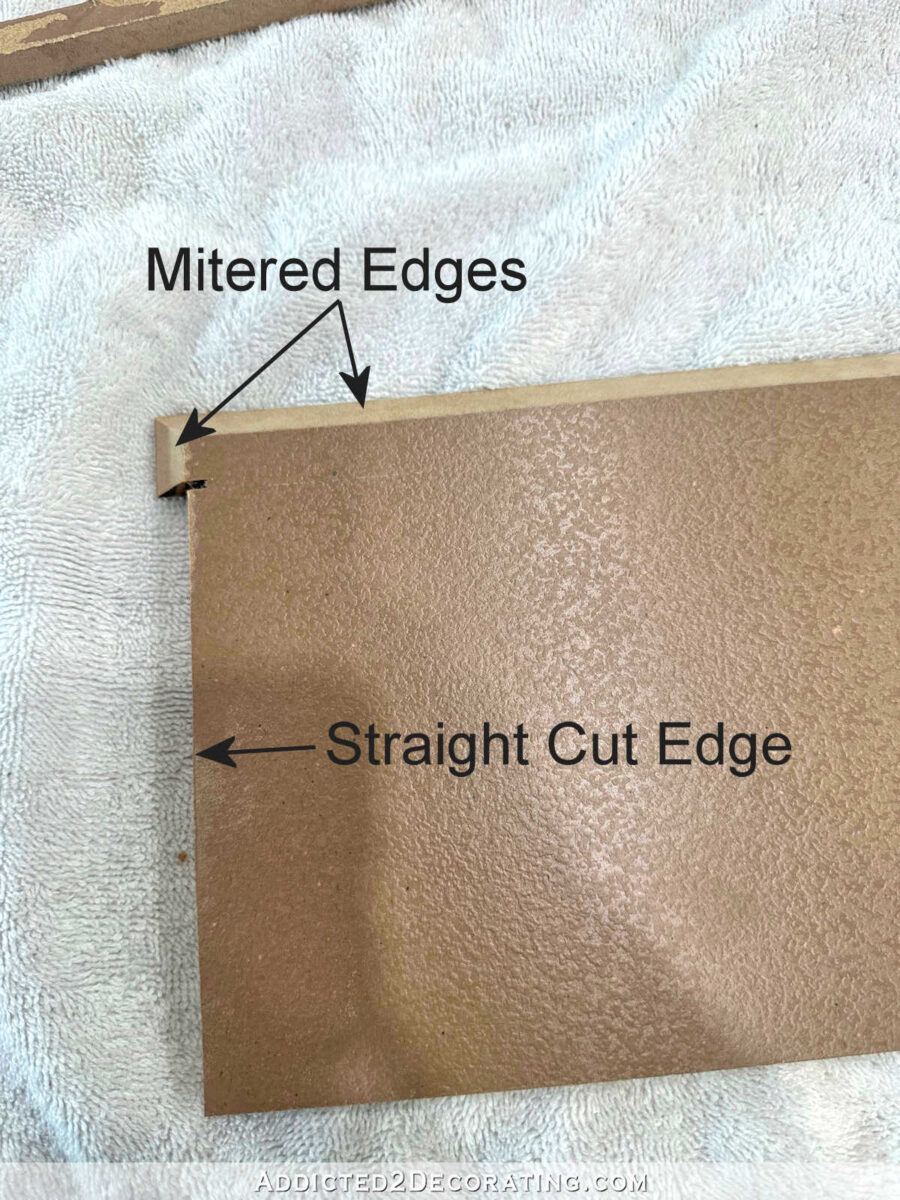
Right here’s one other take a look at the cuts from the underside of the board…
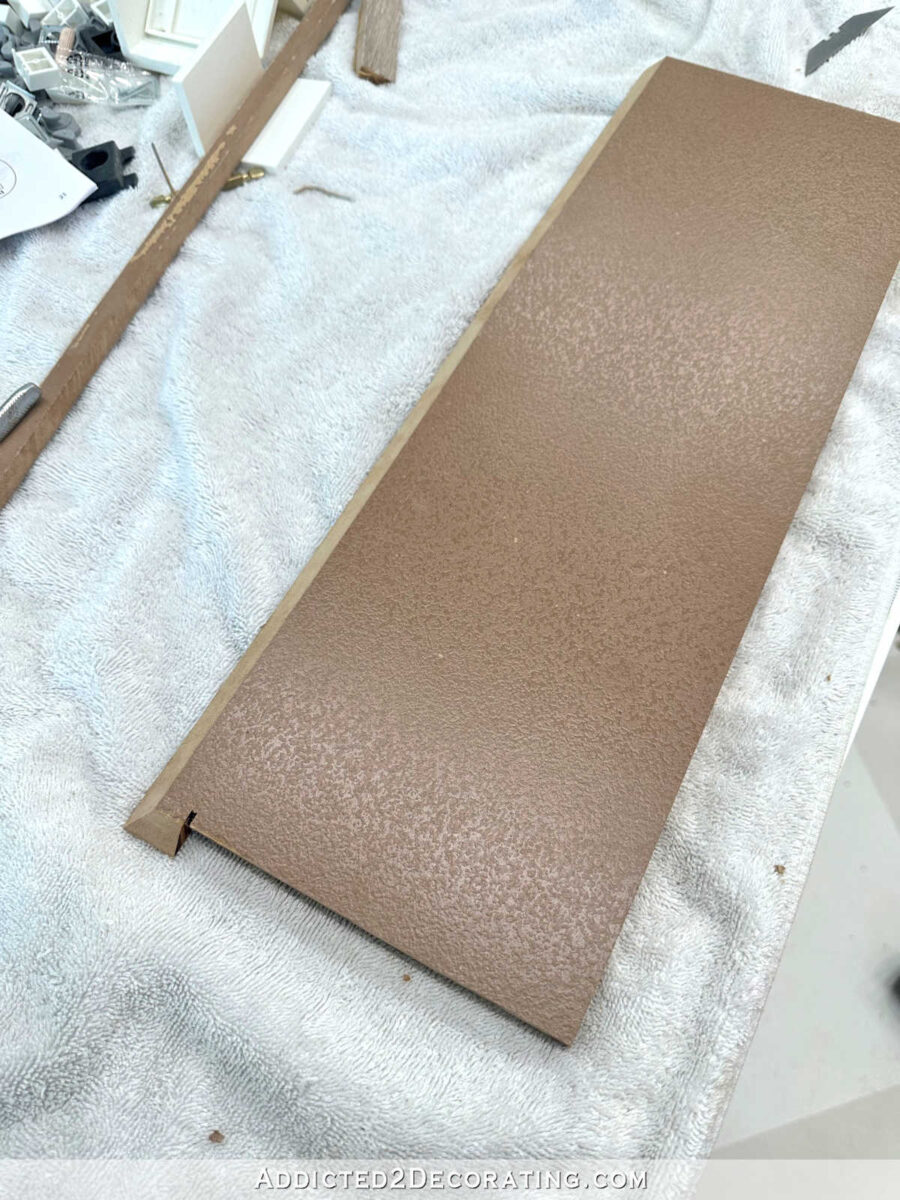
And right here’s the highest view…
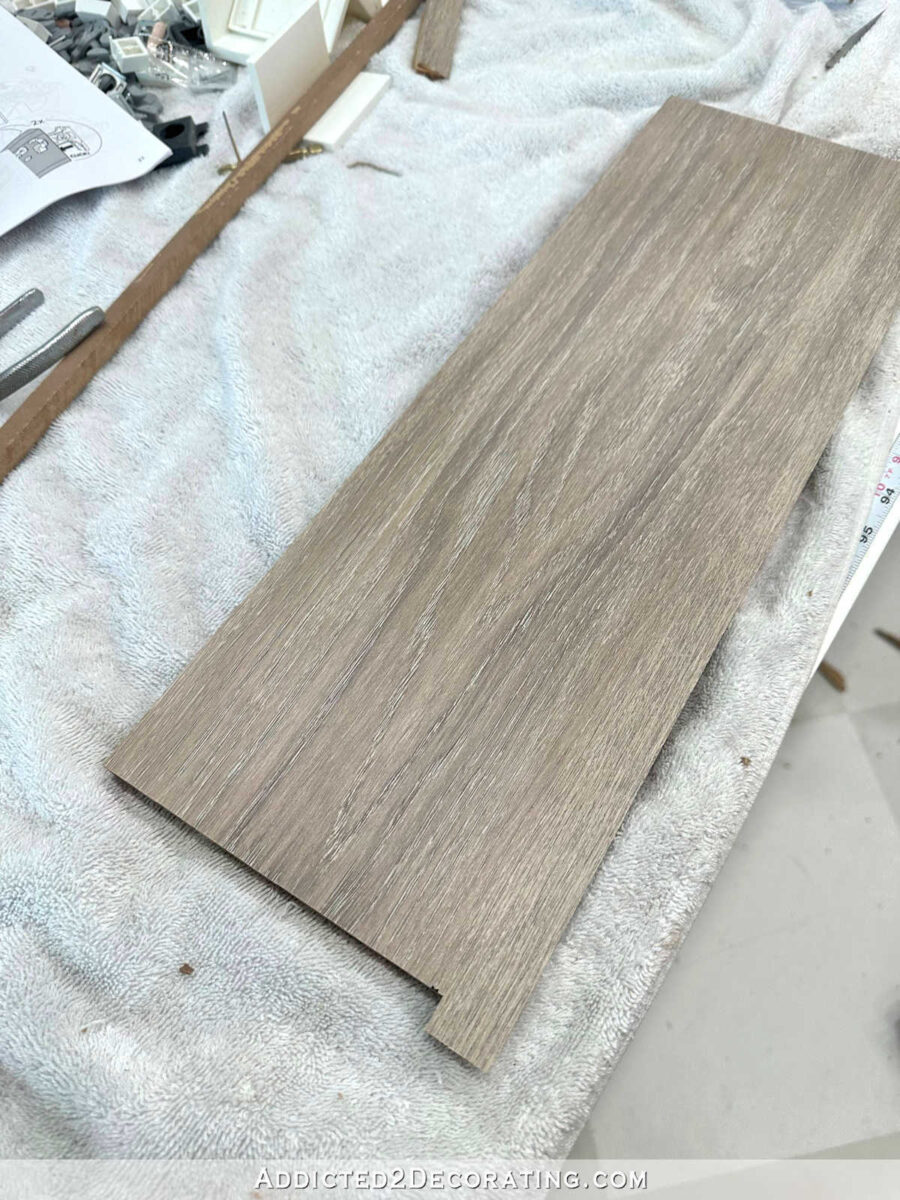
So with this prime entrance board in place, you may see that the entrance 3/4-inch stands proud and wraps across the cupboard with a 45-degree mitered edge whereas the remainder of the board hugs the cupboard.

You may see that my cuts left little tiny cracks between the countertop boards and the cupboards, so I used the identical paint-and-caulk combination to fill in these cracks, in addition to the tiny cracks between the boards. I took one of many boards to House Depot and had them colour match one of many many colours within the laminate boards. I combined it with the identical DAP Alex Quick Dry caulk that I all the time use.

Right here’s a greater take a look at the crack earlier than I crammed it…

I simply used my finger to smoosh the caulk/paint combination into the cracks, after which wiped off the surplus with a moist rag. Right here’s what it seemed like after. It’s not excellent, nevertheless it’s fairly shut!

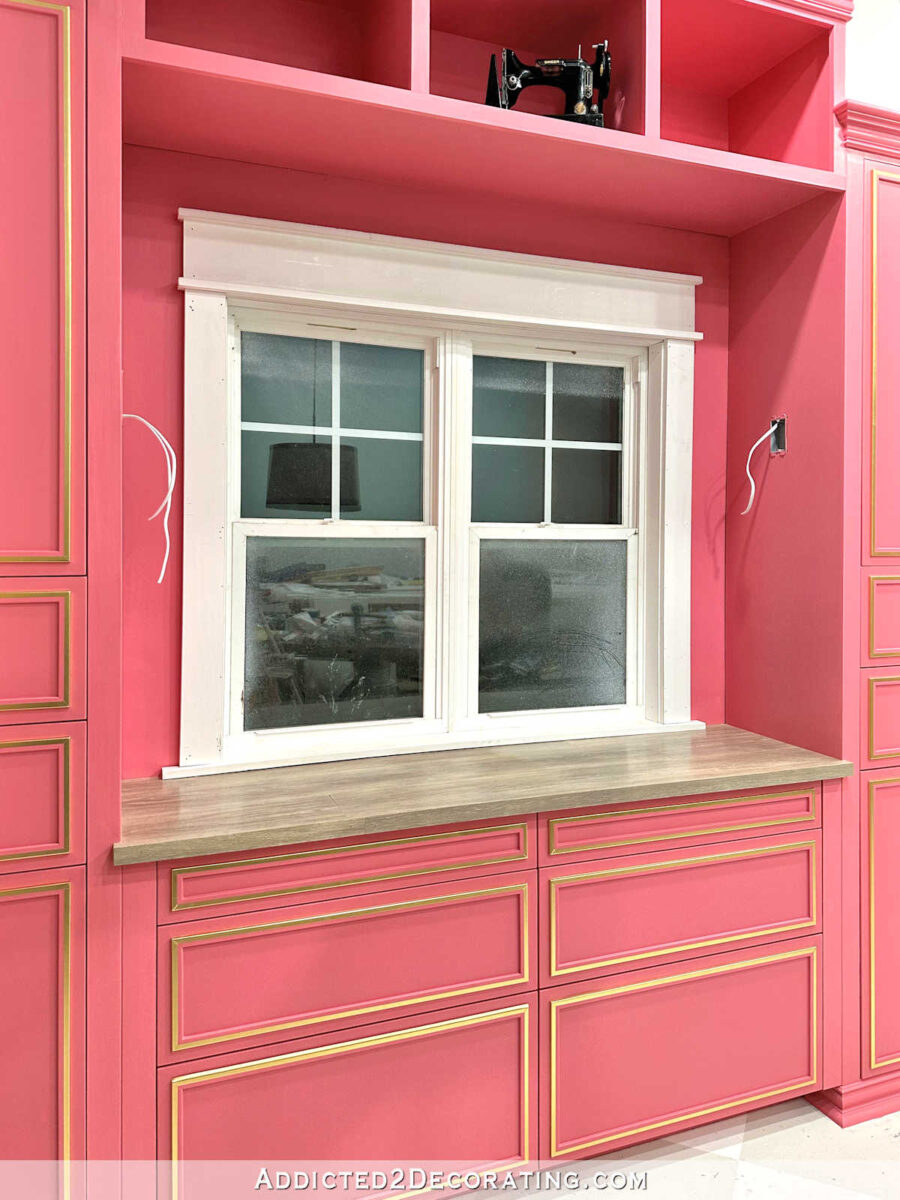
After ending the countertop, I spend about half-hour prepping and re-cutting the trim for the window. I reused the trim that was on there beforehand, so I had plenty of 16-gauge nails to drag out (and people issues don’t need to come out!!), after which I needed to recut the boards to suit the brand new top of the window, which was just a bit bit shorter as a result of top of the countertop. I nonetheless have quite a lot of ending to do on the window trim. Not one of the window trim has been wooden filed, sanded, caulked, or painted but. However take a look at that fairly countertop!

I’m so happy with how this turned out, and I’m thrilled to be performed with it!
To chop the boards, I didn’t purchase a kind of bunny fits. As a substitute, I simply determined to cowl myself from underneath my eyes to my ft with layers of clothes. So the one areas that weren’t lined had been my brow and my palms. However somebody left a remark saying that their allergist stated to verify to guard all your membranes — eye drops in eyes, nasal spray in nostril, lotion throughout pores and skin, and so forth. So earlier than suiting up with layers of clothes, that’s precisely what I did. On the areas of my pores and skin the place I had such a foul response final time — face, neck, and chest — I coated my pores and skin with castor oil, which is the thickest oil I had available.

So after coating myself with castor oil, layering up on clothes, ensuring every little thing that might be lined was lined (besides my palms and brow), and turning on a really highly effective fan to blow the mud away from me as I reduce them, I received all of the boards reduce, after which instantly stripped down, put all of these garments in a plastic bag, and took a chilly bathe. All of that effort appears to have labored. I did all the slicing on Saturday, and at present (Monday), I’m nonetheless not feeling any discomfort. So I’m hopeful that I received via this mission unscathed.

And simply try the little returns on the corners. I’m actually so happy with how these turned out.

And I believe the countertop itself turned out superbly!
So these cupboards are nearly completed. I nonetheless want to complete up the window trim, order a shade for the window (now that I can take the measurements with the trim connected), cowl the cracks between the cupboards and wall with some little trim and get that painted and clear coated, after which gold leaf and set up the sconces. Oh, and the doorways and drawers nonetheless want their fairly jewellery! I hold forgetting about these door and drawer pulls, however they’ll add the right completion. It’s coming alongside!!

Addicted 2 Adorning is the place I share my DIY and adorning journey as I rework and embellish the 1948 fixer higher that my husband, Matt, and I purchased in 2013. Matt has M.S. and is unable to do bodily work, so I do the vast majority of the work on the home on my own. You may study extra about me right here.
[ad_2]
Source link
