[ad_1]
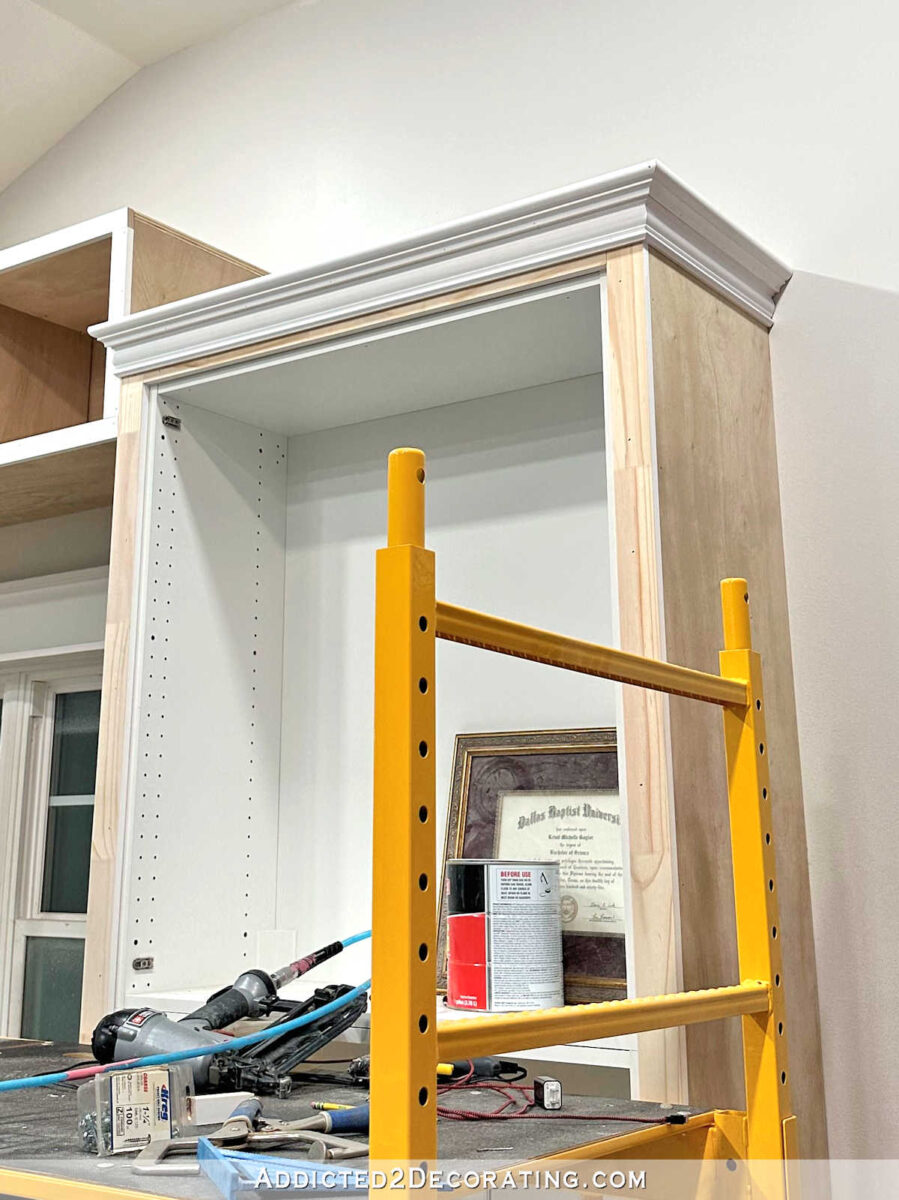
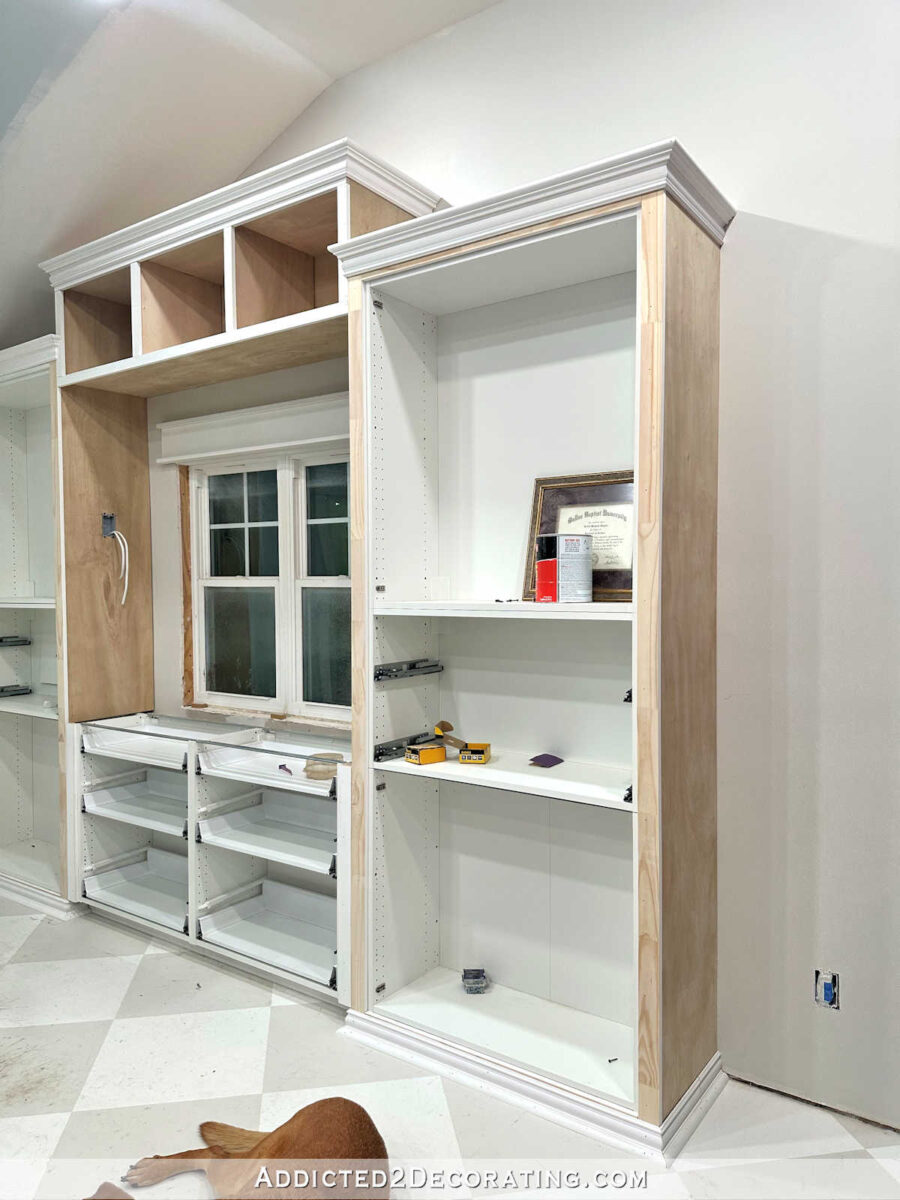
Progress is shifting proper alongside on my studio workplace space cupboards, and I now have the entire ornamental trim connected. And relatively than attaching massive crown molding, I sort of cheated and used what I might name a fake crown molding that’s a lot simpler to chop and connect than precise crown molding, and it appears simply pretty much as good as precise crown molding.
So should you’ve been wanting so as to add crown molding to a room or cupboard, however you’ve been intimidated by the entire slicing and putting in course of, this may make it a lot simpler for you! You don’t want any fancy instruments or jigs. You don’t must know tips on how to decide the spring angle of crown molding. Nothing like that. For those who can reduce and set up baseboards or door casing, then you’ll be able to reduce and set up this trim that gives you the look of a big, attractive crown molding with out all the trouble.
Earlier than I get to that, let me again up and remind you the place I left off on this mission final week. The final I confirmed you, I had constructed the cubby bridge connecting the 2 tall cupboards (that are IKEA Sektion cupboards that I’m engaged on customizing), after which I had added the entire primary trim to the cupboards. At that time, they seemed like this…

And now that the ornamental trim has been added, the cupboards appear to be this…
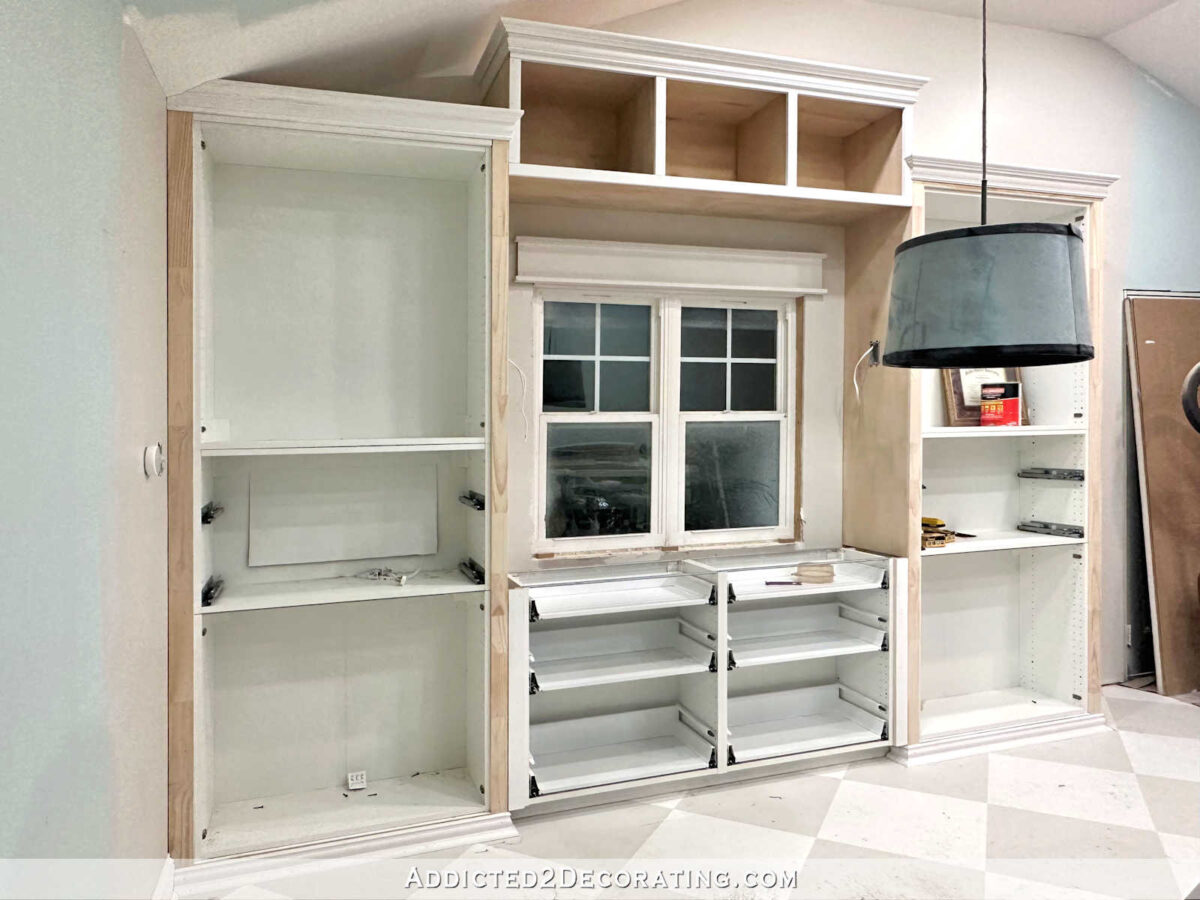
Did you be aware of that faux crown molding? Would you might have ever identified that I cheated that look with a a lot simpler course of had I not pointed it out?

So let me present you the way I created this easy-to-install fake crown molding that you just reduce and set up identical to baseboards. To be able to create that look, I used a very fairly case molding (case molding is used to trim doorways and home windows) and the tiniest (however not the plainest) crown molding I may discover. My Dwelling Depot had two tiny crown moldings. One was very plain and one was not. I selected the one which was not.
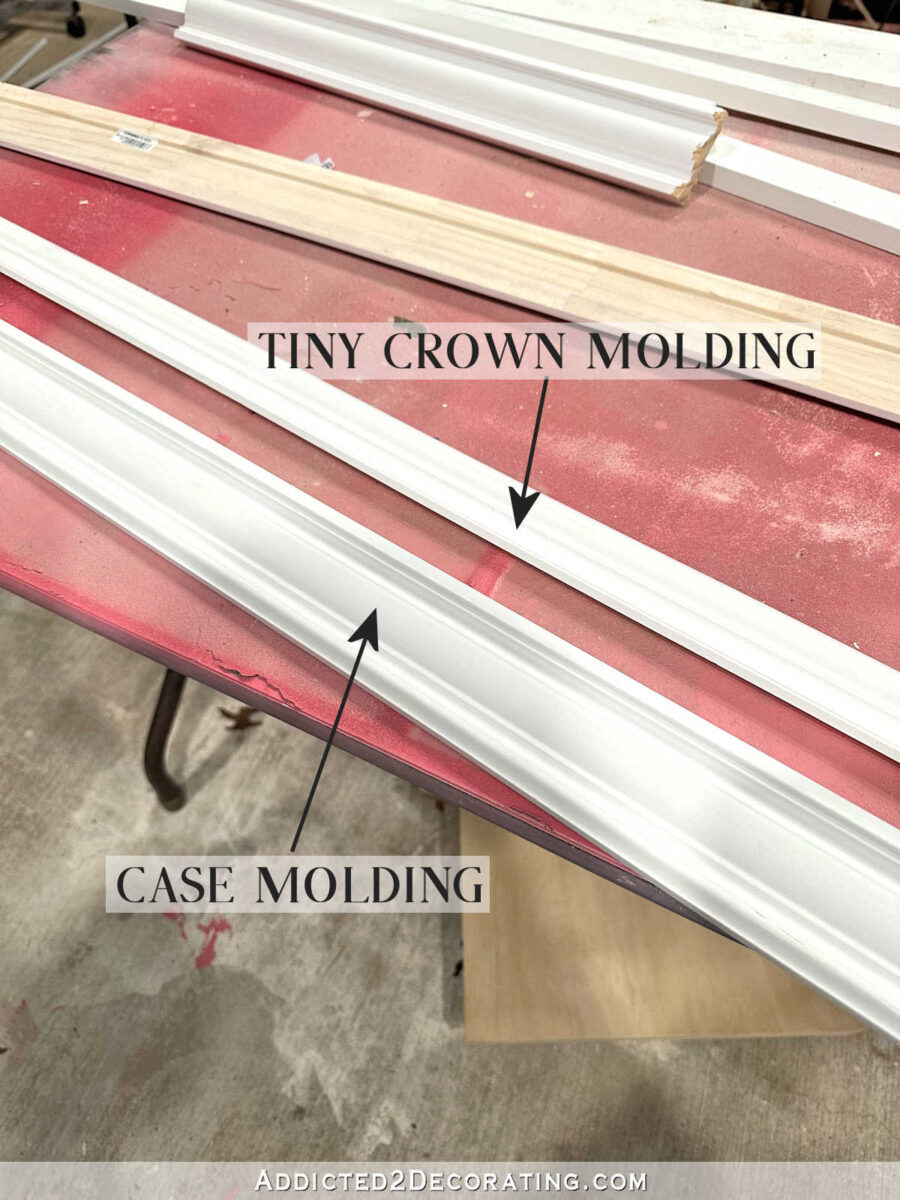
I do know what you’re pondering. “Kristi, you informed us this was a fake crown molding, however you used crown molding!” Sure, that’s true. However that tiny crown molding is only one small piece of the general look. And due to the way it’s used, you gained’t truly must know tips on how to reduce crown molding. Stick with me right here.
What I did is I used wooden glue and 5/8-inch 18-gauge brad nails in my nail gun to connect the tiny crown molding to the slender flat space on the sting of the case molding.
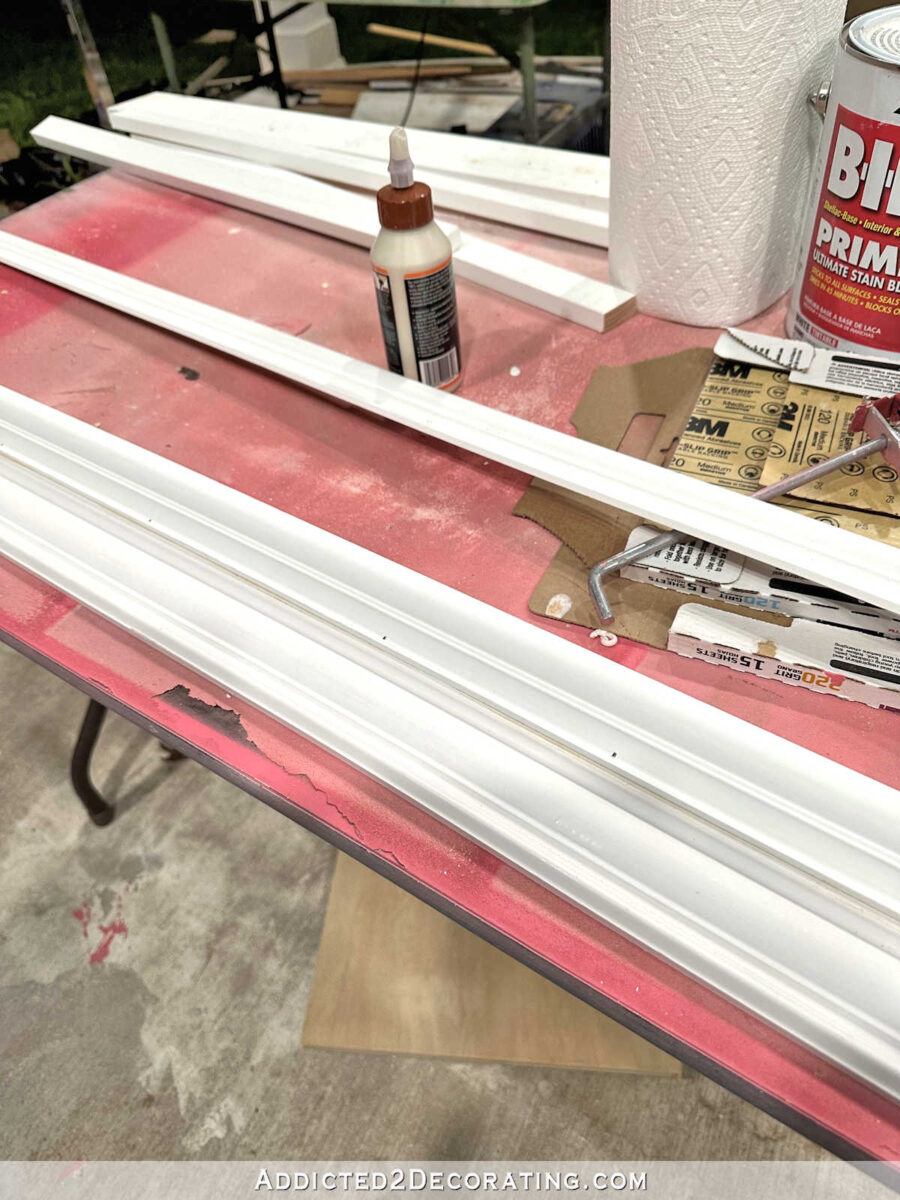
With these two items connected to one another, right here’s what that profile seemed like…

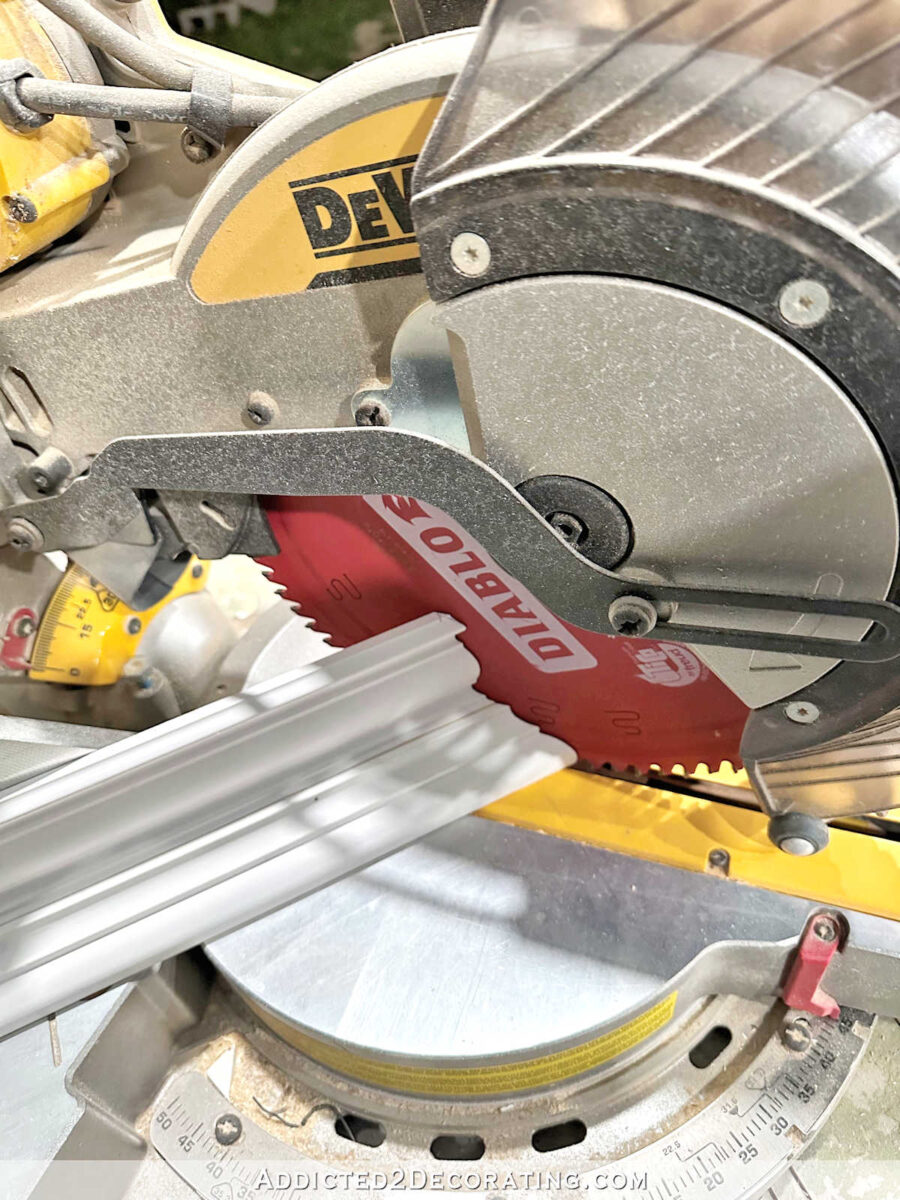
I left it alone for some time for the glue to dry, after which I used to be prepared to chop my items. To be able to reduce, I merely turned the trim the wrong way up, in order that the tiny crown molding was on the backside, and I made positive that the case molding was pushed flat towards the fence on my miter noticed.

I marked the place I wanted to chop (identical to I used to be slicing baseboards), and I at all times put a tiny mark to remind me which path my angle must be reduce.

And with that case molding sitting flat towards the fence, I reduce on the mark.
After which I turned the reduce piece over, with the tiny crown molding on the prime, and connected it to the cupboard utilizing 1.5-inch 16-gauge nails.

I imply, y’all! This might not have been simpler. This offers you the look of fancy crown molding whereas taking the entire guesswork and frustration out of slicing actual crown molding.
Since I do know tips on how to reduce and set up precise crown molding, and I’ve a Kreg Crown Molding Jig to make the method fairly straightforward, and I’ve put in crown molding a thousand occasions, you is likely to be questioning why I selected this fake crown molding technique for these cupboards.
There are two causes. First, there actually aren’t many crown moldings that I like. I are likely to seize the identical one over and over. And since I’ve already used that one on the paint swatch cupboard, I wished one thing totally different on this, however there wasn’t one I favored.
However most significantly, I used to be afraid that an precise, massive piece of crown molding would stick out too far, inflicting the returns on the crown molding on these outdoors sections to increase previous the facet trim of the cubby bridge an excessive amount of. So I wanted a design that might give me the look of crown molding, and provides me some sort of angle, with out it protruding too far. And this labored fantastically.

In my humble opinion, this appears each bit as improbable as a strong piece of enormous crown molding. And it was a lot simpler to chop and set up!
As soon as I used to be positive that my concept would work, I proceeded to do the fake crown molding on the cubby bridge in the very same manner…

The part by the wall was the toughest as a result of I additionally needed to reduce the molding to suit beneath that angled ceiling. I used to be so happy with how exactly I reduce that angle! ?
I simply love how this turned out. And I can’t wait to get all of it painted!

I used the identical case molding and the identical course of on the underside trim, besides as an alternative of utilizing a tiny crown molding, I connected quarter spherical to the molding earlier than slicing it.

I solely wrapped the underside trim across the two outdoors sections of cupboards, and I left the toekick plain to match the toekick on the mural wall cupboards. I didn’t use quarter spherical or something on the toekick space.

So on this part, I put the trim on the entrance, after which wrapped it round on that 3.5-inch return, after which stopped.

After which I repeated that on this part as nicely…

After which this backside trim on this part needed to wrap round this facet additionally. This piece isn’t truly connected but as a result of I seen on the final minute that I can’t connect that till the baseboard on that part is on. However I can’t connect the baseboard till that door is trimmed out. ? So for now, that piece is simply sitting there, and it’ll should be reduce shorter after the baseboard is connected.
In order that’s it with the trim! This complete cupboard unit is now all trimmed out and prepared for wooden filler, sanding, caulk, primer, and paint. I’ve nonetheless received a strategy to go, however I really feel just like the exhausting half is completed!


Addicted 2 Adorning is the place I share my DIY and adorning journey as I transform and enhance the 1948 fixer higher that my husband, Matt, and I purchased in 2013. Matt has M.S. and is unable to do bodily work, so I do the vast majority of the work on the home on my own. You may be taught extra about me right here.
[ad_2]
Source link
