[ad_1]
I’m so near having the primary of the 2 curtains panels completed for the again entry of the studio. The primary one is taking me a bit longer just because it has been so lengthy since I’ve made lined pinch-pleated curtains, so I’m having to recollect the method alongside the way in which. I believed I may maybe refer again to my very own tutorial, however I noticed that I don’t even have a tutorial on easy methods to make a easy, no-frills, no-trim, single-width lined curtain panel.
So I believed I’d take this chance to take photographs of every step in order that I can present a step-by-step tutorial on easy methods to make a single-width, lined, pinch-pleated curtain panel. So right here we go!
First, I set up my curtain rod and rings. I used to do that after the curtain panels have been made and able to be hung, however I’ve discovered that it’s a lot simpler to put in the rod first, after which make the curtains to suit the peak of the put in curtain rod.
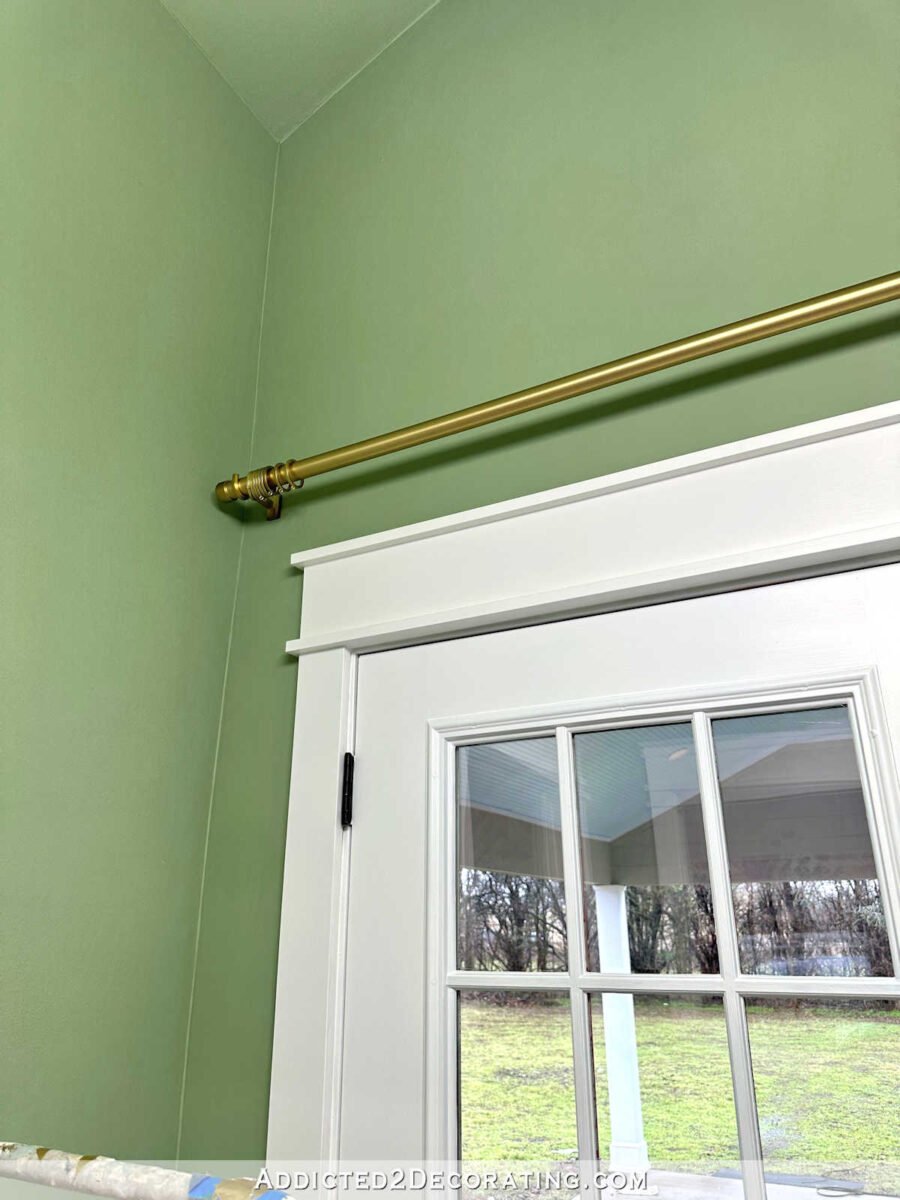
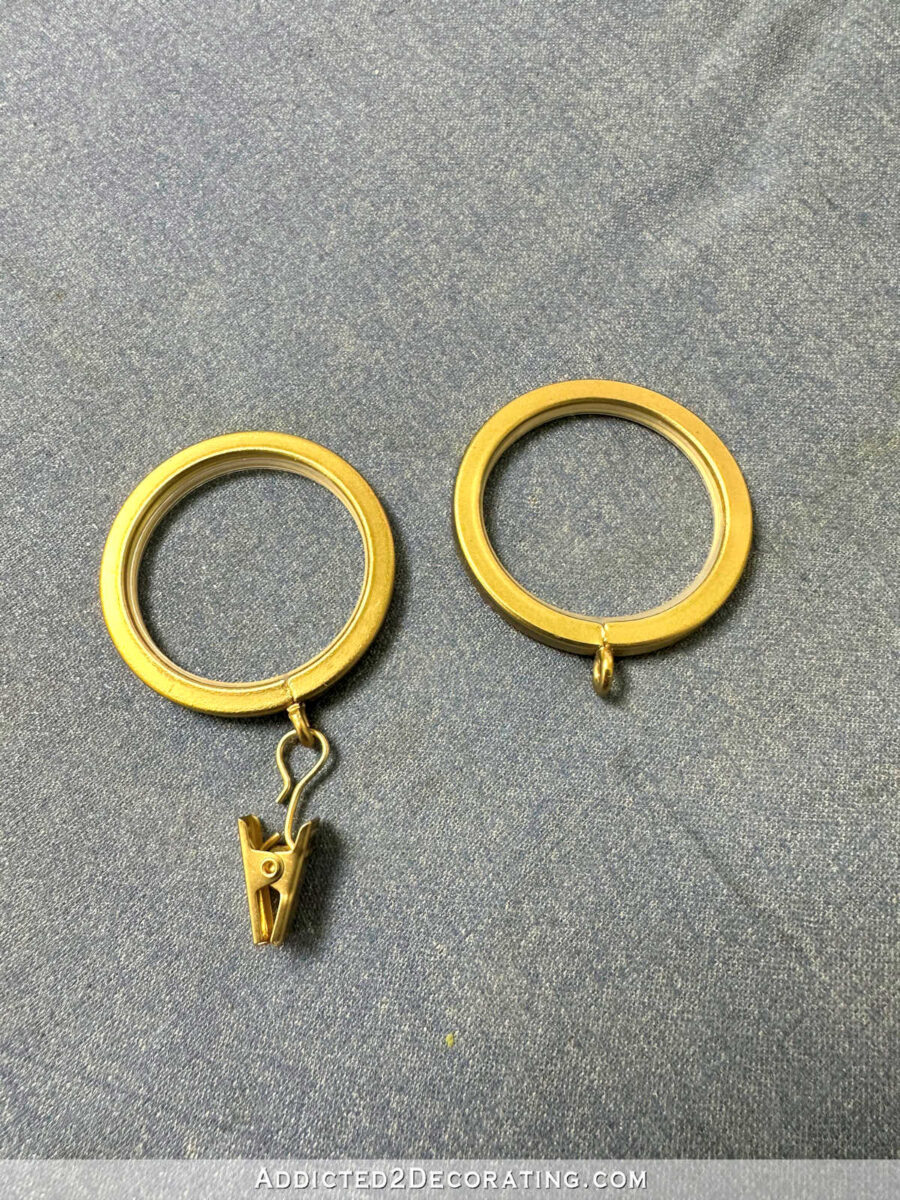
I additionally go forward and add the rings, however I take away the clips first. No correctly made curtain panels ought to ever be hung utilizing clips.
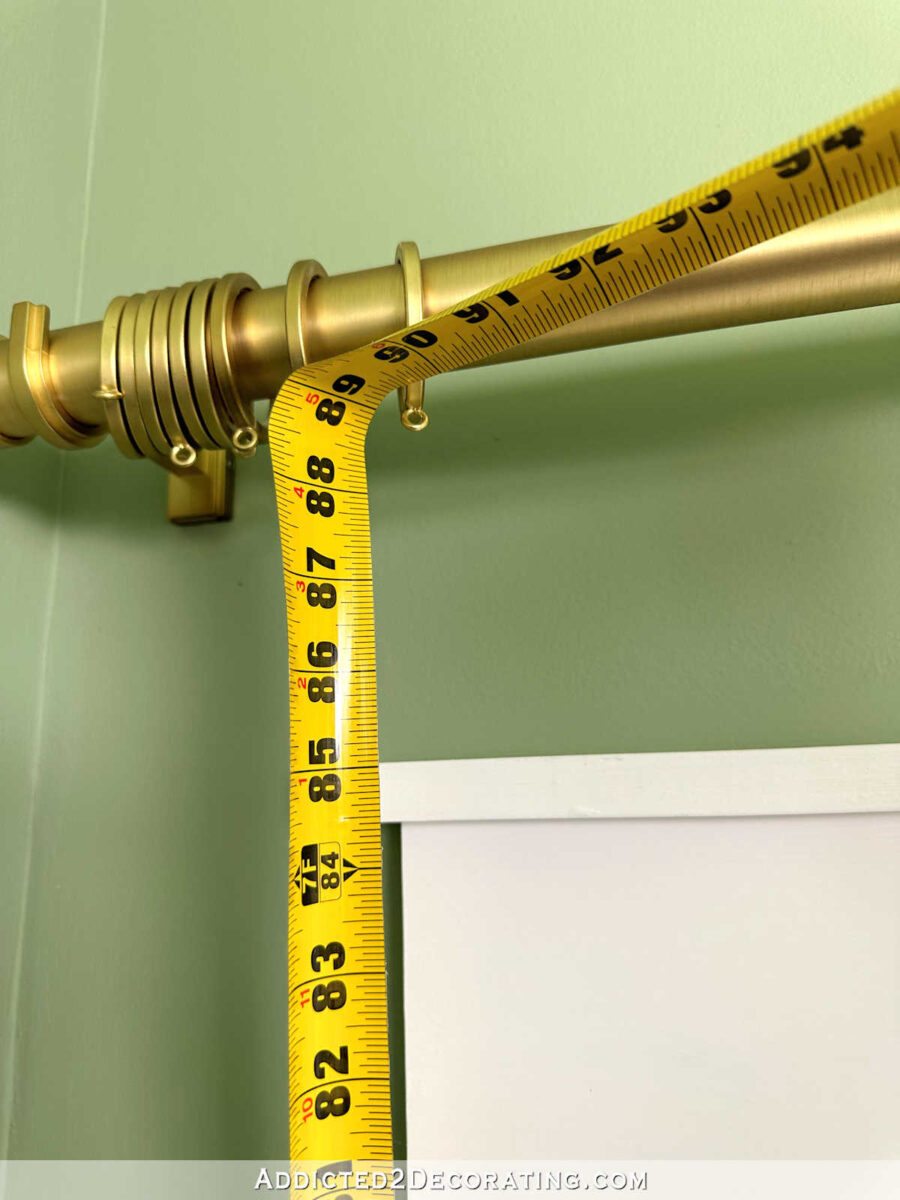
As soon as these the rings are added, I can measure for the completed peak of my curtain panels. I measure from the ground to proper on the high of the little hook ring, which gave me a measurement of 88 7/8 inches. Then I subtract about 1/4 inch to get my completed size for my curtain panels.
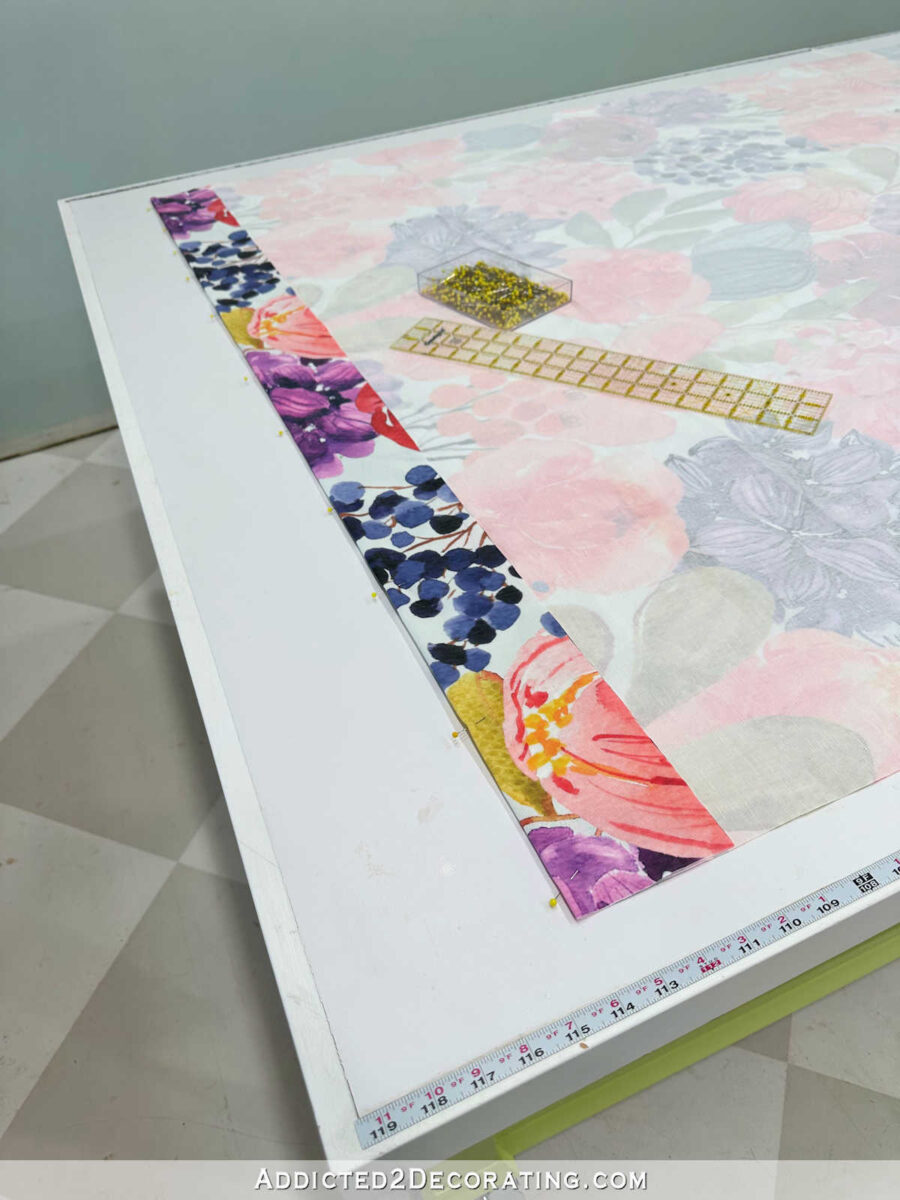
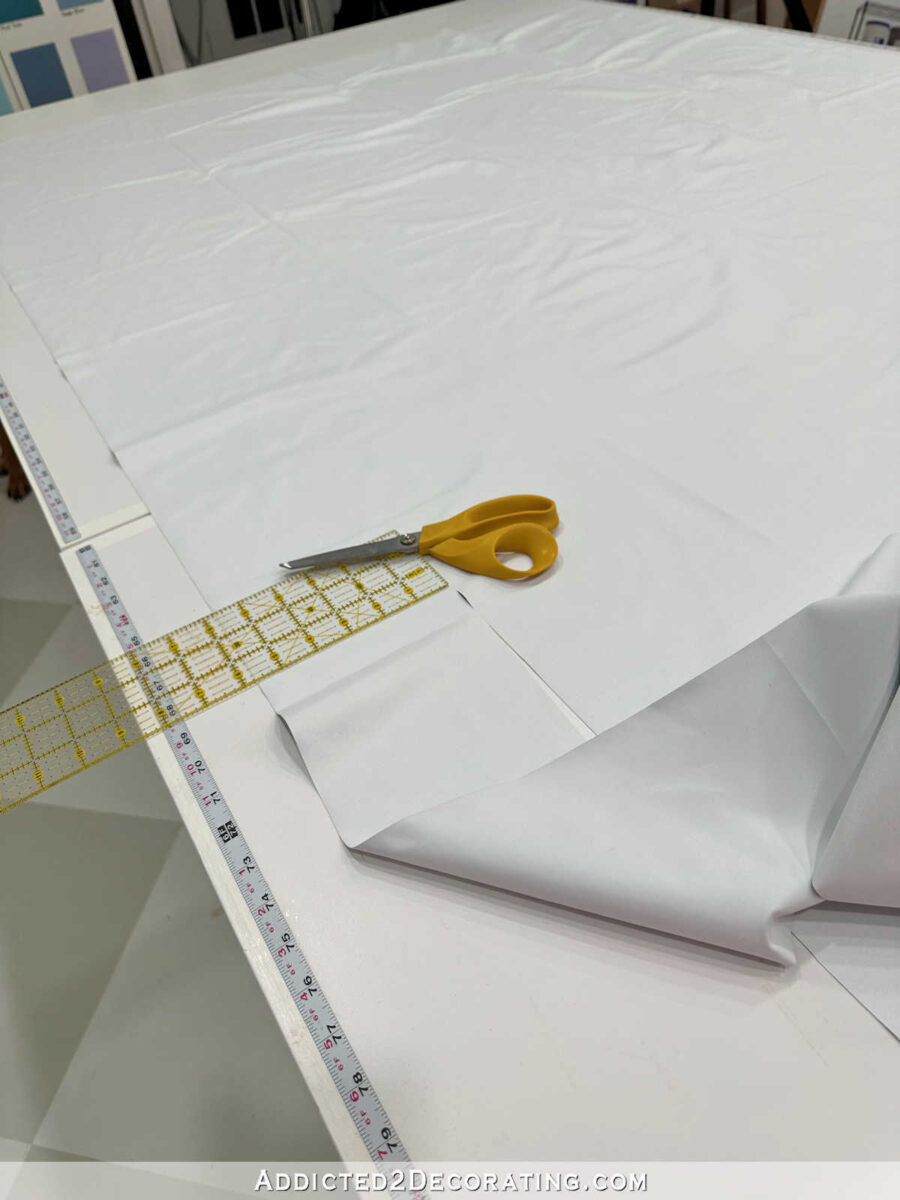
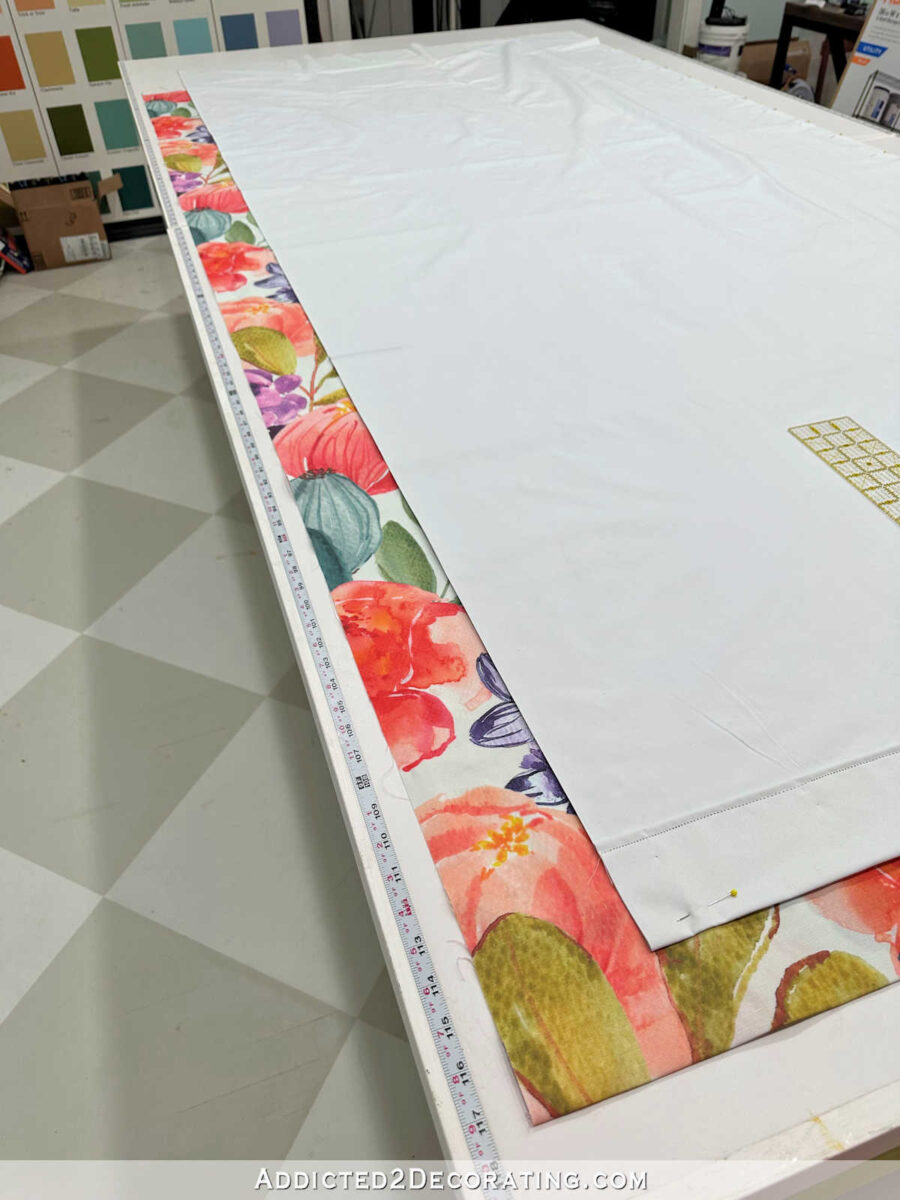
Subsequent, I lower my cloth. For every panel, I permit about three yards of cloth. Step one is to sq. up the underside fringe of the material. I do that by folding the material in half lengthwise, after which utilizing a framing sq. (you’ll be able to inform I’m a builder at coronary heart ? ) to sq. up the underside fringe of the material.
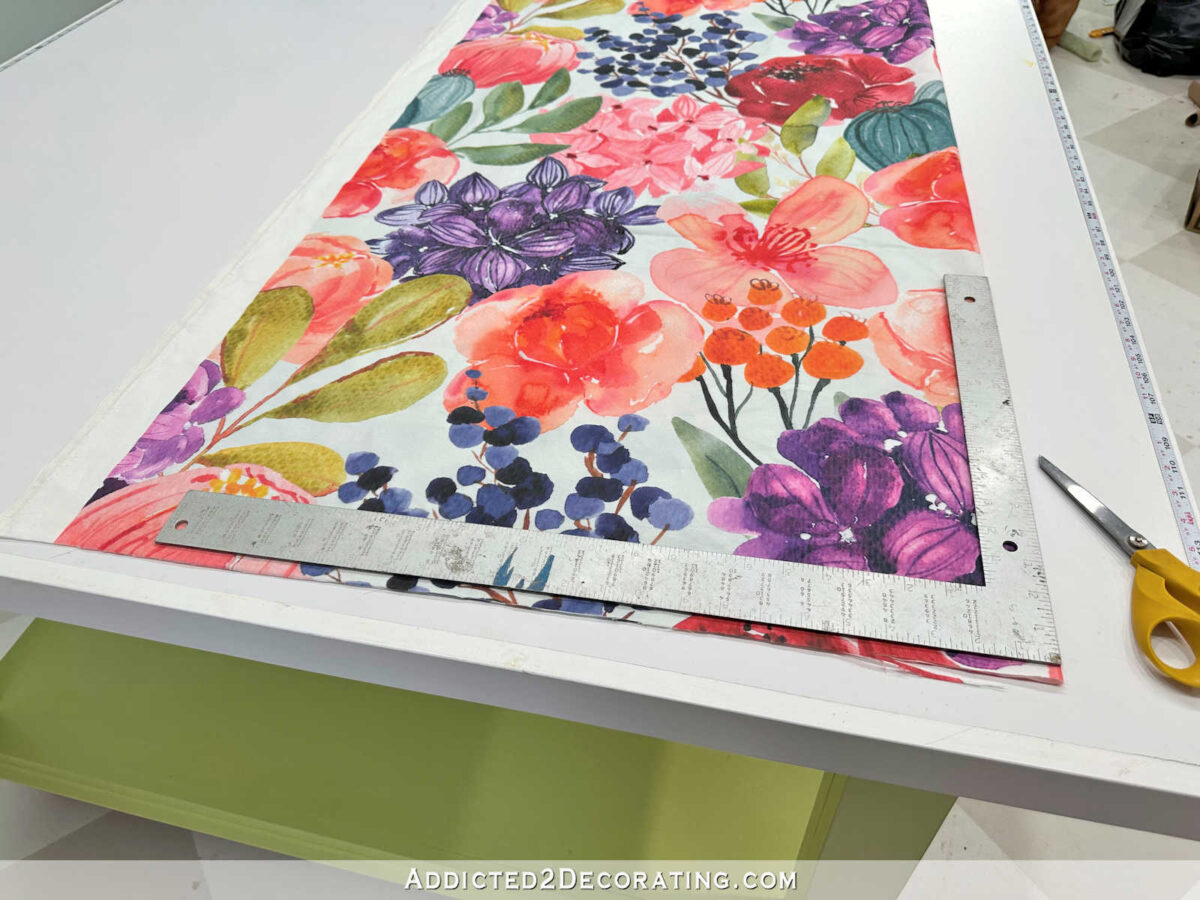
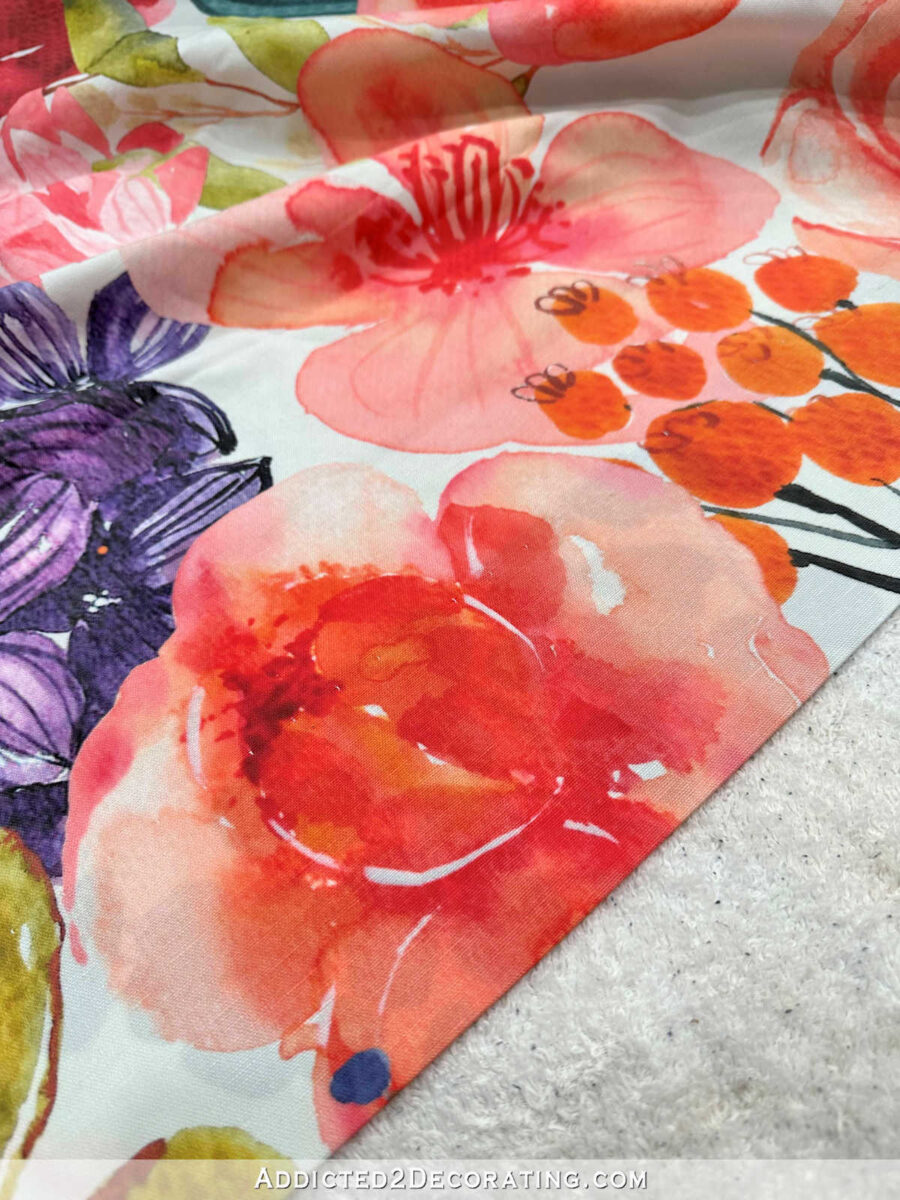
As soon as the underside is sq., I typically lower off the selvage on each side of the material. For these curtains, I’m utilizing Spoonflower cloth, which is printed with this huge white area on each aspect edges.
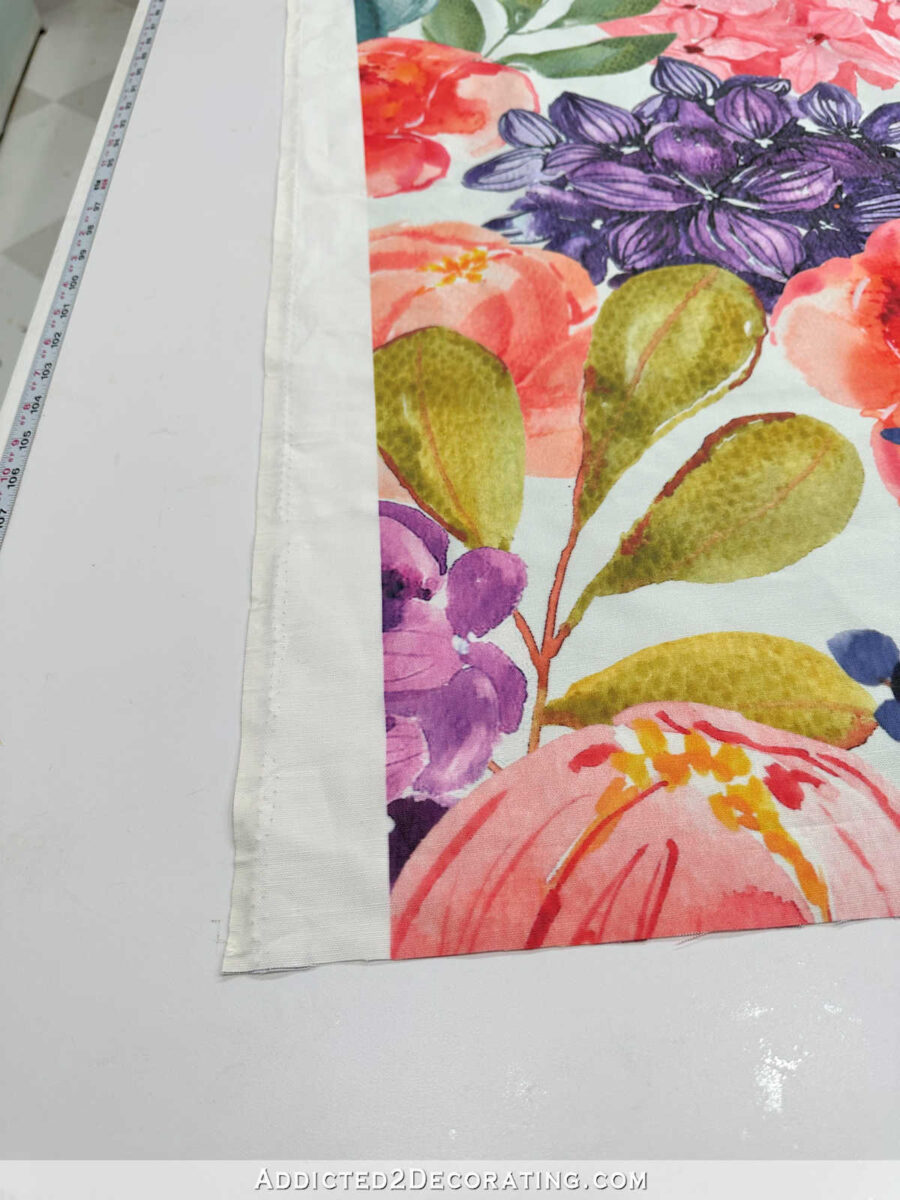
So as a substitute of chopping off simply the selvage, I lower off the entire white space proper as much as the printed design. I repeated that on the opposite aspect fringe of the material.
As soon as the material was all trimmed, I measured the (new) width of the material and wrote down that quantity. My cloth was 53 7/8 inches large after being trimmed.
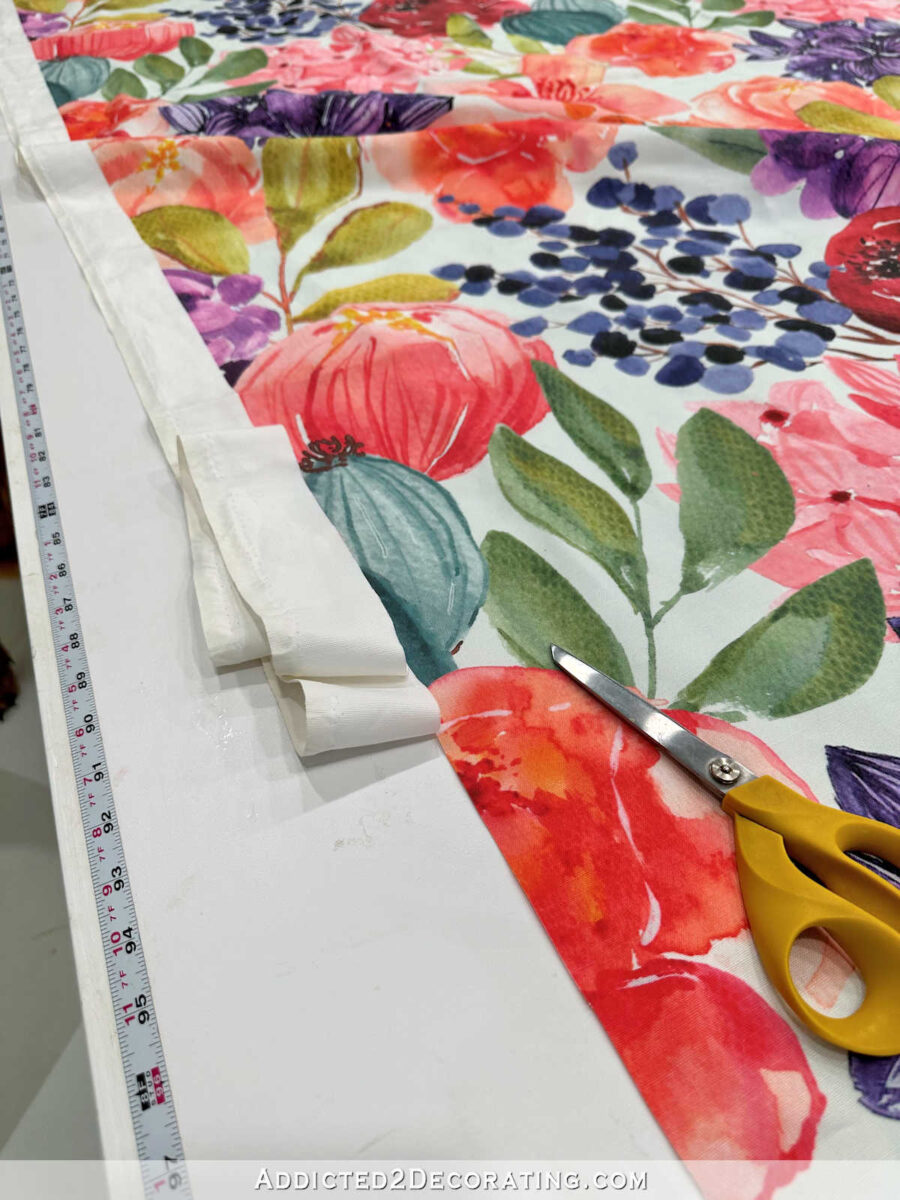
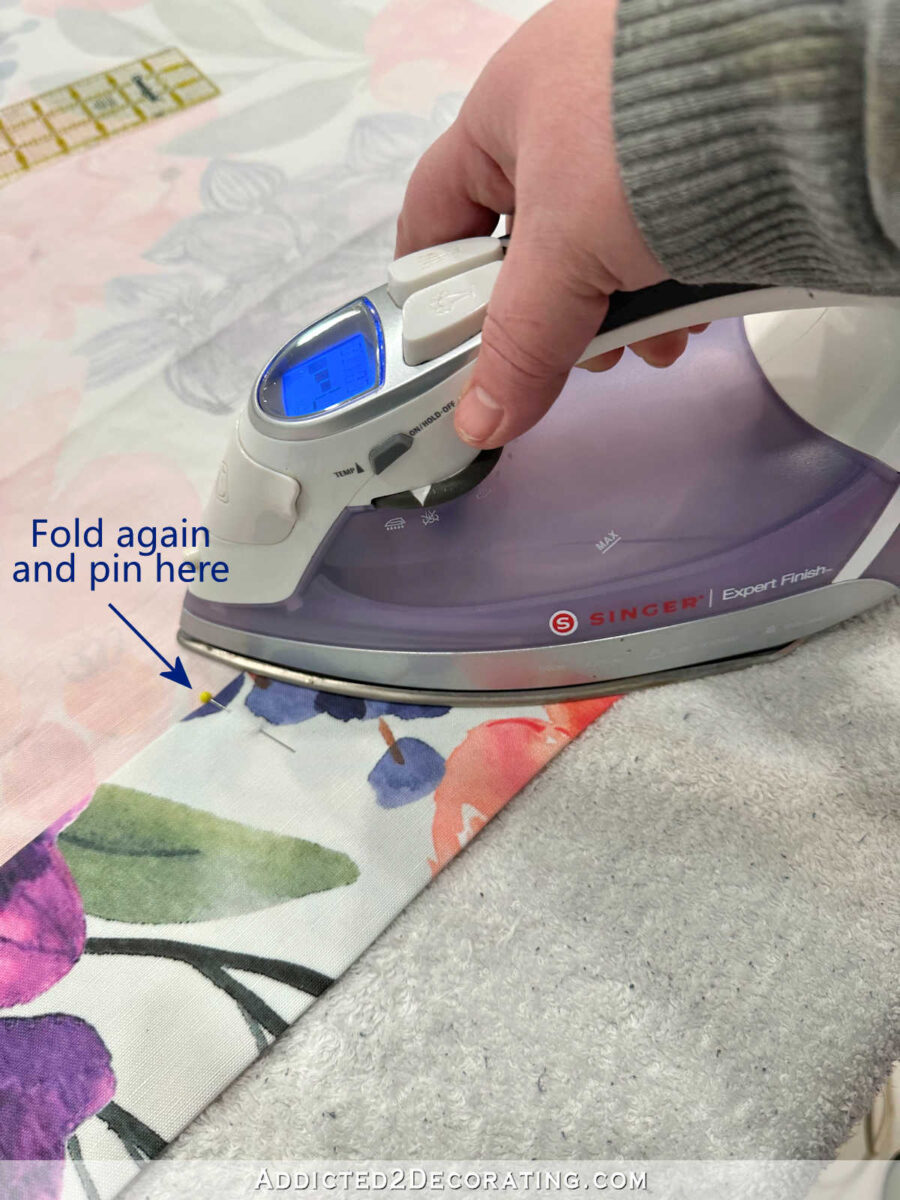
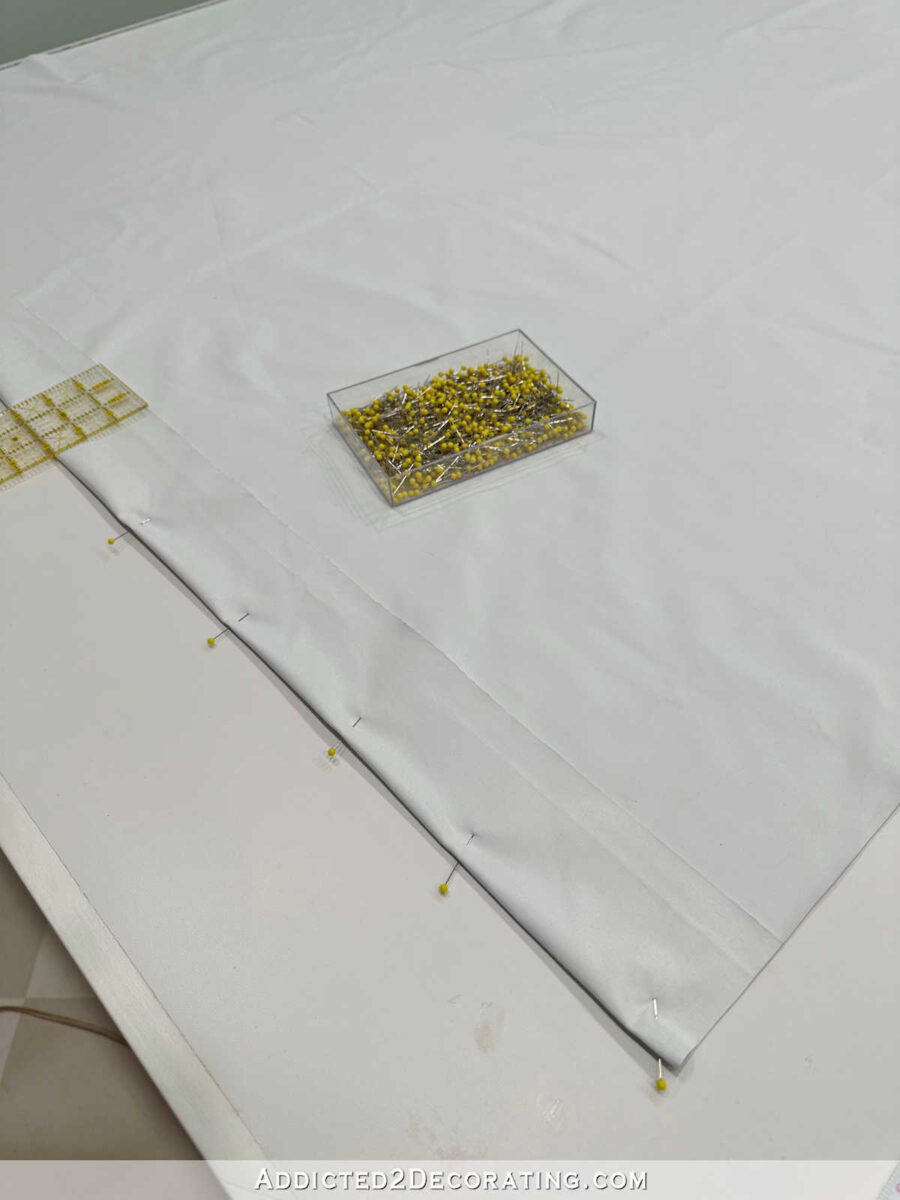
With the material all trimmed and squared on the underside, I used to be able to pin within the hem. I did this by turning the material up 4 inches and pinning it into place alongside the underside fold.
Right here’s a have a look at it as soon as it was folded and pinned all the way in which throughout.
After which I folded it up once more one other 4 inches, pinned it into place alongside the highest fold of the hem, after which ironed the folds into place.
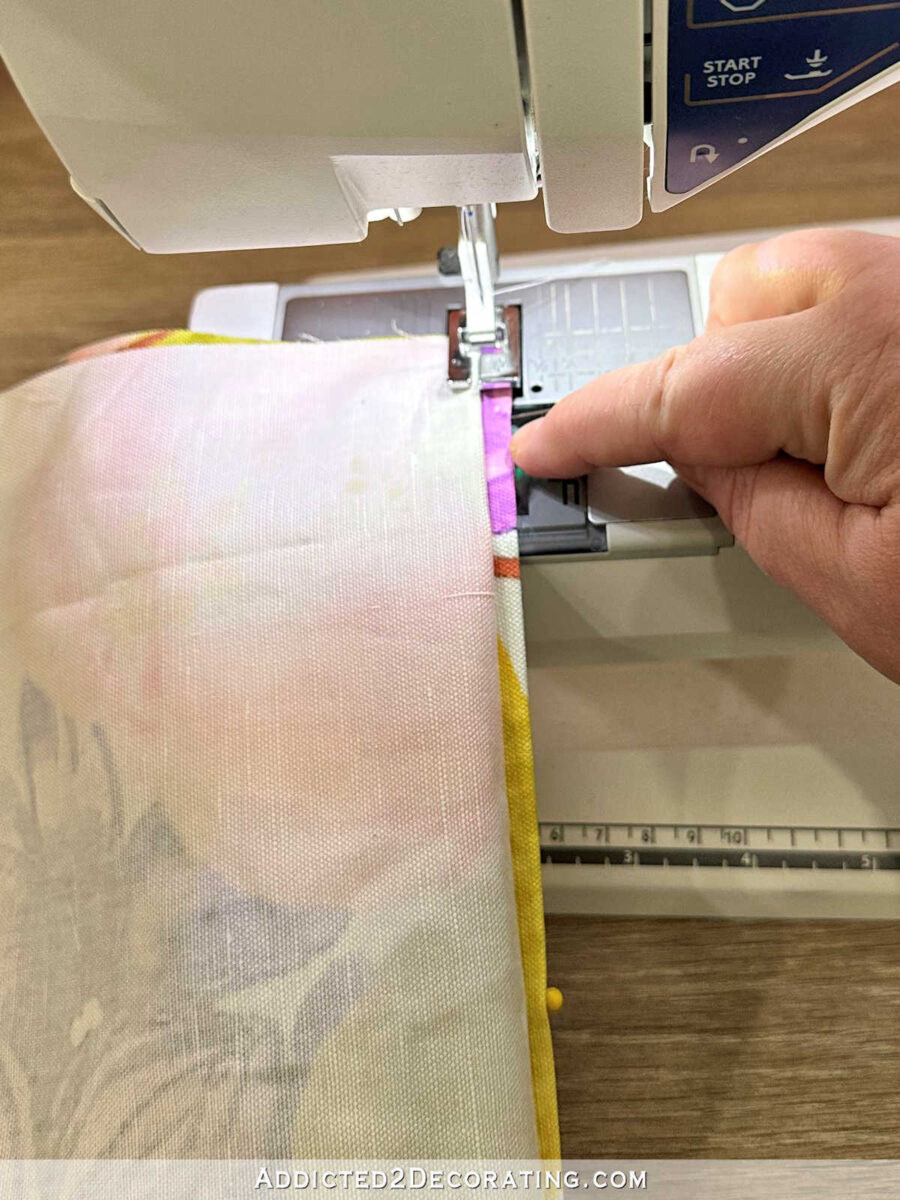
With a view to sew the hem, I used a blind hem sew on my stitching machine. First, I folded the four-inch hem again in opposition to the face of the material in order that solely the highest fringe of the folded hem was uncovered on the appropriate aspect, and the again of the material was exhibiting on the left. After which I positioned that below the foot of the machine.
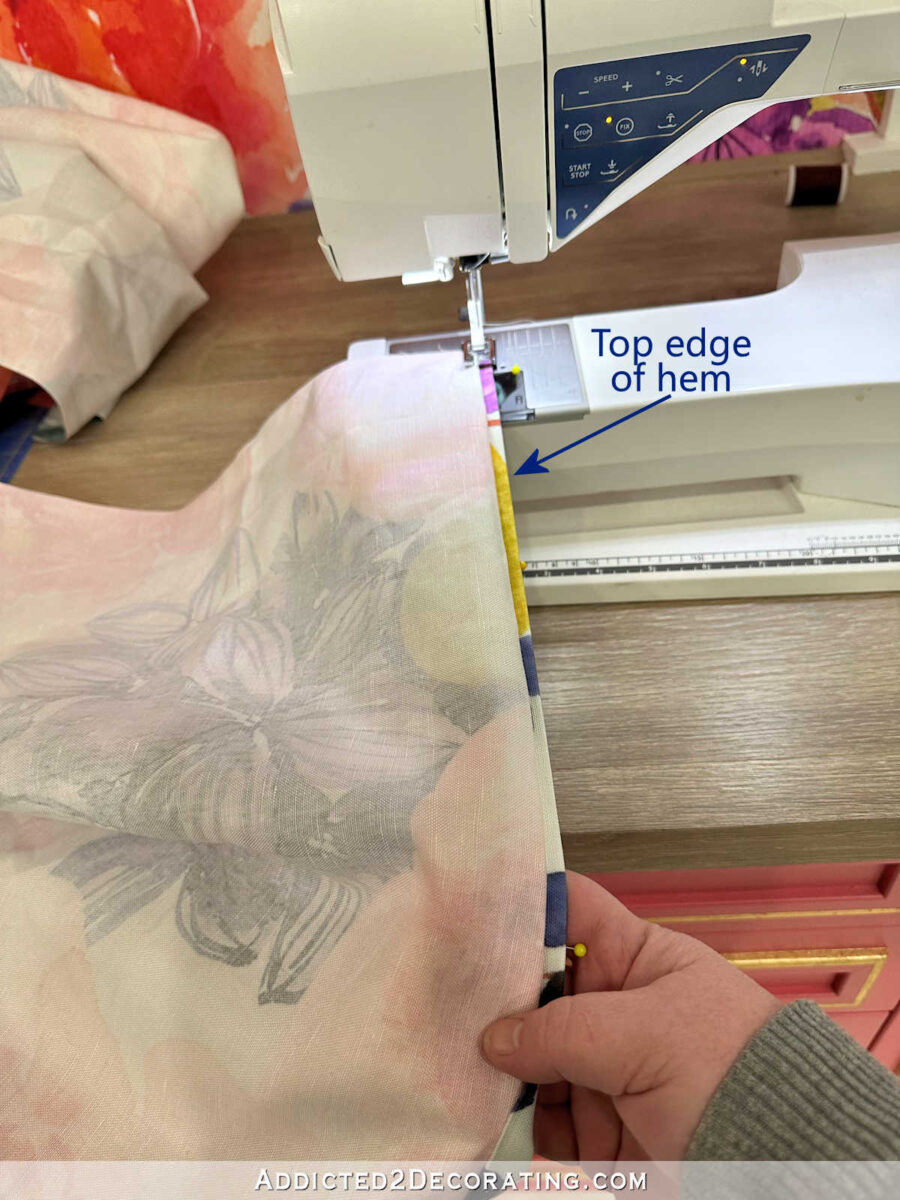
Here’s what a blind hem sew seems like. Most machines have this sew. Even my $120 Kenmore stitching machine that I began off with 20 years in the past had this sew.
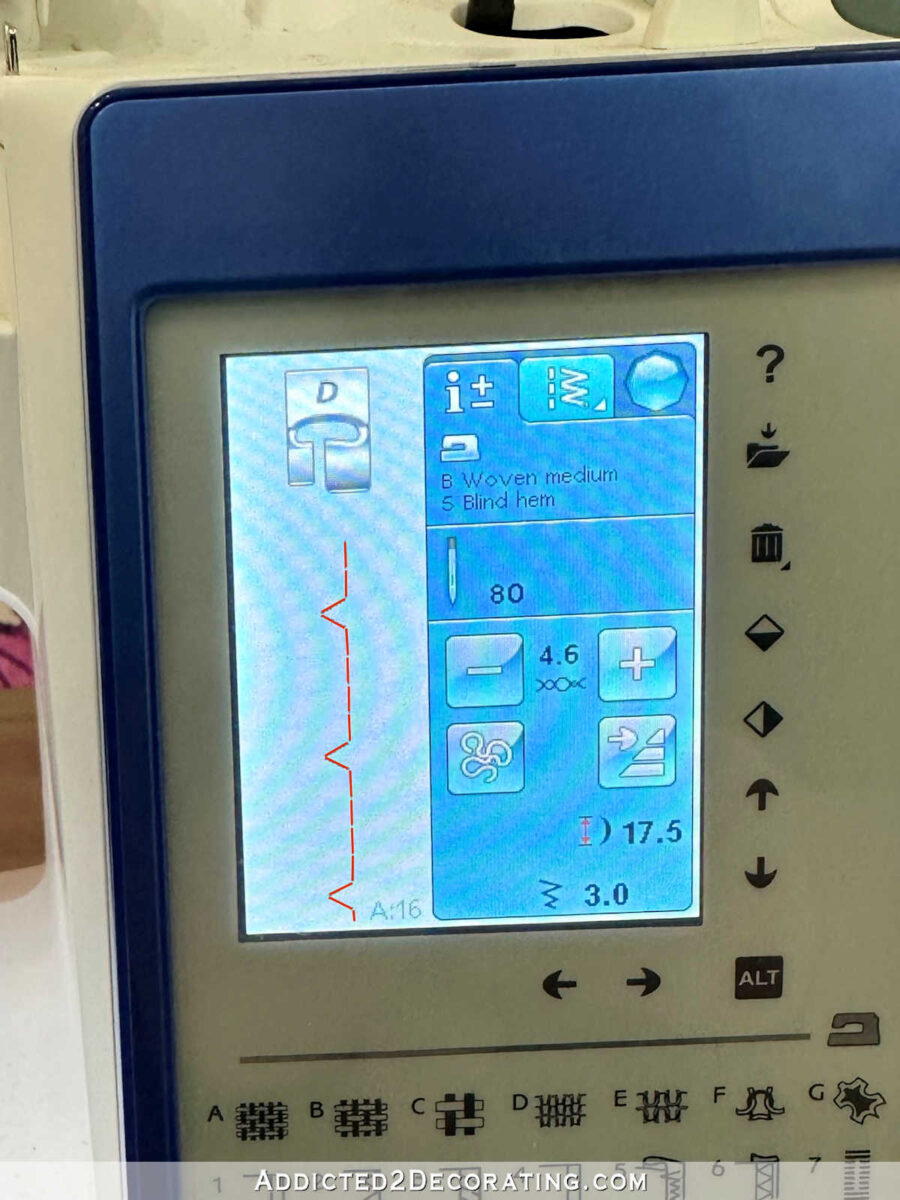
It is going to sew about 4 or 5 stitches on the appropriate, alongside the highest fold of the hem, after which each fifth or sixth sew, it would attain over to the left and seize simply the tiniest little bit of that cloth on the left.
Right here’s a closeup of what that sew seems like with the hem nonetheless folded again in opposition to the entrance of the material.
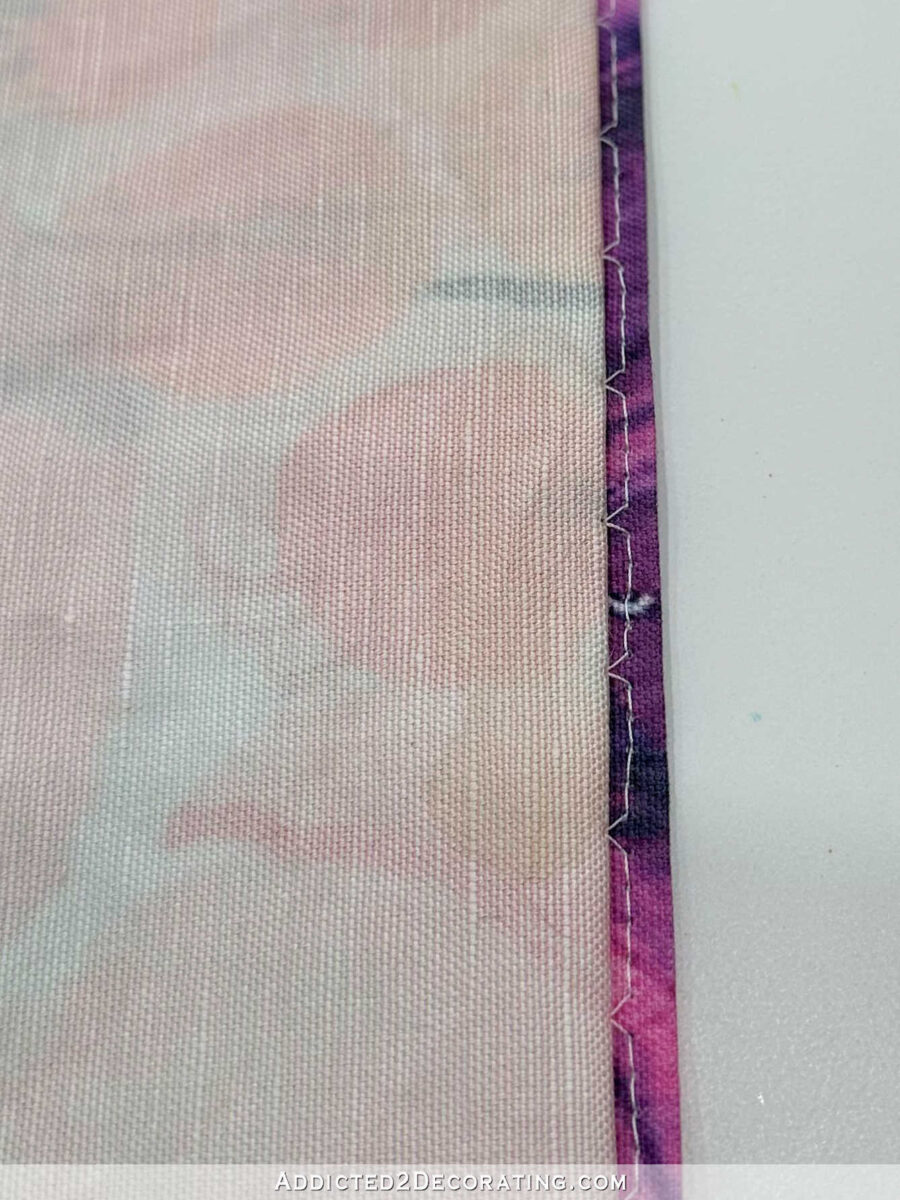
After which when the hem is unfolded, it seems like this…
And when the material is turned over with the appropriate aspect of the material going through up, you’ll be able to’t even see these stitches, therefore the identify “blind hem sew.”
Right here’s a fair nearer look. Are you able to see the stitches? In individual, should you’re actually on the lookout for them, you’ll be able to see them. However no informal viewer of those curtains is ever going to note these stitches.
Placing that cloth apart for some time, I used to be prepared to organize the liner for the curtain panel. Simply as I did with the material panel, I began by squaring up the underside edge, after which pinning a double three-inch fold alongside the underside edge. I all the time do a double four-inch fold for my face cloth hem, and a double three-inch fold for the liner hem.
As soon as that pinned in and ironed, I sewed that hem into place with a regular high sew. You are able to do a blind hem sew on the liner as properly, however I by no means have. I don’t see the purpose in it, and since I’m making these for me, I’m tremendous with a topstitch. If I have been working in an expert material workroom and making them for a paying buyer, I’d select in any other case.
One of many causes I don’t trouble is as a result of I all the time use blackout lining, and there’s simply actually no hiding stitches on blackout lining. I like the blackout characteristic, however I hate that it exhibits each single sew, and even each single place the place pins are added. And wrinkles are nearly not possible to take away from blackout lining. So a topstitch is ok for me.
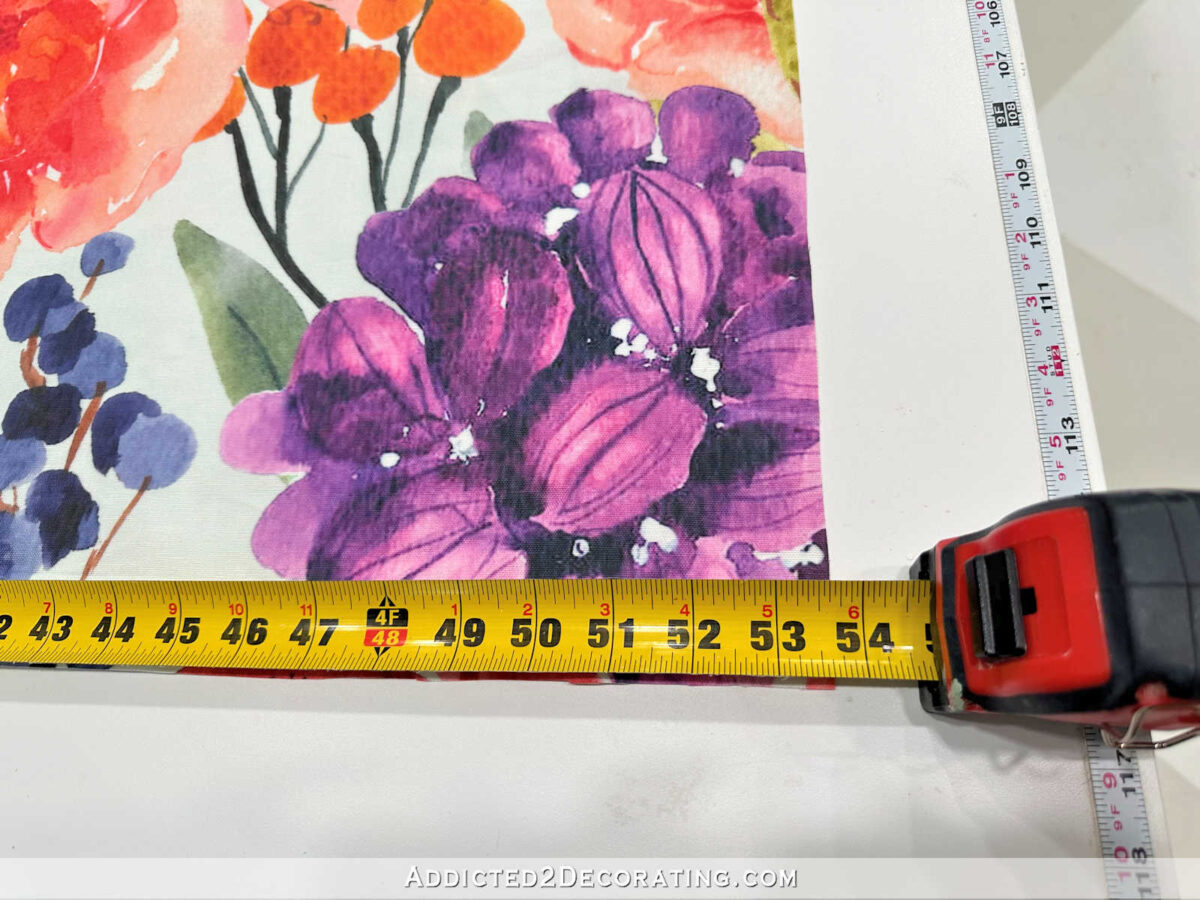
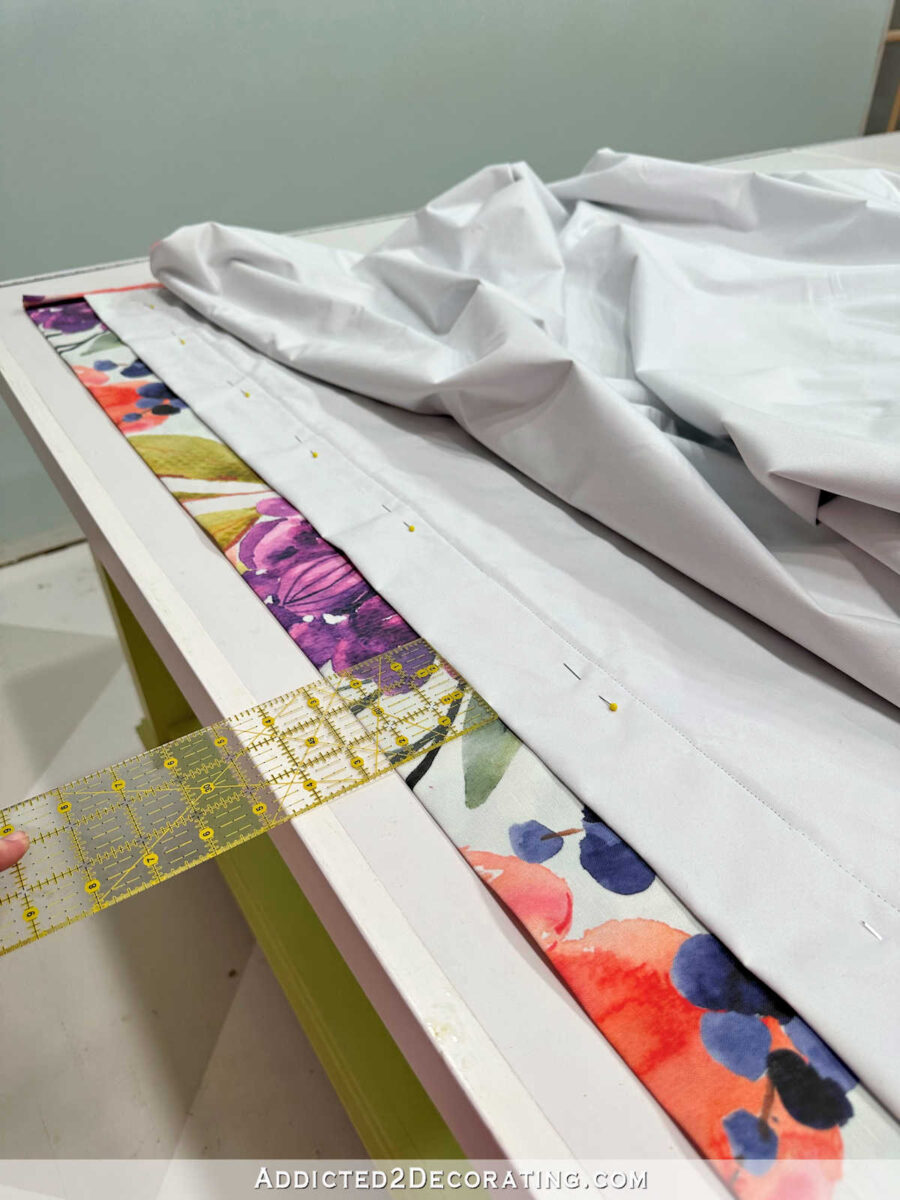
And the very last thing to do to organize the liner is to chop it to the correct width. I had already measured the lower width of my face cloth, which was 53 7/8 inches. To determine the lower width that I wanted for my lining, I simply subtracted 4 inches from that quantity. So I measured and lower my lining to 48 7/8 inches large. Since blackout lining doesn’t have a selvage, I solely wanted to make one lower alongside one aspect edge to get the correct width. If I have been utilizing a thinner cloth lining with selvages, I might have lower each aspect edges.
Now that I had the face cloth and the liner prepped, I used to be prepared to affix them collectively. I did this by inserting the face cloth, proper aspect up, on my work desk.

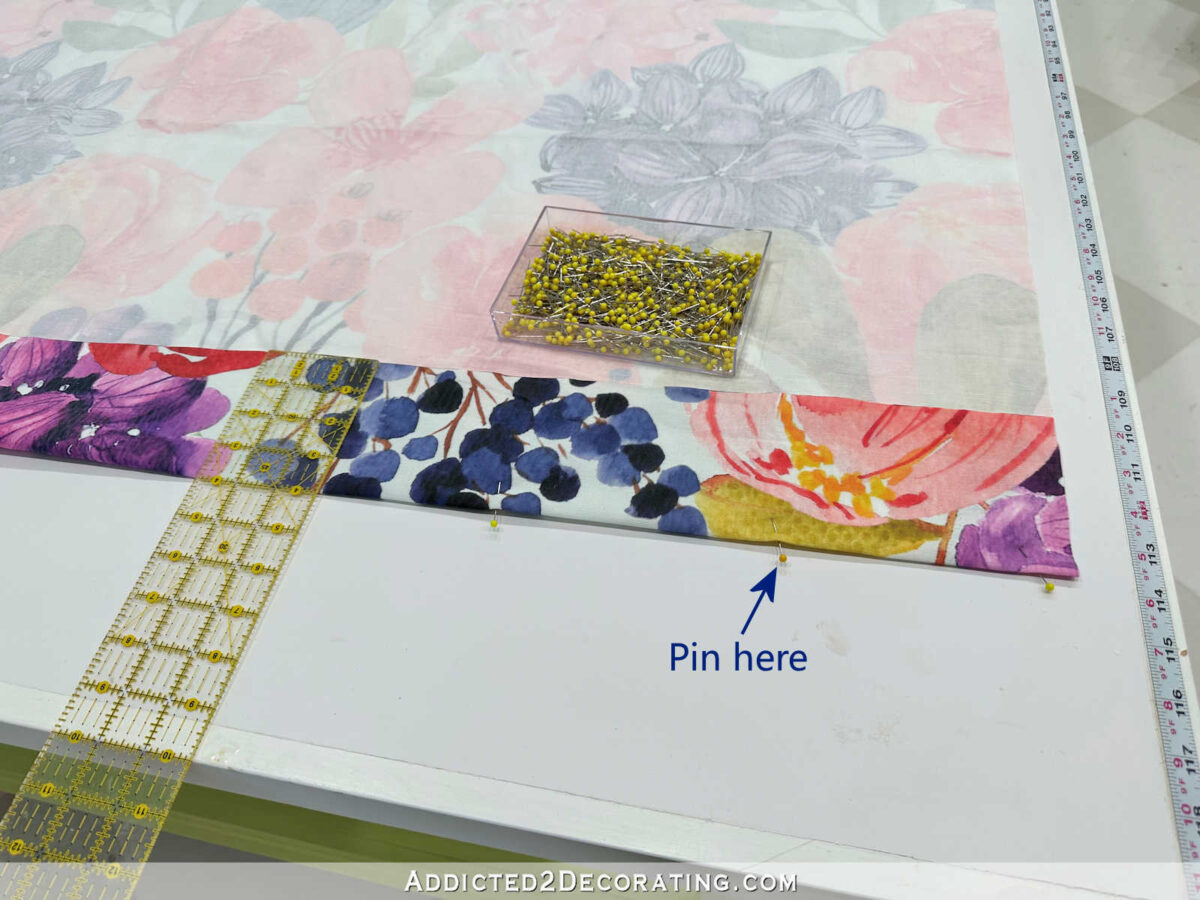
After which I positioned the liner, proper aspect down, on high of the material. Measuring from the underside fringe of the hemmed cloth, I measured up 2 1/2 inches for the location of the underside fringe of the hemmed lining, and commenced pinning the liner and cloth collectively alongside the aspect edge.
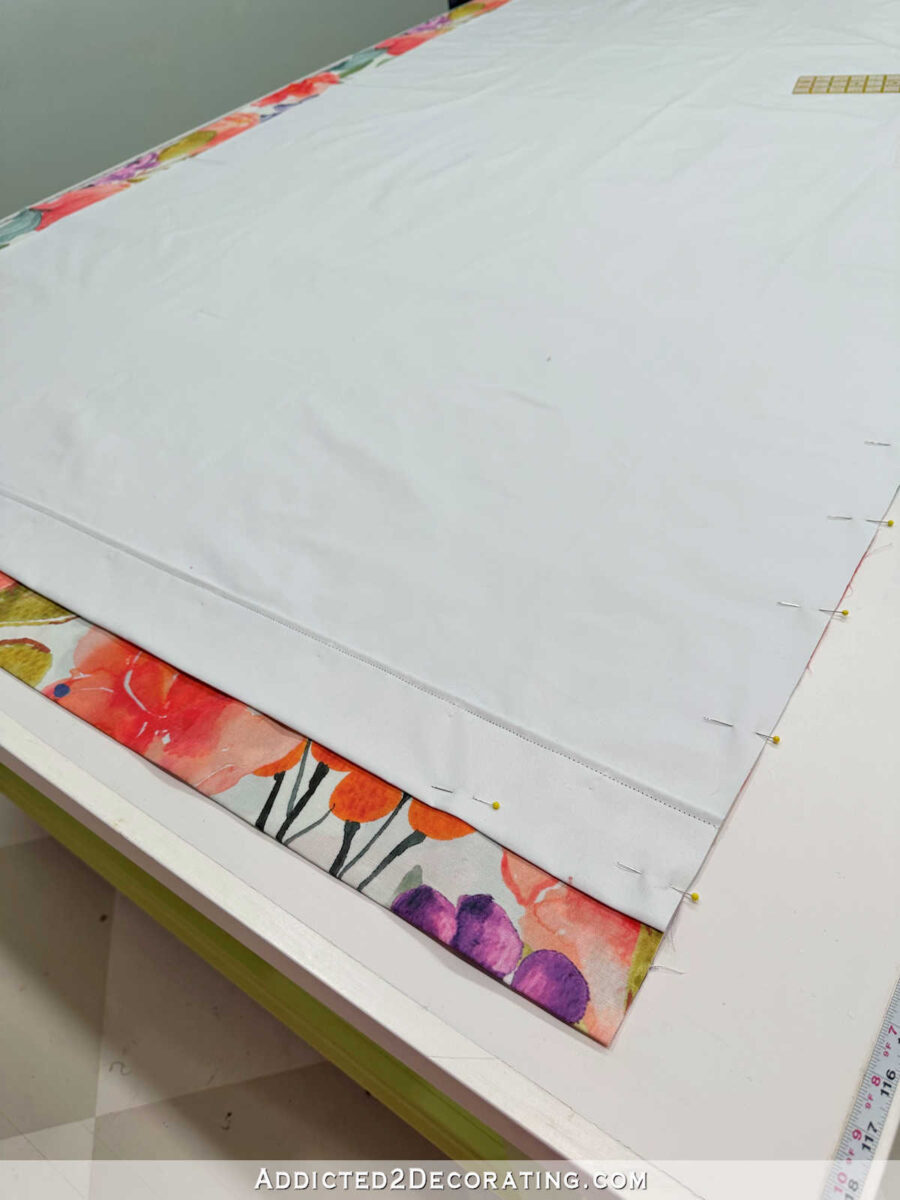
So once more, the appropriate (face) aspect of the material and the appropriate (face) aspect of the liner are going through one another, and the underside hemmed fringe of the face cloth extends 2 1/2 inches beneath the underside hemmed fringe of the liner.
And I pinned these collectively all the way in which up the aspect of the material.
Subsequent, I pinned the opposite aspect collectively. For the reason that lining was lower 4 inches narrower than the face cloth, it initially seemed like this with the items mendacity flat on one another.
So I needed to pull the liner over in order that the sting of the liner met the sting of the face cloth. I made positive that the underside hemmed fringe of the liner was 2 1/2 inches up from the underside hemmed fringe of the face cloth, pinned that into place, after which labored my approach up the aspect edge, pinning the to items collectively all the way in which up.
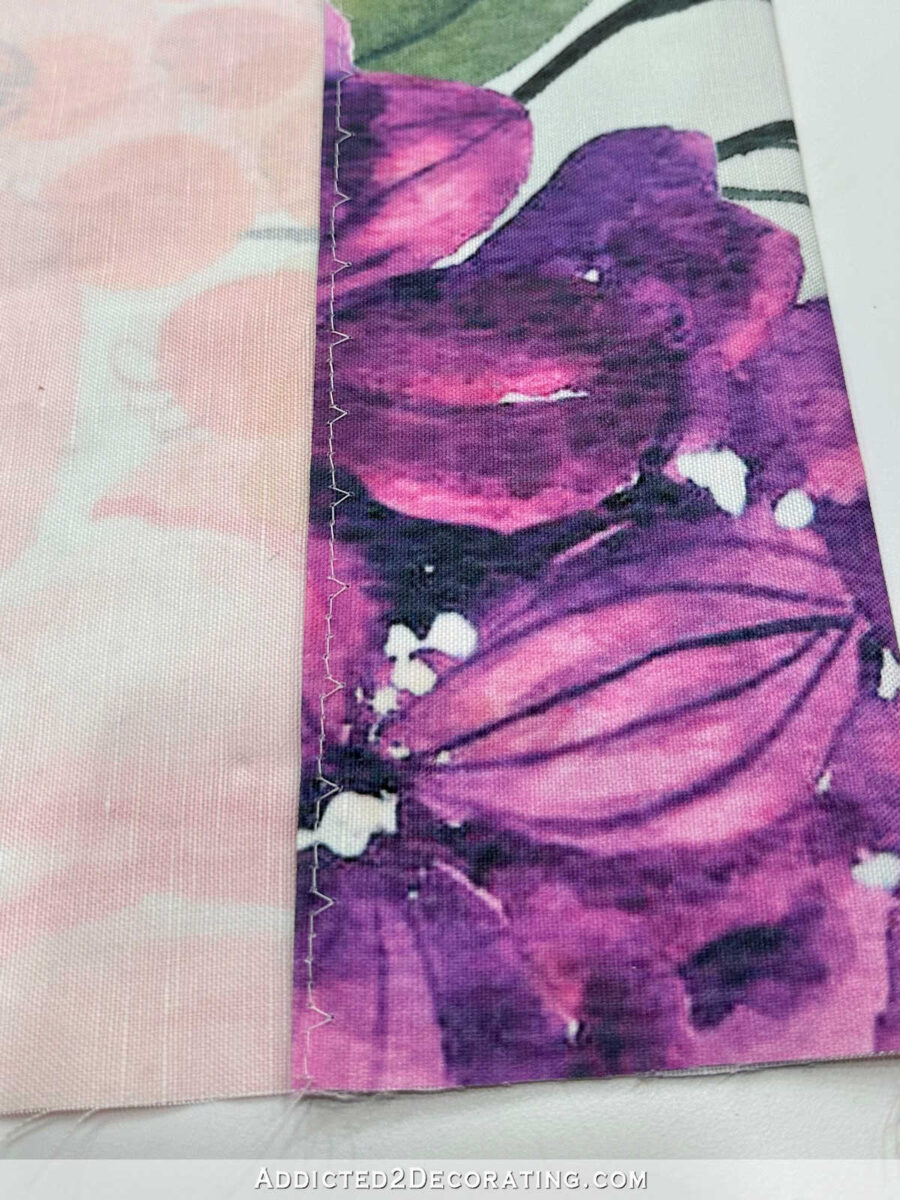
Subsequent, I sewed the items collectively alongside each aspect edges, stitching my straight sew one inch from the sting. That’s lots wider than a regular 5/8 inch that’s typically used when stitching most objects (like clothes or pillows), however you’ll see why later. I repeated that on the opposite aspect.

Only a notice: When stitching the liner and face cloth collectively, I sew each side getting in the identical route. In different phrases, if I begin stitching on the hems and work my solution to the highest of the material panel on one aspect, I make sure that to start out on the hem and work my solution to the highest on the opposite aspect as properly. That’s only a good follow and can prevent a headache should you ever occur to be working with a cloth that shifts or crawls slightly because it’s sewn. If it’s going to crawl, not less than each side can be crawling in the identical route.
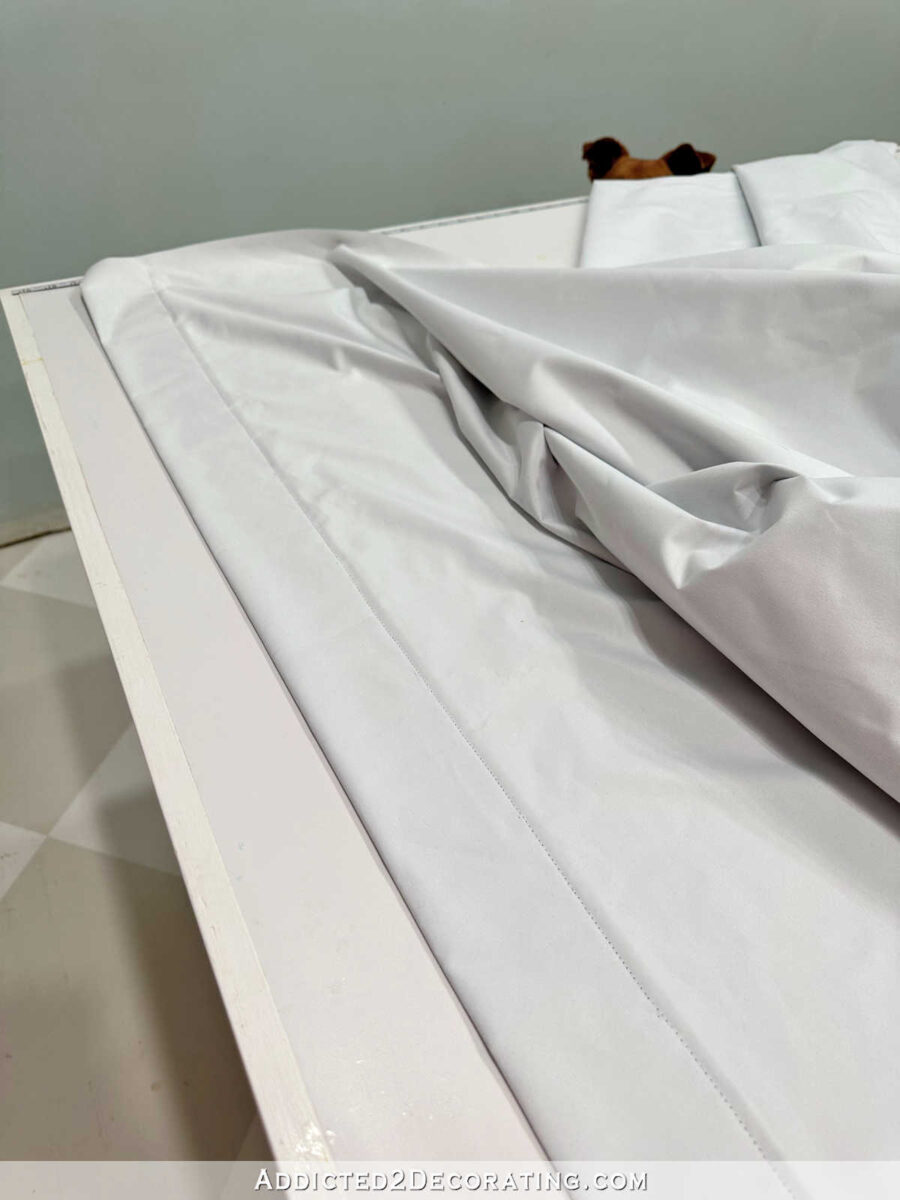
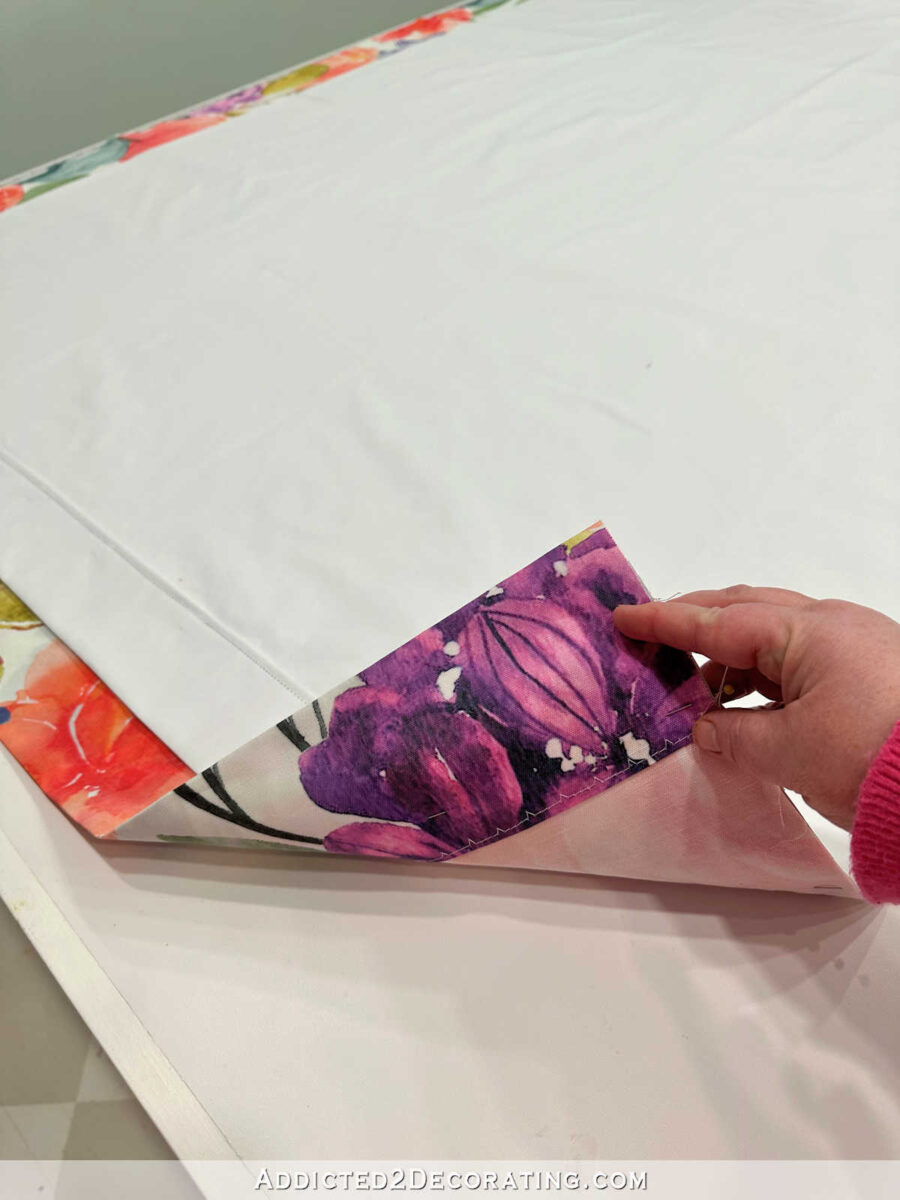
With the perimeters sewn collectively, I all the time steam iron these stitches into place to easy out the stitches as completely as doable.

Then I separate the liner and face cloth, and steam iron the seam in order that the face cloth is folded again on itself, and the liner is straight (i.e., not folded).

And at last, I flip the panel proper aspect out, and steam iron that seam as soon as once more from this aspect. Once more, I make sure that I’m ironing it in order that the material is folded in opposition to itself, and the liner is straight.

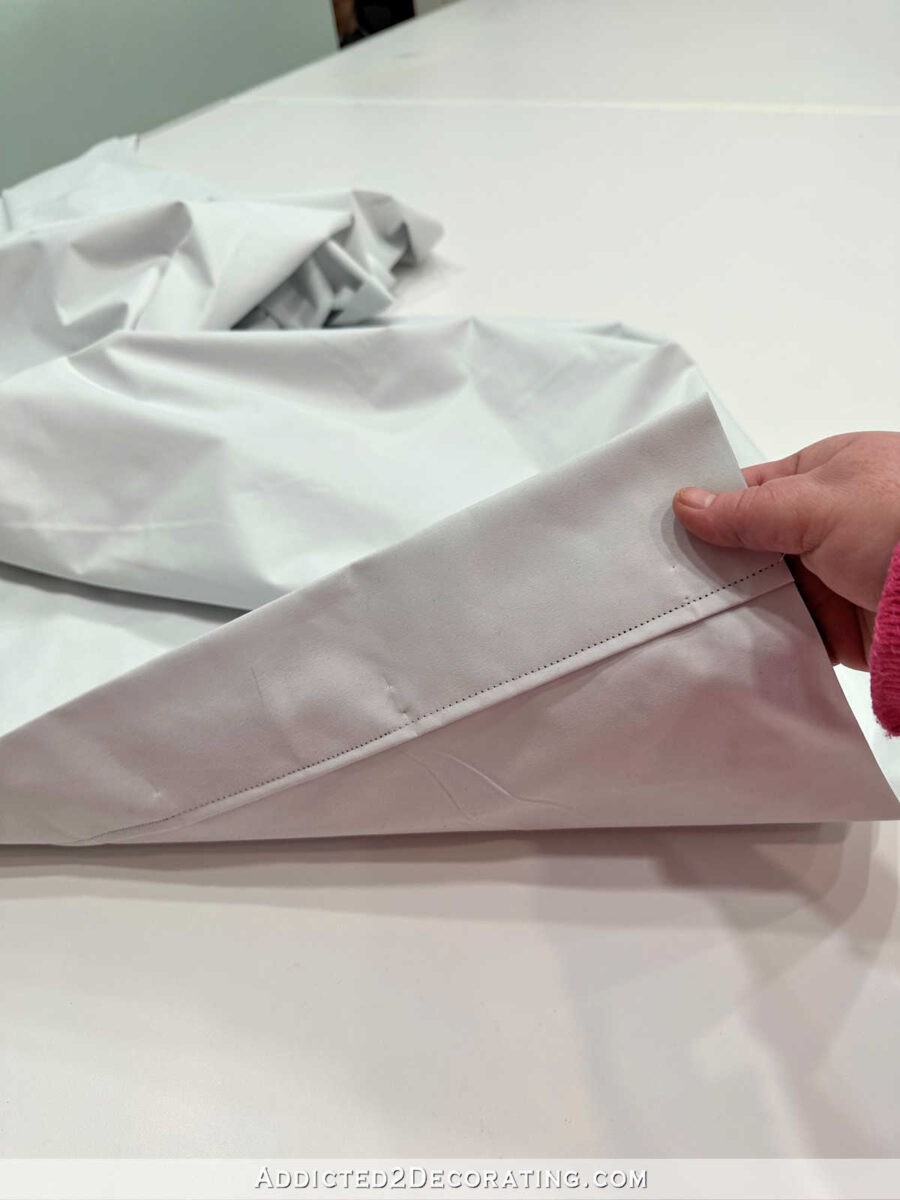
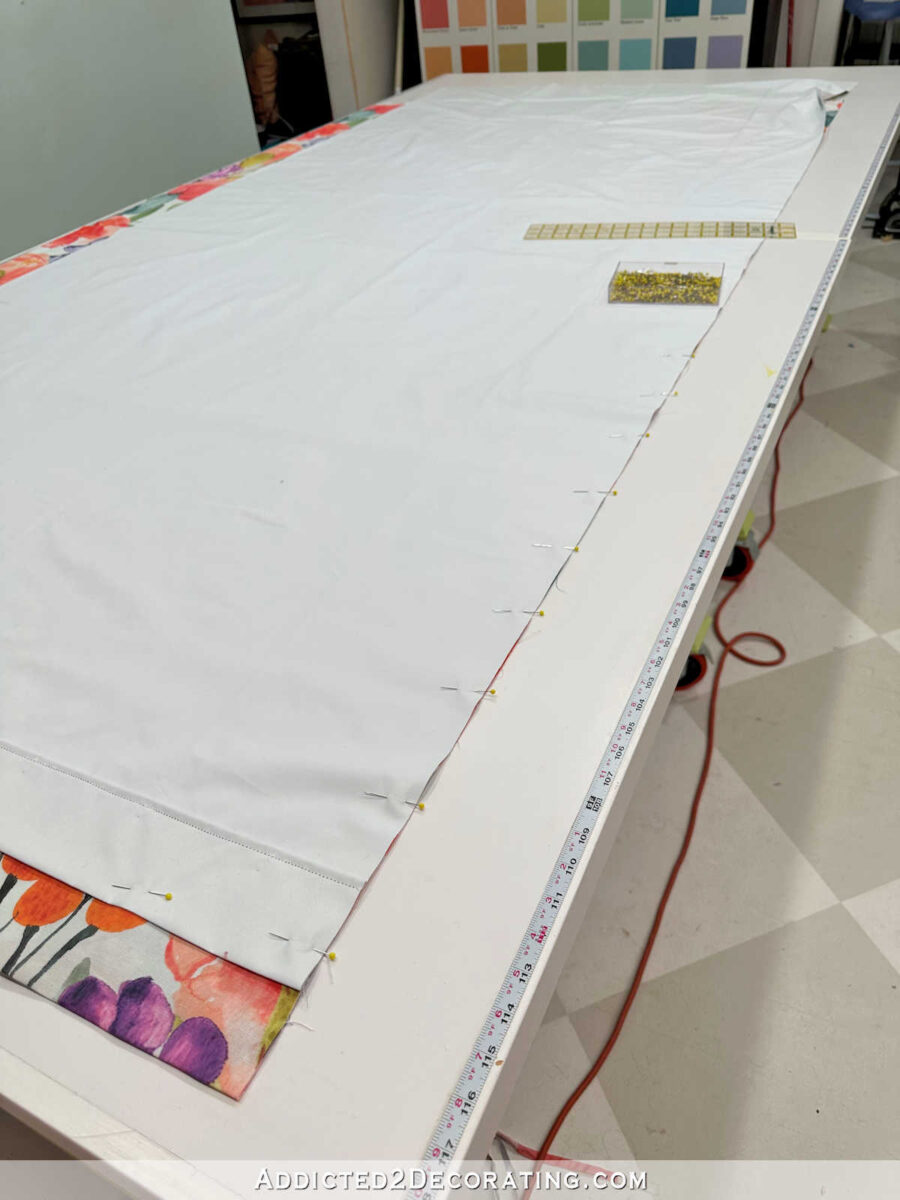
With every little thing ironed flat, I’m prepared to put the curtain panel again on my work desk and get all of it straightened out and flattened. I begin on the backside hemmed edges, and pin the 2 layers collectively all the way in which throughout.
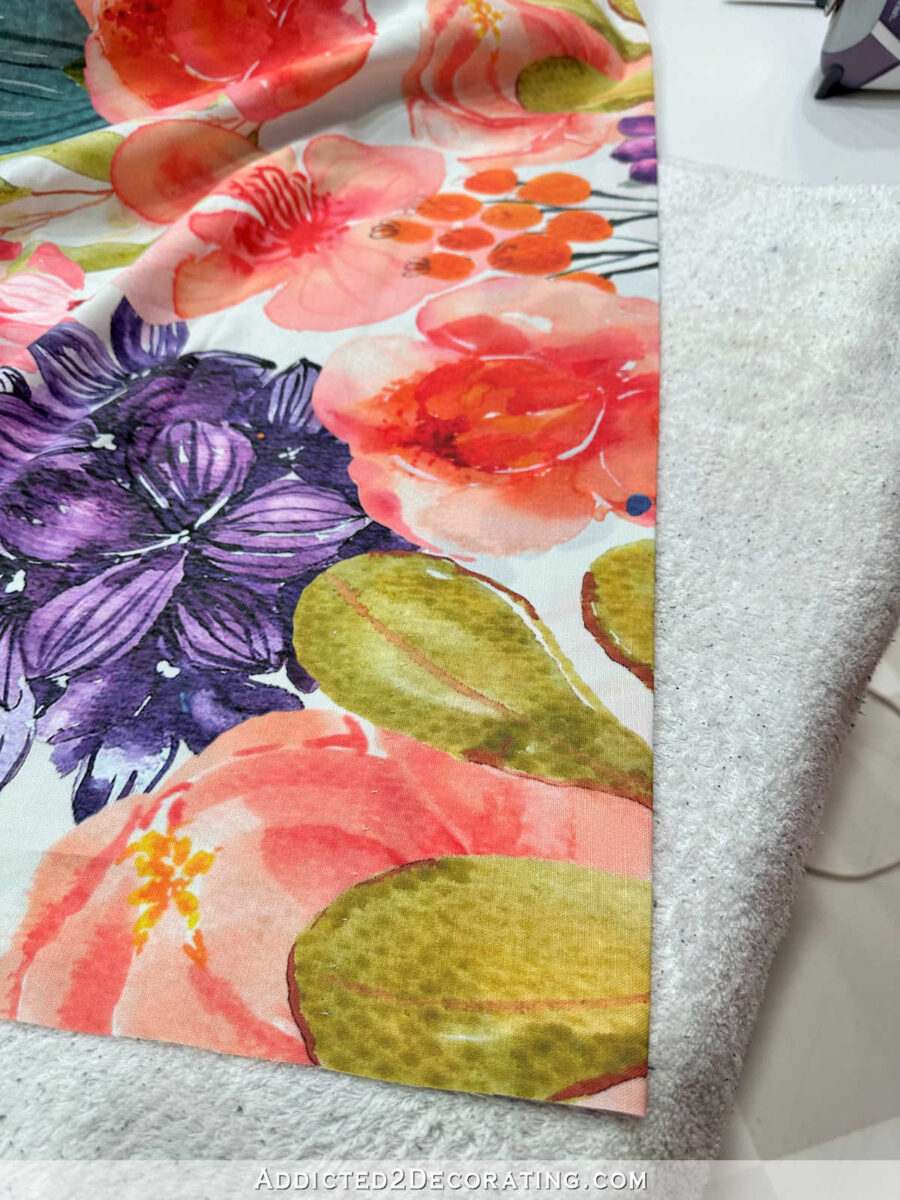
After which flatten and easy the layers till they appear like this, with one inch of the face cloth exhibiting alongside the again of every aspect edge.
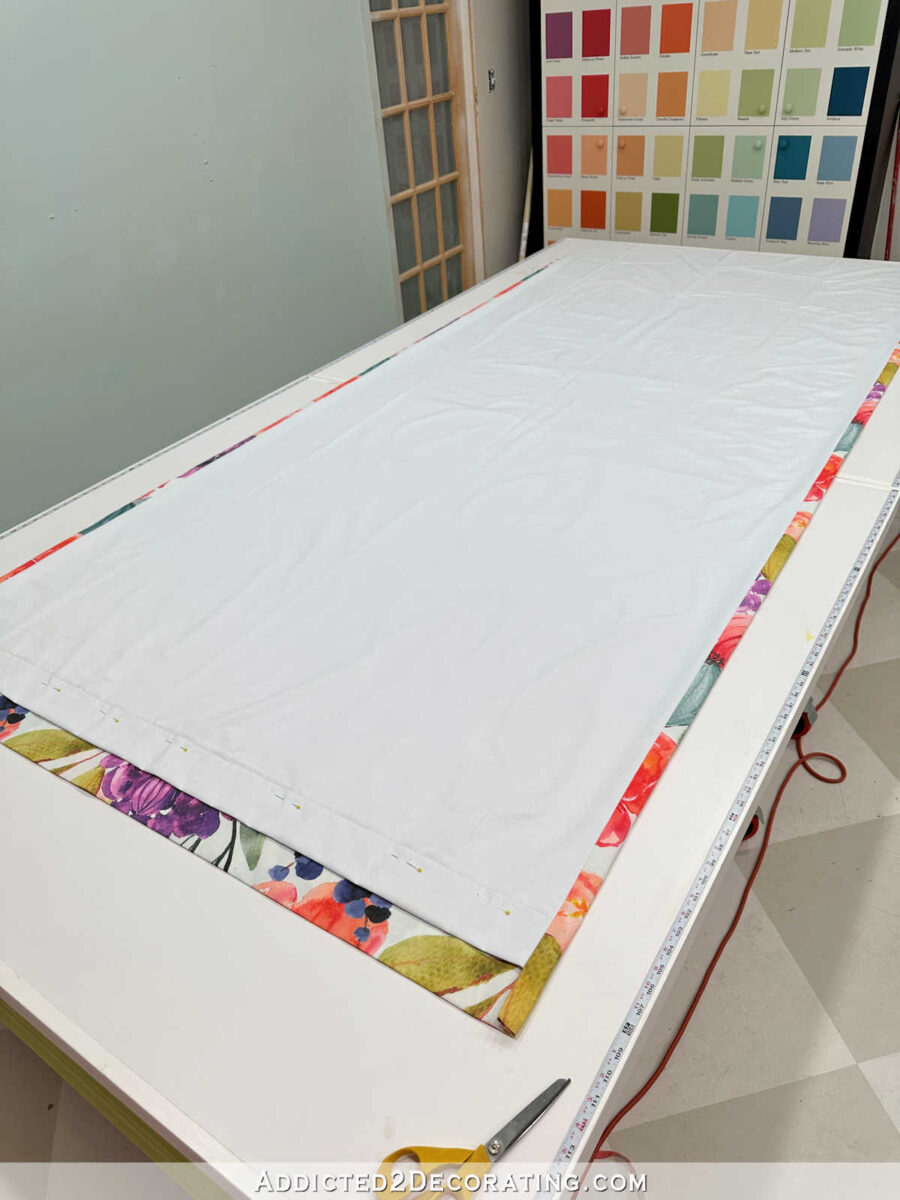
As soon as every little thing is totally easy and flat, I give these edges a very good steam iron another time to ensure these folds within the face cloth are securely in place, and I’ve a clear, sharp ironed-in crease alongside the sting of the material panel.
And that’s so far as I’ll get for at this time. Tomorrow, I’ll present you easy methods to end the panel with the pleated header on the high, and the entire ending hand stitching that I do for a very clear, completed look. So keep tuned for that!

Addicted 2 Adorning is the place I share my DIY and adorning journey as I transform and adorn the 1948 fixer higher that my husband, Matt, and I purchased in 2013. Matt has M.S. and is unable to do bodily work, so I do nearly all of the work on the home on my own. You possibly can be taught extra about me right here.
[ad_2]
Source link
