[ad_1]
Yesterday, I shared my resolution on what I plan to do with the doorways within the again entry of the studio. Should you missed that, you possibly can learn out it right here. Since my concept is a bit more difficult than simply buying a quart of paint and portray a couple of doorways, I’m giving myself time to determine precisely go about getting the look I need. So within the meantime, I made a decision to do some demolition on the studio half rest room to get it prepared for its new wallpaper.
However now I’m within the course of of creating some modifications in order that the toilet will circulation higher with my new imaginative and prescient for my studio. I’ve already repainted the vainness, painted the ground, and designed a brand new wallpaper that may go on the partitions. That wallpaper appears to be like like this…

So when that is completed, the toilet will find yourself being each bit as colourful as it’s now, however I feel it’s going to coordinate a lot better with what’s happening in the principle a part of the studio.
A couple of weeks in the past, I made a decision to interchange the yellow accent tile with a reed-type design utilizing dowel rods. I spent a number of time eradicating the yellow tiles in half of the toilet, after which reducing and sanding items of dowel rods and gluing them to the wall.

That was a enjoyable undertaking, and I’d like to see it accomplished, however I made a decision that it simply wasn’t proper for this rest room. So final evening, I spend a while popping these off of the wall with somewhat 5-inch prybar.

I began out utilizing my warmth gun to melt the glue earlier than prying them off, however that turned out to be actually messy and sticky. I discovered that there was truly no must warmth the glue earlier than eradicating the dowels. They popped off the wall fairly simply and cleanly with out using the warmth gun.
The identical can’t be stated for the yellow tiles, although. The half of the room wherein I had already taken the yellow tiles off of the partitions had three huge gouges within the drywall from me prying these tiles off of the wall. I didn’t hassle patching them earlier than gluing on the dowels, however now that my plans have modified, they usually’ll be lined by nothing however wallpaper or paint, I’ll need to restore them.

So after I began eradicating the tiles from the opposite half of the room. I used the warmth gun. The tiles had been utilized to the wall utilizing Easy Mat adhesive sheets from Residence Depot. And let me inform ya, these issues are sticky! On the primary half of the room, I used to be utilizing a giant prybar and a hammer to get the tiles off of the wall, and people issues didn’t need to come off. That’s why I left three huge gouges within the drywall.
However utilizing the warmth gun to take away them made issues a lot simpler. I used to be capable of get the second half of the tiles (and the sticky sheets) off of the partitions with no harm to the drywall.
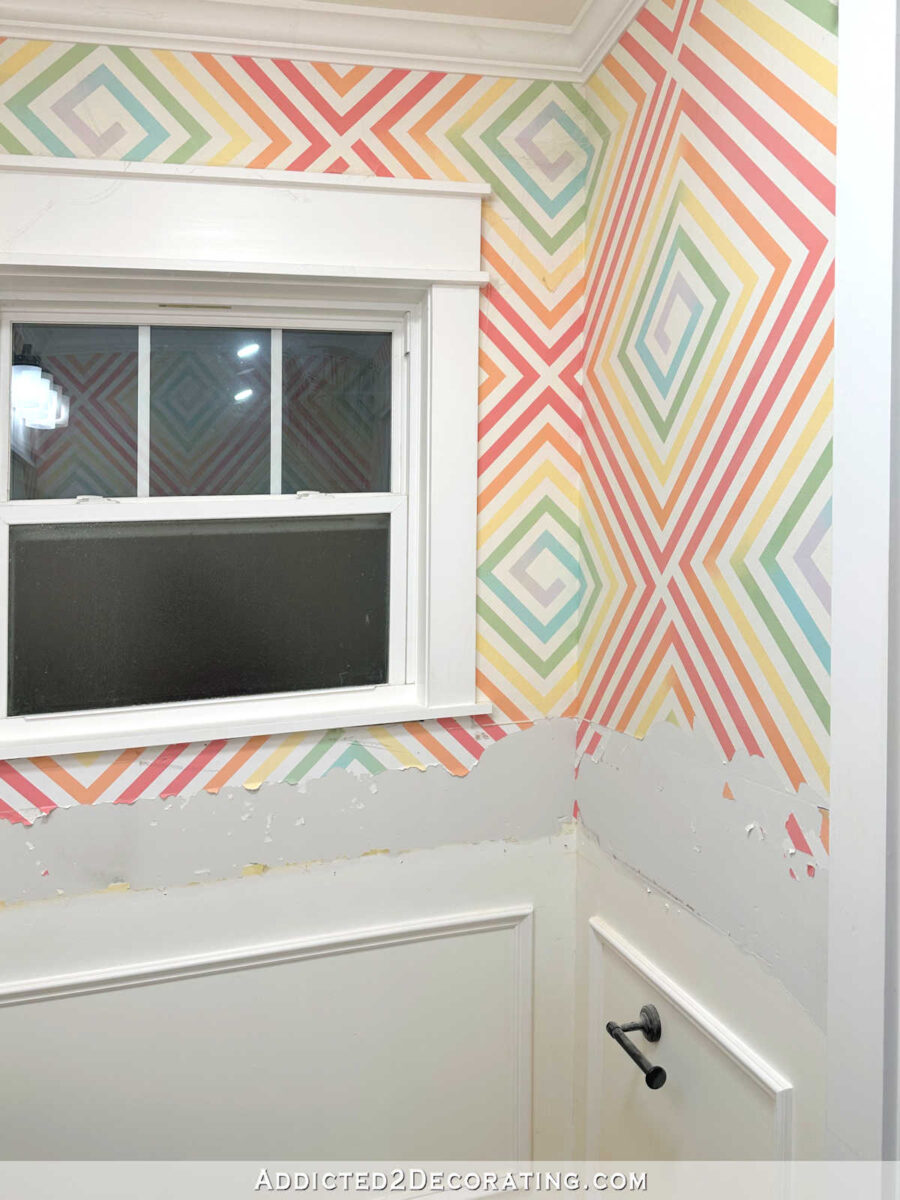
It did peel off a number of primer and paint from the drywall, which has left a number of very uneven areas that may have to be mudded over and sanded easy earlier than I can transfer on with paint and wallpaper, however that’s fairly easy.

Now that I’ve determined to take away the accent and chair rail, I’ll have the ability to have a full apron on the window trim. As a result of the chair rail got here up so excessive, I’ve had this tiny little 1-inch apron sandwiched between the window sill and the chair rail all these years. That’s a kind of issues that actually irritated me, however I didn’t actually have every other selection if I needed a chair rail.
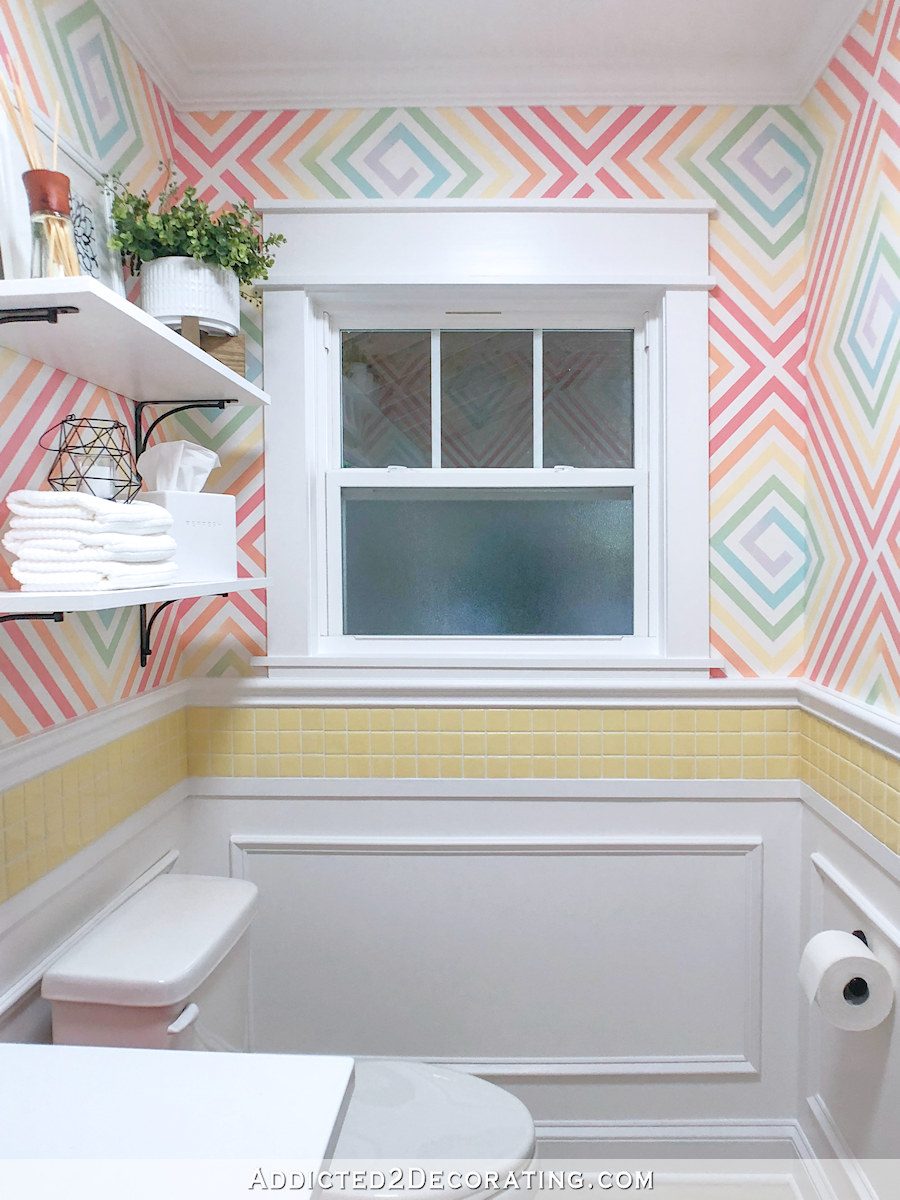
However now that the chair rail is gone, there shall be loads of room for a full apron. It’ll look so a lot better!

The trim across the mirror, which was accomplished precisely just like the window and door trim, was additionally lacking an apron.
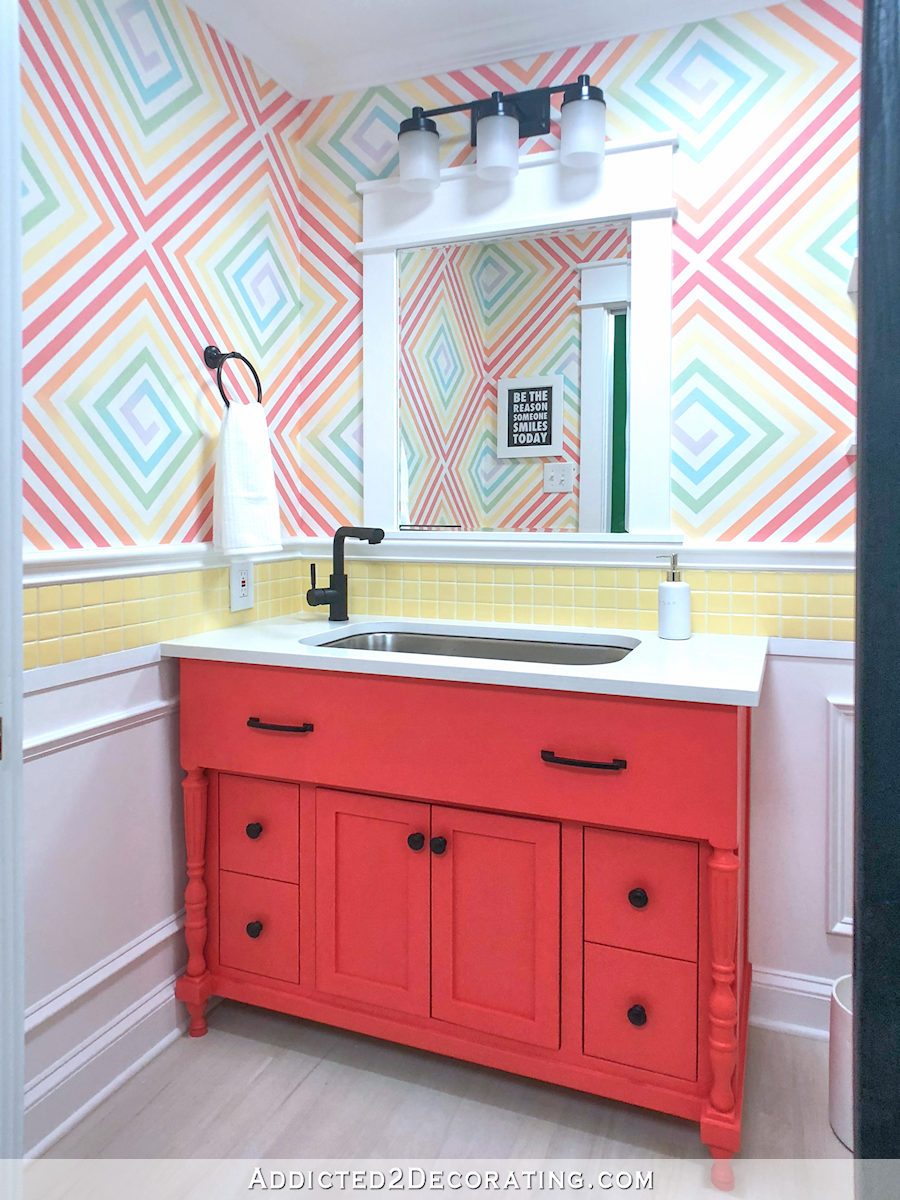
Though there shall be loads of room for an apron now, I’ve determined to take away it fully and discover a good framed mirror to make use of on this room as a substitute.
After I did this rest room (and the hallway rest room) years in the past, I liked the thought of framing out the mirrors to match the home windows and doorways. However I’m prepared to maneuver previous that look now. I need to hold the window and door trim on the home windows and doorways, after which take the chance to herald somewhat further one thing with the mirrors.

Sadly, I glued this mirror on to the wall, so I’m certain getting it off will trigger some harm that may want restore.

So issues on this rest room seem like an entire mess proper now, however it has to worsen earlier than it will get higher. I’m very glad it’s a tiny rest room, so regardless that the partitions will want some restore earlier than I can wallpaper, at the very least I don’t have a number of space to cowl. I’m simply actually excited to lastly get the wallpaper on the partitions! I’ve had the wallpaper for weeks, and I’m able to see some progress on it.


Addicted 2 Adorning is the place I share my DIY and adorning journey as I transform and embellish the 1948 fixer higher that my husband, Matt, and I purchased in 2013. Matt has M.S. and is unable to do bodily work, so I do the vast majority of the work on the home on my own. You may be taught extra about me right here.
[ad_2]
Source link
