[ad_1]
I had excessive hopes that I’d be completed with this cupboard by in the present day, however I didn’t make it. I had utterly forgotten that the partitions and the ceiling in that space of the room hadn’t even been painted but, so having to care for that earlier than engaged on the cupboard set me again a day on cupboard progress. However I did make a variety of progress, and this cupboard will be completed by Monday.
So for these of you who’re simply now seeing this mission for the very first time, let me perform a little little bit of evaluate. I’m engaged on an enormous cupboard that sits proper inside my studio door from the breakfast room, and I’m utilizing IKEA Sektion cupboards with Veddinge doorways to create this cupboard. I had initially deliberate for these cupboards to look absolutely built-in and match the opposite built-in cupboards within the room, that are pink with gold leaf accents.
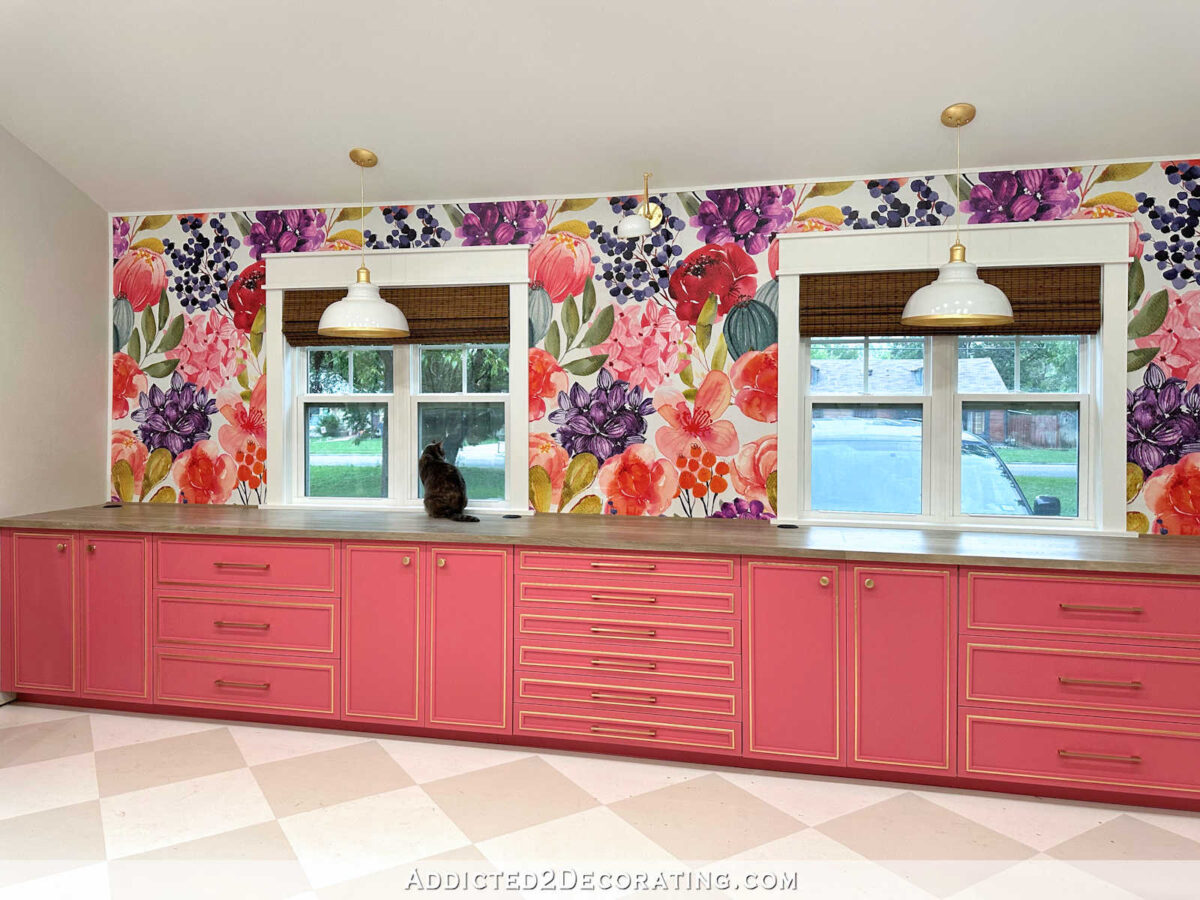
However the extra I considered it, the extra involved I obtained about having three massive sections of matching pink and gold cupboards. As a lot as I really like pink and gold, I believed that every one three massive sections of cupboards matching could be overkill. So as an alternative, I made a decision to design this part to seem like a separate, standalone piece of furnishings, like while you go to the furnishings retailer and purchase a china cupboard. In order that’s my aim with this mission, and for those who’ve missed the earlier posts about this cupboard, you may need to return and evaluate these first.
Please observe: This can be a multi-post mission. If you happen to missed the primary two posts about this mission, click on on the titles beneath to learn them.


The problem with utilizing IKEA Sektion cupboards is that the doorways are all full overlay doorways. So for those who’re wanting to construct a standalone cupboard utilizing Sektion cupboards, and also you need that cupboard to have a body round it, like most standalone cupboards do, it’s important to construct that half out your self. In any other case, all you’re going to see from the entrance is doorways from edge to edge. Simply doorways. That’s it.
If you happen to’re not fairly positive what I’m speaking about, let me use the cupboard that I constructed for our lavatory water closet for instance. Once you have a look at the entrance of this cupboard, do you see the way you’re not simply seeing doorways going all the way in which to the perimeters? You’re seeing framing all the way in which round (together with further ornamental trim on the highest and the underside), in order that the doorways are inset into that framing.

Nicely, I wished that for this studio cupboard, too. I didn’t simply need the entrance view to be nothing however doorways from the left facet to the correct facet. I wished the doorways to be framed in the same strategy to that rest room cupboard. So with the intention to have that, I needed to construct out the body myself.
I began by stacking and attaching 4 of the six cupboard packing containers, ensuring they had been secured to one another. I connected quite simple field ft to the underside cupboards to boost them up three inches off the ground. You possibly can learn extra about that course of right here. These ft lifted the cupboards off the ground sufficient to supply house for the underside trim.
As soon as the cupboards had been screwed to one another, I added an 8-foot-long 2″ x 2″ piece of lumber to the facet, ensuring that the entrance of this piece was flush with the entrance fringe of the cupboard field. I nonetheless wanted to place the third row of cupboards on high, however for some cause that made sense to my mind on the time ? , I made a decision to connect these items to the facet first.

I simply screwed these into place utilizing about three screws per cupboard, screwed from inside the cupboard and into the wooden piece. I all the time pre-drill holes with IKEA cupboards to keep away from cracking or chipping the white laminate.

Then I added one other piece to the again fringe of the cupboards, and screwed them into place the identical manner.

As soon as I had these two items on, I went forward and added the 2 high cupboards, and screwed them to one another and to the facet wooden items as properly.

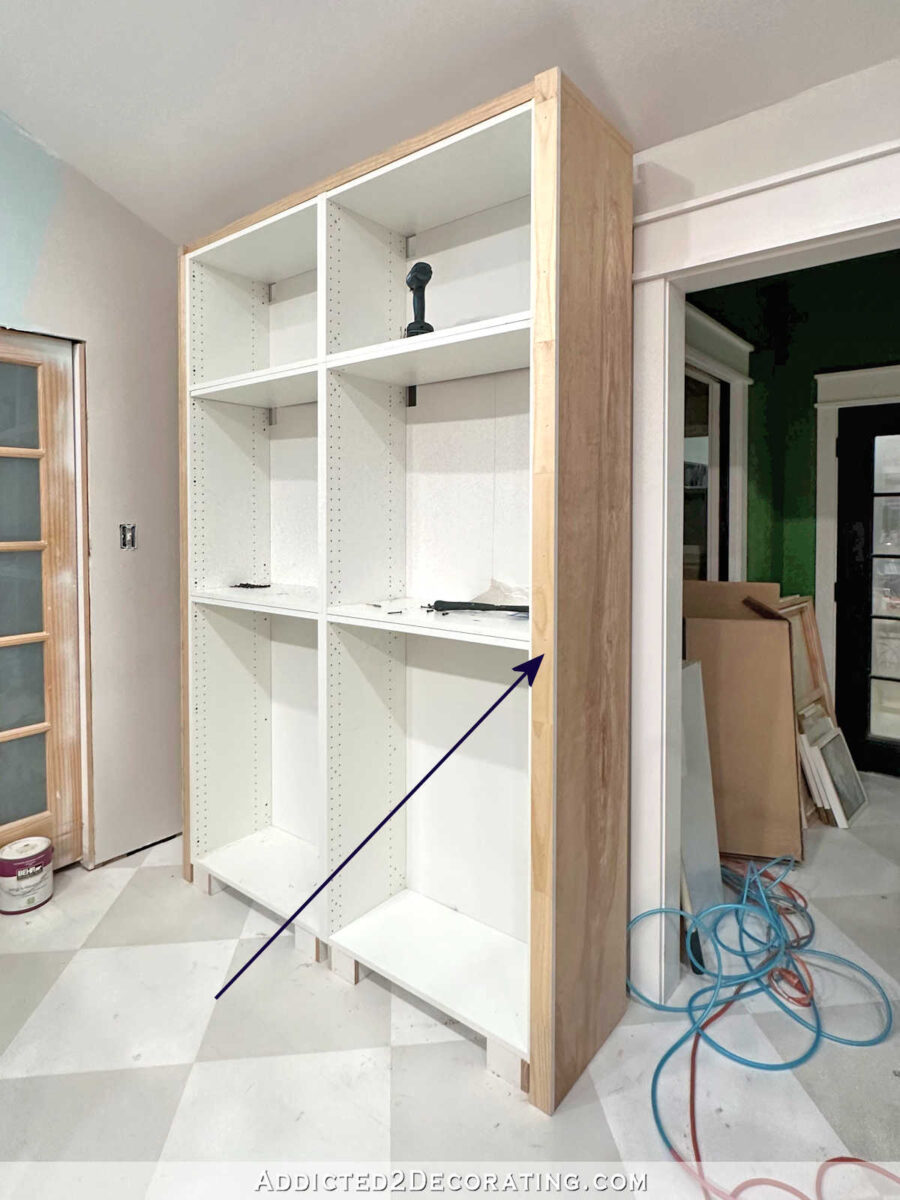
And right here’s what it regarded like with all the cupboards secured to one another, and the 4 2″ x 2″ items of lumber connected to the perimeters.

Subsequent, I added a bit of three/4″ sanded plywood to the facet, ensuring that the sting of the plywood was flush with the two″ x 2″ lumber and the entrance fringe of the cupboard field. I nailed that to the two″ x 2″ items utilizing 1.5-inch 16-gauge nails.

Then I repeated that on the opposite facet. (Please observe that I didn’t construct this cupboard the place it’s truly going to take a seat. I needed to transfer it away from the facet wall to have room to work, however when it’s completed, it’ll be centered in that house.)
I forgot to take a photograph of this subsequent step earlier than I moved on, however I reduce extra 2″ x 2″ items and nailed these to the highest (entrance and each side) to present me one thing to nail the crown molding onto later within the course of.

As soon as the perimeters had been coated, and the highest items had been in place, I started to border out the entrance. For these items, I had to make use of my desk noticed to tear all of them to the correct width, after which I additionally ran all of them by means of my planer in order that they might be 5/8″ thick (the identical thickness because the IKEA Veddinge doorways) as an alternative of three/4″ thick.
I began by including the vertical items on the left and proper. The important thing with these entrance body items is that they can’t overlap the IKEA cupboard packing containers in any respect. If these items overlap the entrance edges of the cupboard packing containers in any respect, they are going to intervene with the operation of the cupboard doorways.
Subsequent, I added the entrance body piece alongside the highest, once more ensuring that I got here proper as much as the IKEA cupboard with out masking it even the slightest bit.

And eventually, I added the entrance body piece alongside the underside.

Now as a lot as I really like IKEA cupboards, and have been singing their praises recently, there’s one factor that irritates me about them. My irritation is that the horizontal cupboard items don’t sit flush on the entrance edge or the underside edge with the vertical items. For some cause, they’re inset each methods only a tiny bit.

That turns into a difficulty while you attempt to body them or add trim since you’re going to finish up with these gaps that must be stuffed with caulk. It’s not an enormous problem, however it’s only a slight irritation for me.

With the cupboard framed, I used to be prepared so as to add the ornamental trim. I began with the underside, and added this trim on the entrance and sides.

Then I obtained curious and wished to connect two doorways to verify every little thing regarded proper, and make it possible for the doorways would freely open and shut with out rubbing the body items.

And after I was glad that it as all going to work out, I added the crown molding on the high.

In order that’s so far as I obtained. The cupboard is constructed and trimmed, however I’ve all the ending work to do — wooden filling, sanding, caulking, priming, and portray. However I really feel fairly assured that I can get this completed this weekend.

Addicted 2 Adorning is the place I share my DIY and adorning journey as I rework and embellish the 1948 fixer higher that my husband, Matt, and I purchased in 2013. Matt has M.S. and is unable to do bodily work, so I do nearly all of the work on the home on my own. You possibly can be taught extra about me right here.
[ad_2]
Source link
