[ad_1]
The cupboard doorways for my 72-color paint swatch cupboard within the studio are completed. I believed this was going to be such an extended, drawn out venture, however this turned out being a lot sooner and simpler than my pink gold-leafed cupboards on the mural wall of the studio, and that’s even with me having to combine 33 of the colours myself.
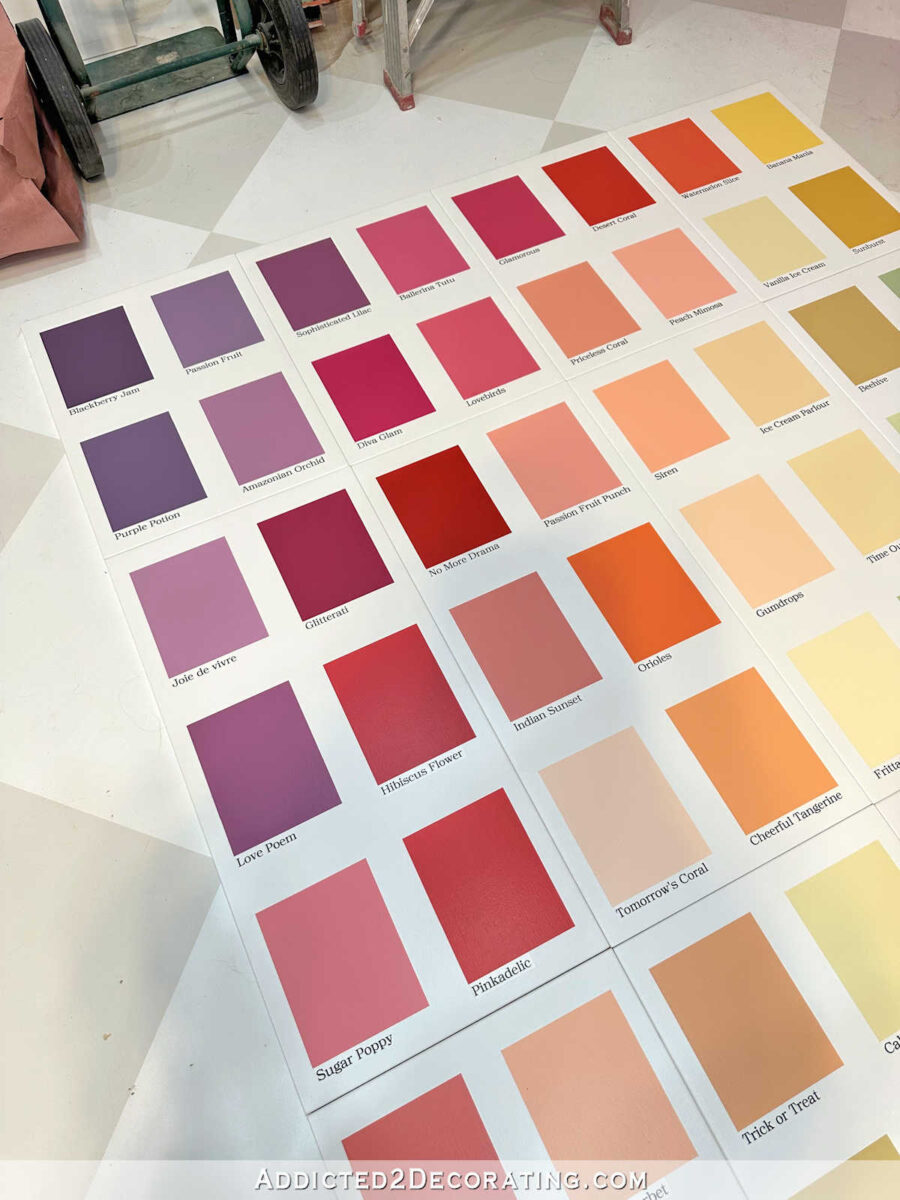
Right here’s how they turned out. It’s type of exhausting to inform, however there are 12 cupboards doorways there…

And right here’s a more in-depth look so as to see the paint names beneath the colours…

I’m so enthusiastic about how these turned out! And I can’t wait to get the cupboard containers all put in and trimmed out in order that I can get the doorways hooked up and see how the completed cupboard appears. The one factor I nonetheless stay undecided on is cupboard {hardware}. I’ve no clue what kind of door pulls I ought to use on these that gained’t intrude an excessive amount of with the design.
Yet another factor. You’ll discover that mine turned out fairly a bit completely different from my authentic inspiration cupboard. If you already know me however in any respect, that ought to have been anticipated. ? Whereas I beloved the extra carefree brushed design of the unique with the handwritten labels, and whereas I began this venture intending to repeat those self same particulars, I noticed as I received into this venture that I needed to be true to who I’m.
I have a tendency in direction of issues which can be neat, put collectively, tailor-made, exact, and so forth. That’s simply who I’m, so I needed to be true to me. I believe I’d have loved the extra carefree search for some time, however I believe it will have gotten outdated for me in a short time. It could have pissed off my mind after a short time, if that is sensible. I knew that the neat, clear, exact look is what I personally would get pleasure from extra. And I’m truly glad it labored out that approach. Whereas I really like getting inspiration from others, I do wish to put my very own private spin in initiatives in order that I’m not simply outright copying different folks.
Please be aware: That is the second publish about this venture. For those who missed Half 1, click on on the title beneath to get caught up.

Okay, let’s get on with the precise venture and let me present you the way I did it. After figuring out the 72 colours I wished to make use of, finalizing the order I wished them in, and mixing 33 of these colours myself (all of which I coated in Half 1 of this venture), I used to be lastly prepared to start out portray the colours onto the cupboard doorways.
First, I began off by taping the rectangles on the fronts of my 12 IKEA Veddinge cupboard doorways. I used two widths of tape — the purple 1.5″ tape, and the blue 1″ tape — to get the design to look identical to I wished it. With a view to get the spacing excellent on my doorways, I made my rectangles about 7″ excessive, and allowed about 3 inches of house between the rows. That spacing allowed the design to suit completely onto the three completely different sizes of cupboard doorways I used — 20″ doorways on the highest row, 30″ doorways on the center row, and 40″ doorways on the underside.
As soon as all the pieces was taped, I went again and pressed the tape down very securely, after which sealed the perimeters of the tape with the bottom coloration (Behr Polar Bear) in order that the colours wouldn’t bleed beneath the tape and I’d have completely sharp edges.
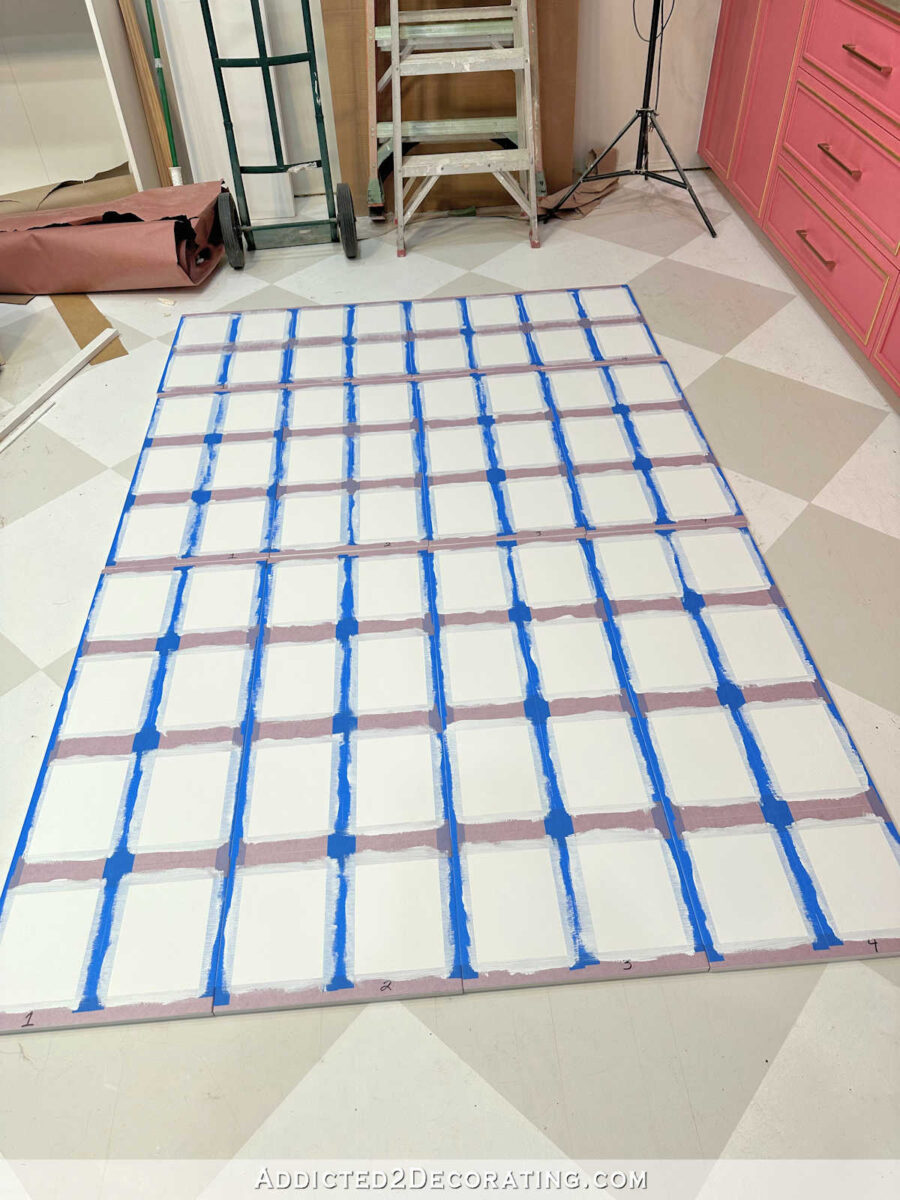
Hopefully you may see the tape particulars a bit of higher with this closeup. I used two items of purple (1.5″) tape to separate the rows, and two items of blue (1″) tape to separate the columns.

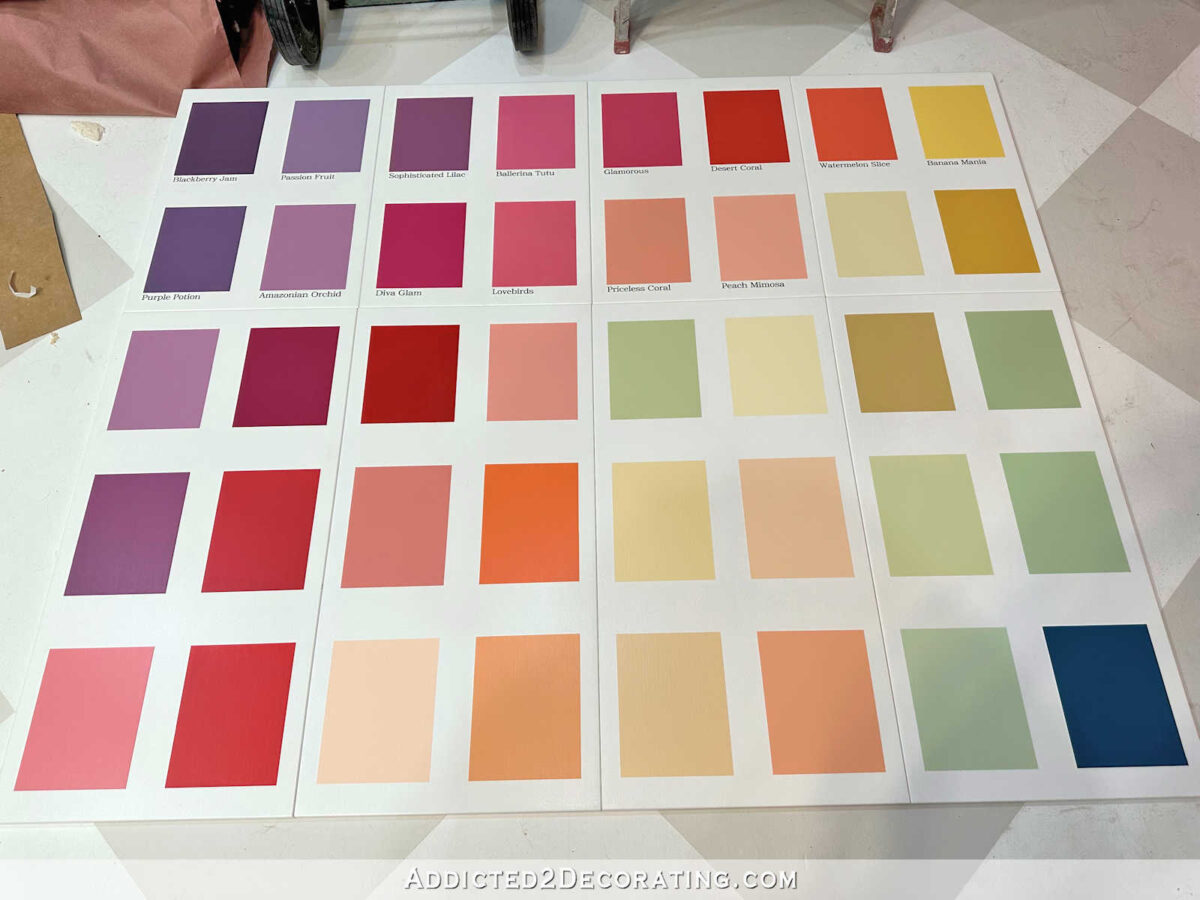
Subsequent, I took my 72 paint playing cards and positioned them on the doorways within the order I wished them to seem. The paint playing cards had been already numbered within the right order, and I had numbered the entire paint containers to correspond with the paint playing cards in order that there can be no room for confusion.
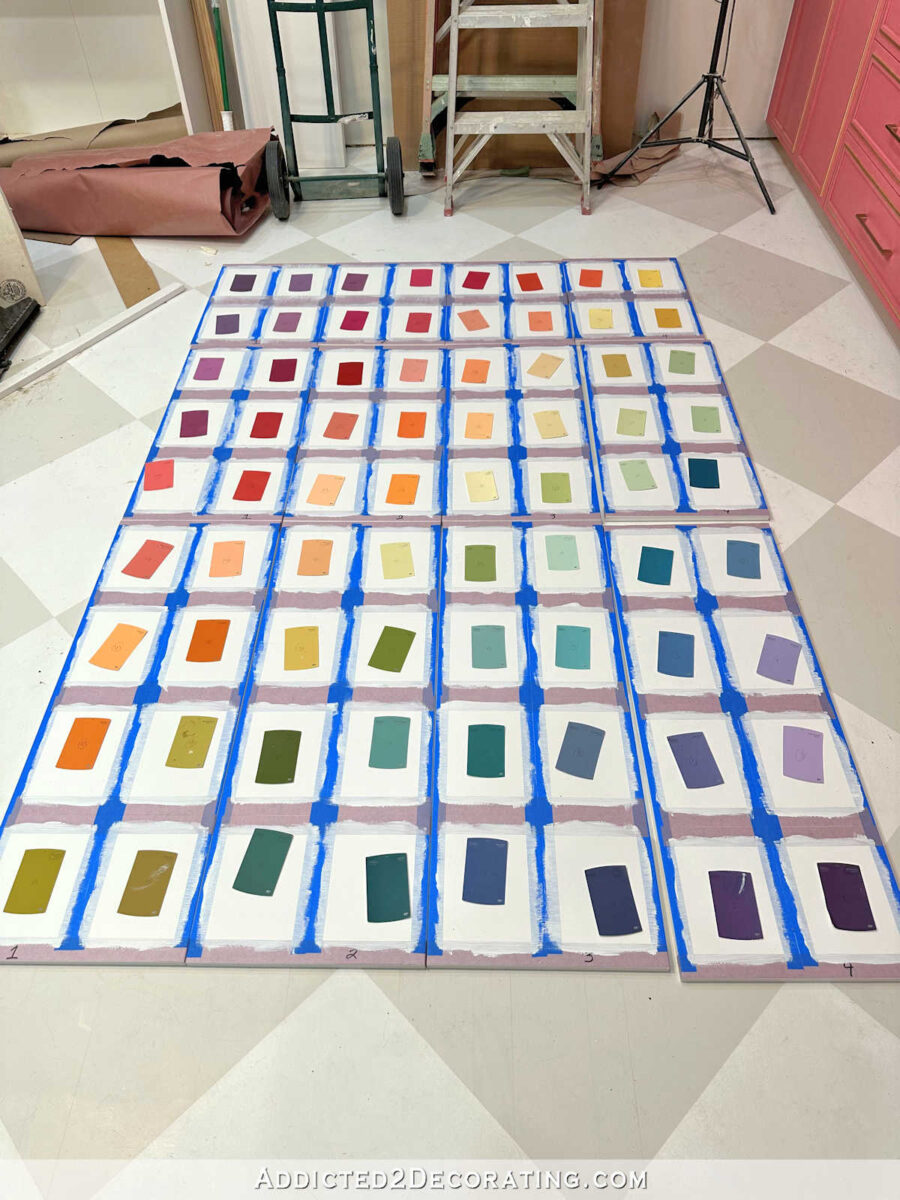
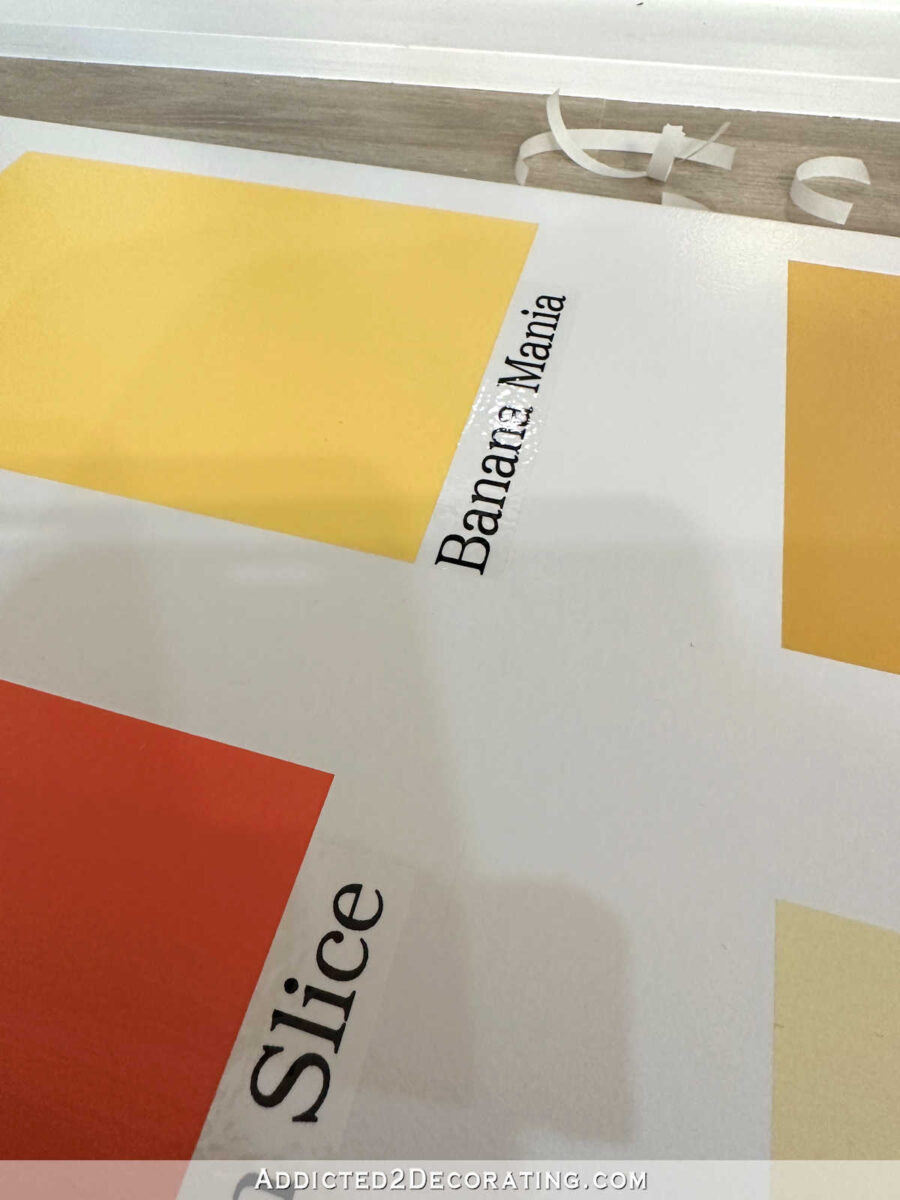
After which earlier than I painted every door, I wrote the colour quantity on the tape above every rectangle. I painted the colours with a 1.5″ angled brush, and every rectangle required two coats of paint. I truly had three rectangles (essentially the most saturated colours) that required three coats, however the remaining solely wanted two. The photograph beneath solely exhibits one coat of paint on these three rectangles.

As quickly as I completed portray the second coat on the rectangles, and whereas that second coat as nonetheless moist, I eliminated the entire tape from the door.
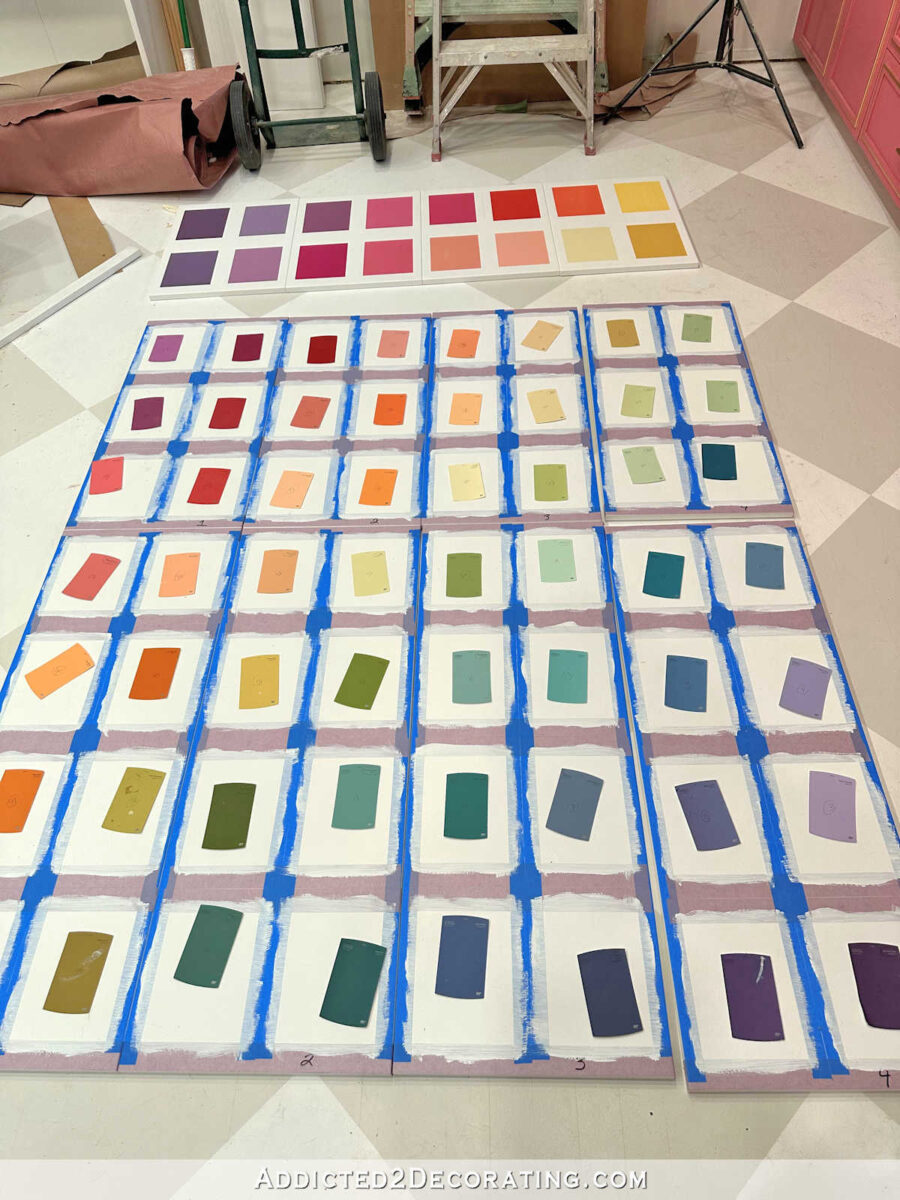
I truly totally loved this course of. It was enjoyable and stress-free, and I received to play with a lot of coloration. What’s to not get pleasure from? And it was very satisfying to see the progress because the tape was faraway from every new door and people exact little rectangles had been revealed.
And right here’s how all of them regarded with two coats of paint on every rectangle, all of the tape eliminated, and the doorways positioned again so as. I may stare at that each one day lengthy.

As soon as the entire doorways had been painted and dry, I utilized one coat of my favourite clear coat — Common Finishes Excessive Efficiency Clear Coat in a flat end (affiliate hyperlink). The explanation I clear coated it at this level is as a result of I had nonetheless deliberate handy label the paint colours, and Sharpie marker doesn’t work nicely immediately on latex paint, so it’s higher to seal the floor first.
However then I began training my handwriting, and realized in a short time that there’s no approach I’d be glad with hand labeled swatches. I simply don’t write a lot anymore. Every part we do today is on the pc or cellphone, so whereas I used to like my handwriting, it simply appears sloppy to me now, like I’m out of shape. I attempted all caps, higher and decrease case, cursive. There was simply no approach I used to be going to place any of these on my freshly painted, completely exact paint swatches.

So then I needed to scramble for a brand new concept. I considered rub on transfers. Are you able to even make your personal? I came upon which you can, however that choice didn’t appear cheap. After which I made a decision to drag out my trusty label maker and see if I may make that work.
Truthfully, I didn’t have excessive hopes that it will work. However I didn’t need to write off the concept till I truly gave it a attempt. That is an older Brother label maker, and it’s not made anymore. That is the up to date (and fancier) model of what I’ve (affiliate hyperlink). So I put the most important tape in it (3/4″), and set it to the most important font attainable, and gave it a attempt.

I believed the dimensions and font had been excellent, and I beloved the clear, constant look. However I used to be nonetheless cautiously optimistic as a result of the labels had been very shiny, which made them very apparent.
I wished to attempt placing the Common Finishes flat clear coat over the labels to see if I may make that shine go away, however I used to be involved that the wetness of the clear coat would seep beneath the perimeters of the labels, ruining the adhesive, and inflicting the perimeters to raise. However I wouldn’t now till I attempted. And I’m so glad I did, as a result of it labored!
It took two coats of clear coat (which I utilized with a four-inch curler and 1/4″ nap curler covers for clean surfaces (affiliate hyperlink)) to cover the shine of the labels fully and make them the identical sheen because the doorways, however it truly labored. The wetness of the clear coat didn’t have an effect on any of the labels in any respect. Not a single one.
This was a lot enjoyable to do, and to see all of it come collectively as I completed every door.

I did run right into a little bit of a snafu as a result of I carelessly positioned one of many doorways the wrong way up and didn’t catch it earlier than I picked up that door to label the colours and clear coat the door. Are you able to see the out-of-order door beneath? It stands out like a sore thumb to me within the image, however for some motive, I didn’t catch it as I used to be truly engaged on the doorways.
So final night time, after I had completed the entire doorways (the entire labels, two coats of clear coat on the entire doorways) and all the pieces was dry, I began inserting the doorways again on the ground so as, and I couldn’t determine what the heck was occurring. I initially positioned them in order that the entire labels had been the best course (clearly), however the colours didn’t look proper. I believed, “Why is that random inexperienced in the midst of the entire orange and yellow? Oh my gosh! Did I paint these colours it the fallacious order? Am I going to must sand that entire door down and begin over? How did I not see that prior to now?!“
It took me a couple of minutes to clear the confusion and at last understand what was occurring. I had turned the door the wrong way up and put the labels on the fallacious aspect of the paint swatch rectangles. UGHHH!!!

Luckily, it was fairly a simple repair. I used to be in a position to get use a razor blade and punctiliously peel the clear coated labels off with out inflicting any injury. Then I simply needed to perform a little little bit of sanding with some 220-grit sandpaper to clean out the clear coat edges that had been left across the space the place the label had been, make new labels, connect the brand new labels (on the proper aspect this time), and provides the door two extra coats of the clear coat. Disaster averted. I completely love how these doorways turned out!!
I’m not even joking after I inform you I may waste away my whole day looking at these lovely colours. I’m not going to inform you how a lot time I’ve spent simply this morning taking a look at these doorways. It’s embarrassing. ?

I imply, I can’t consider something extra excellent for my studio than an enormous cupboard coated in 72 completely different paint colours. (Really, it’ll be 73 by the point it’s completed, however extra on that later.)
The one factor higher can be a cupboard with MORE colours. 100 colours. 120 colours. All the colours. However 72 colours will work simply superb. ?
This turned out approach higher than I believed it will. And I believe even whether it is seen from the principle rooms of our home (which will probably be), it’ll nonetheless look nice with its clear, organized look. My major concern with the extra freehand paint + handwriting look is what it will seem like from the entryway, lounge, kitchen, and breakfast room. However this? I’ll be proud to point out this off from any room in the home.
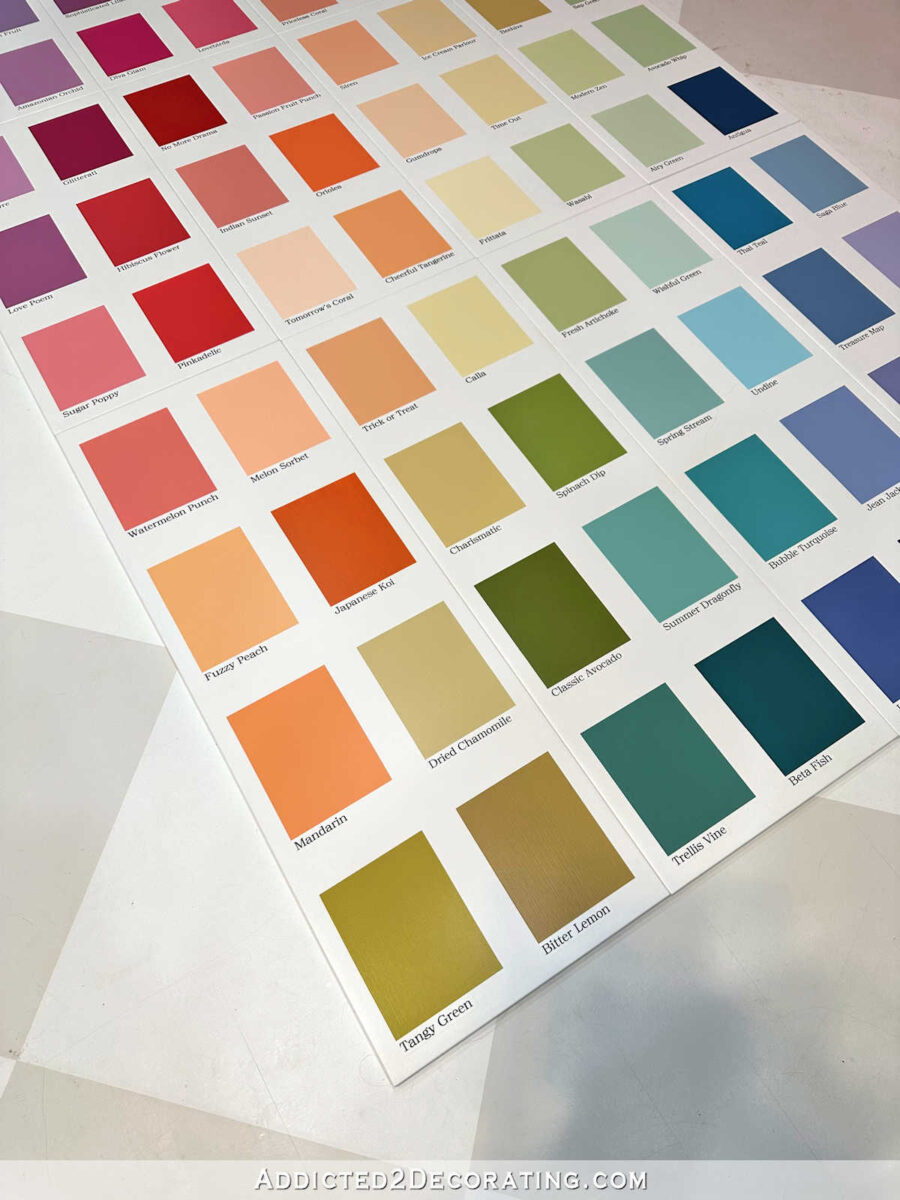
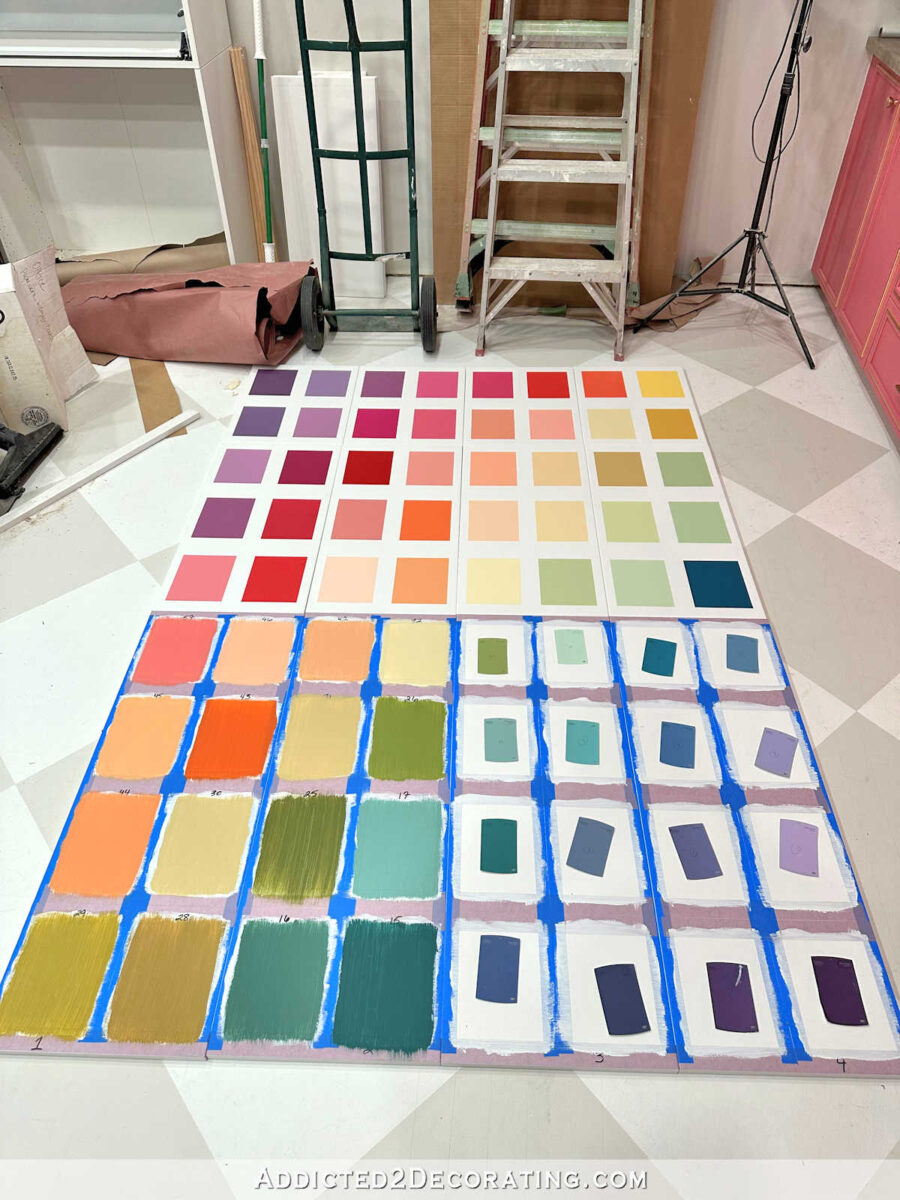
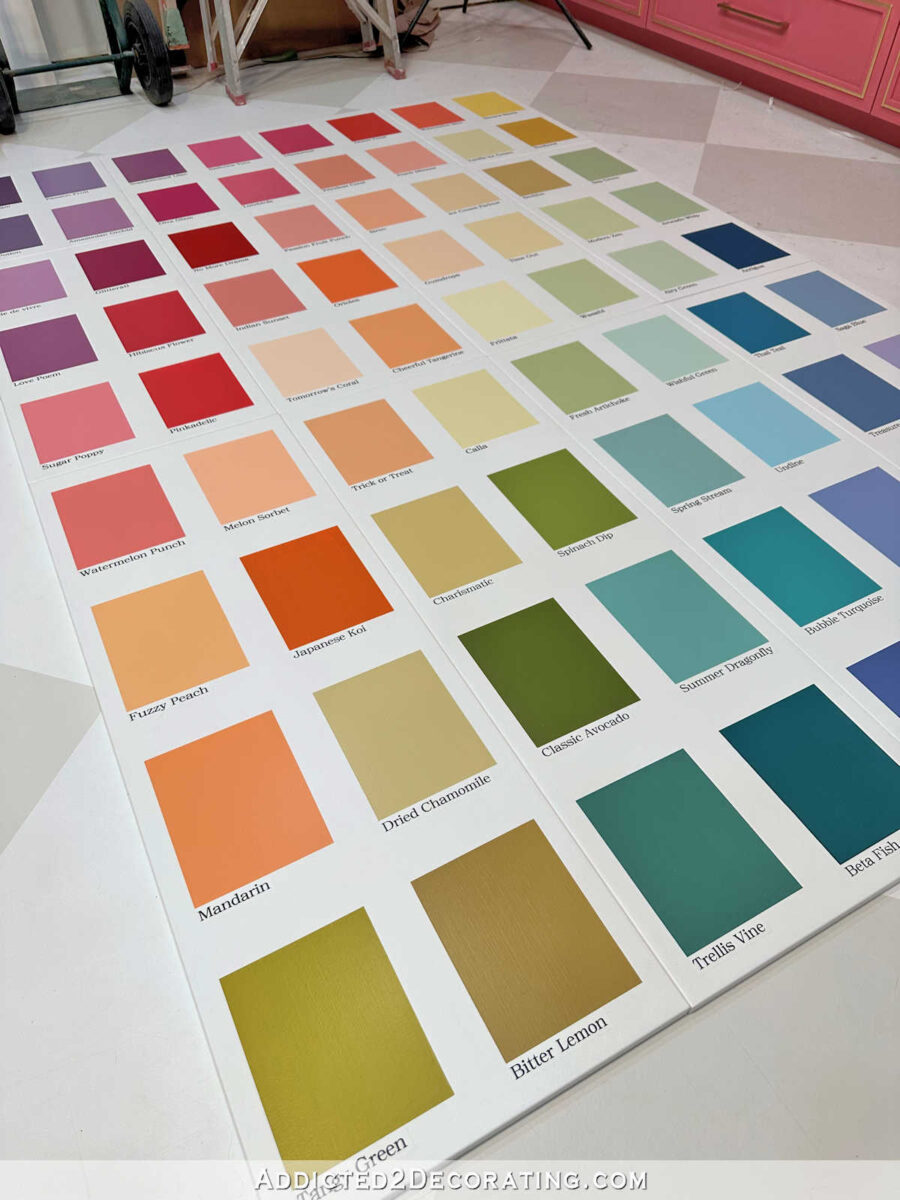
And whereas I did combine 33 of the colours myself, the colours I ended up with had been fairly near the Behr colours. Plenty of them had been fairly exact. So I simply caught with the entire Behr names quite than making up my very own. So all 72 of those paint coloration names are precise names of Behr paint colours.

And also you’ll additionally discover that I ended up making just a few adjustments to the order of the greens. As a lot of you identified, I had a darkish inexperienced that caught out like a sore thumb and appeared out of order. So I swapped the greens round in order that they flowed higher, and that darkish inexperienced was nearer to the underside quite than the center.

And that’s it for the paint swatch cupboard doorways. They’re completed! Now the precise cupboard containers want a bit of work, and I can examine this venture off of my “to do” listing.

Addicted 2 Adorning is the place I share my DIY and adorning journey as I transform and beautify the 1948 fixer higher that my husband, Matt, and I purchased in 2013. Matt has M.S. and is unable to do bodily work, so I do the vast majority of the work on the home on my own. You’ll be able to study extra about me right here.
[ad_2]
Source link
