[ad_1]
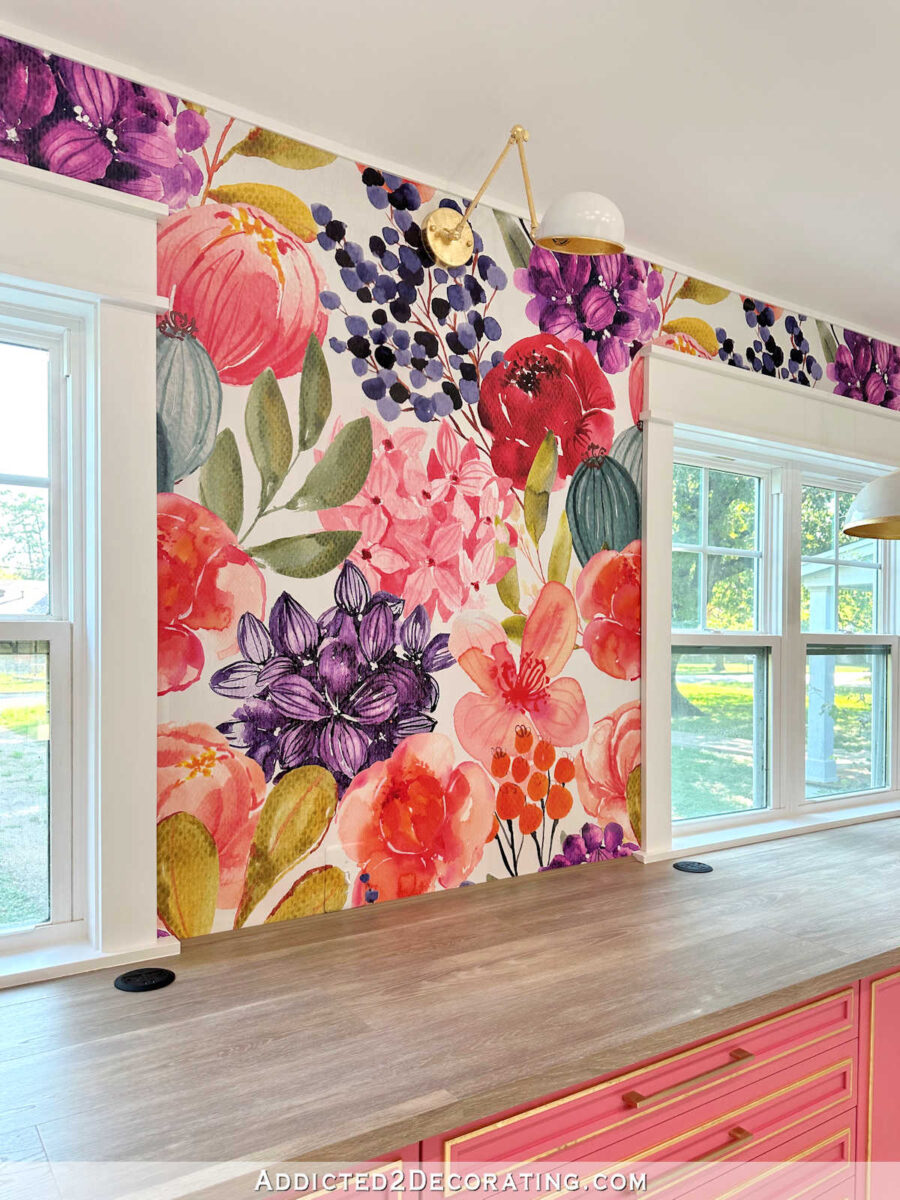
This morning (sure, this morning!) I completed up the ultimate factor on my punch checklist for the mural wall. It’s FINISHED!! This has been a protracted course of, and I’m hoping that the opposite zones within the room don’t take this lengthy. So let me present you the way it turned out…
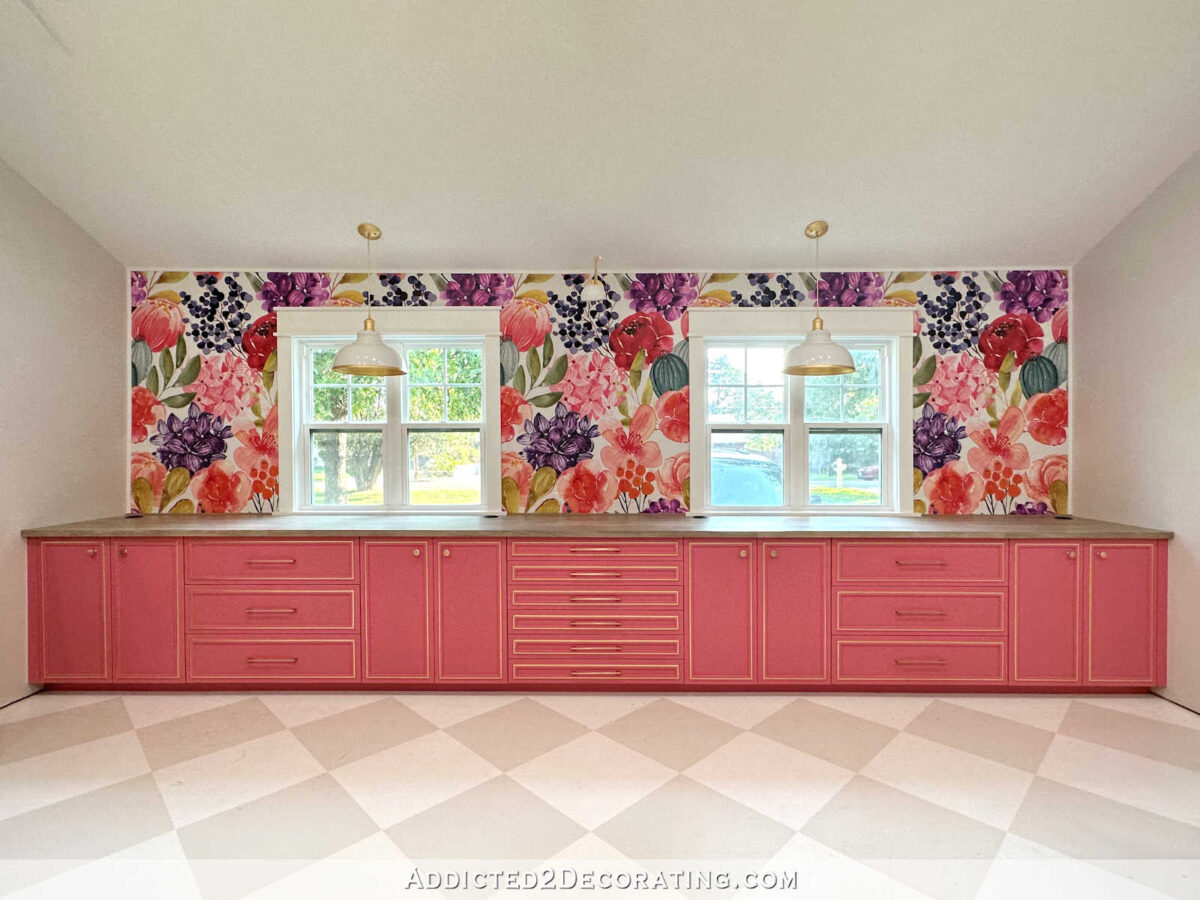
This wall turned out fairly completely different from what I had initially imagined. My authentic plan included higher cupboards on every finish and desk areas underneath the home windows, which might have given me fewer decrease cupboards.

However when the mural went up, I made a decision that I wished as a lot of it to indicate as doable. So the concept of protecting up a lot of every finish with higher cupboards now not appealed to me.

After which I made a decision that having two desk areas on this wall didn’t make sense, both. I’ve one other space within the room that’s particularly for a desk, and when engaged on initiatives, I usually like to face. Plus, having extra space for storing is a a lot larger precedence for me than having a number of desk areas within the room. So I made a decision to remove the desk areas and put cupboards alongside the complete wall.

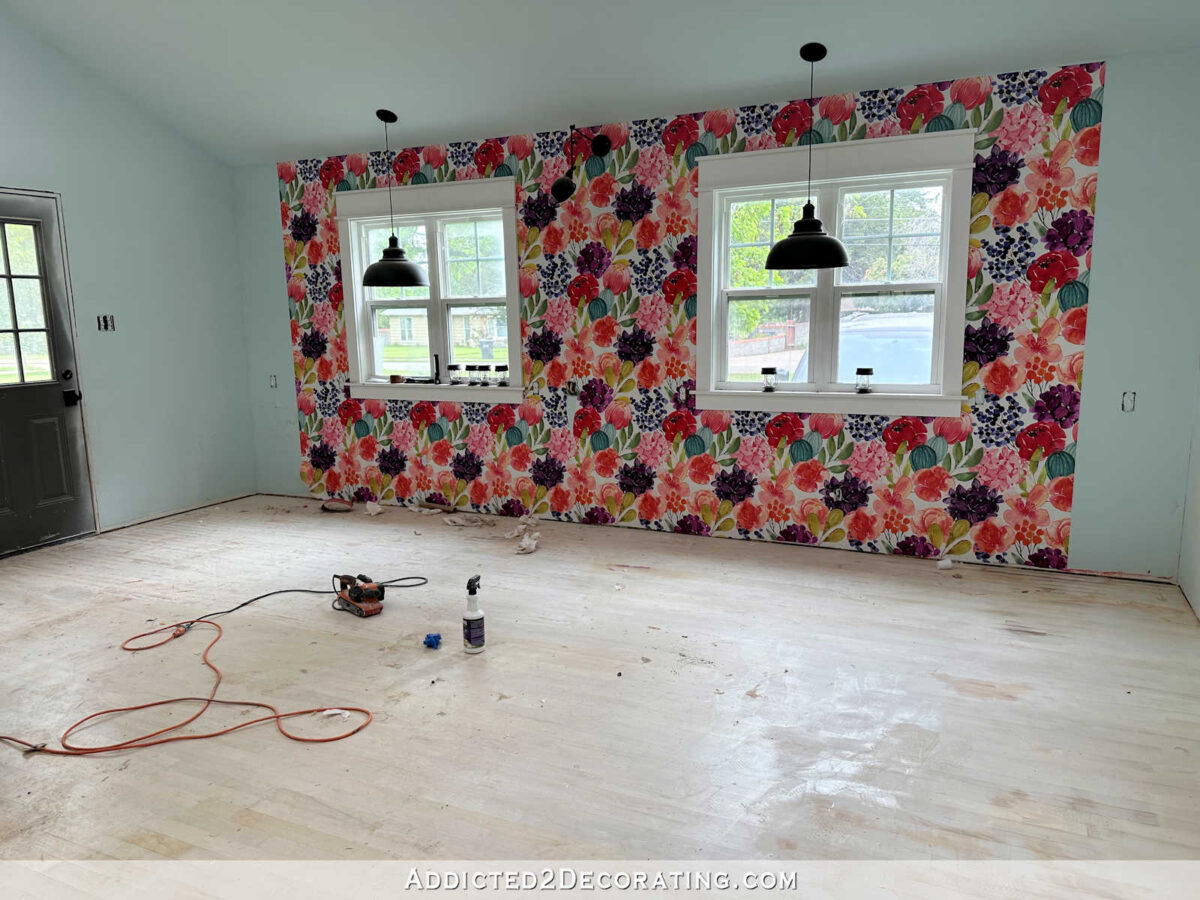
The top end result has far exceeded my expectations, nevertheless it took some trial and error to get right here. I had initially designed this floral wallpaper in a a lot smaller print, and it regarded actually darkish and busy to me. Right here’s a superb view of it on this picture I took manner again once I was on the brink of paint the ground.
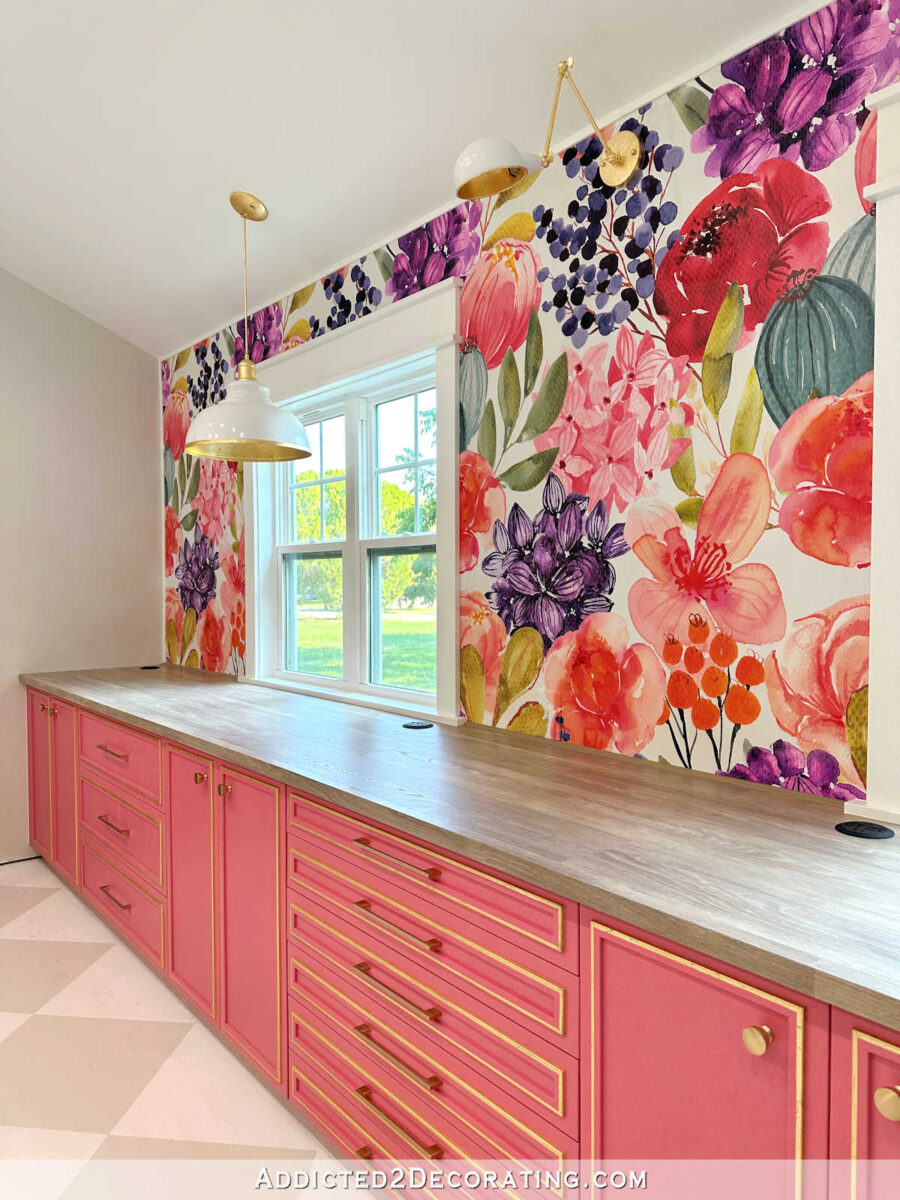
So I made a decision to attempt once more on the wallpaper. The second time round, I made the flowers 4 occasions the unique dimension, and my mother helped me to loosen up a number of the flowers that had been showing like darkish blobs within the authentic wallpaper. The ultimate result’s so good for me, and I couldn’t think about something extra “me“!

The cupboards are IKEA Sektion cupboards, and I ordered them with the Veddinge doorways and drawer fronts. After which I sanded them, added trim to them, painted them, after which added gold leaf accents. I lastly acquired my pink cupboards! The colour is Tuberose from Sherwin Williams, however I had it coloration matched in Behr Premium Plus paint.

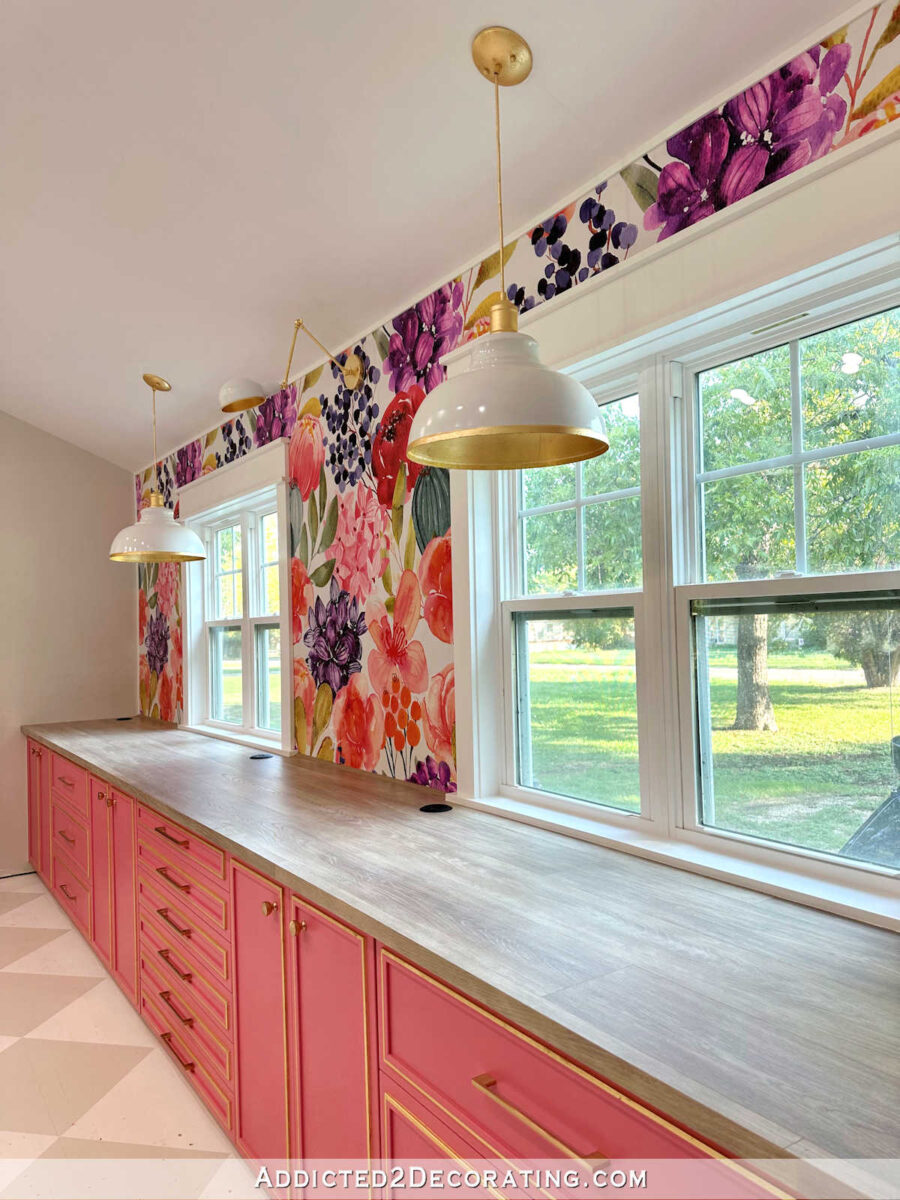
Nonetheless lacking from this wall are the window shades, however they received’t be right here for one more ten days. I ordered my favourite cordless bamboo shades in a Rustic Walnut coloration (affiliate hyperlink), that are the identical shades I utilized in our grasp rest room and residential health club. They’ll customized minimize them to the precise dimension you want in your home windows, and the standard is nice.
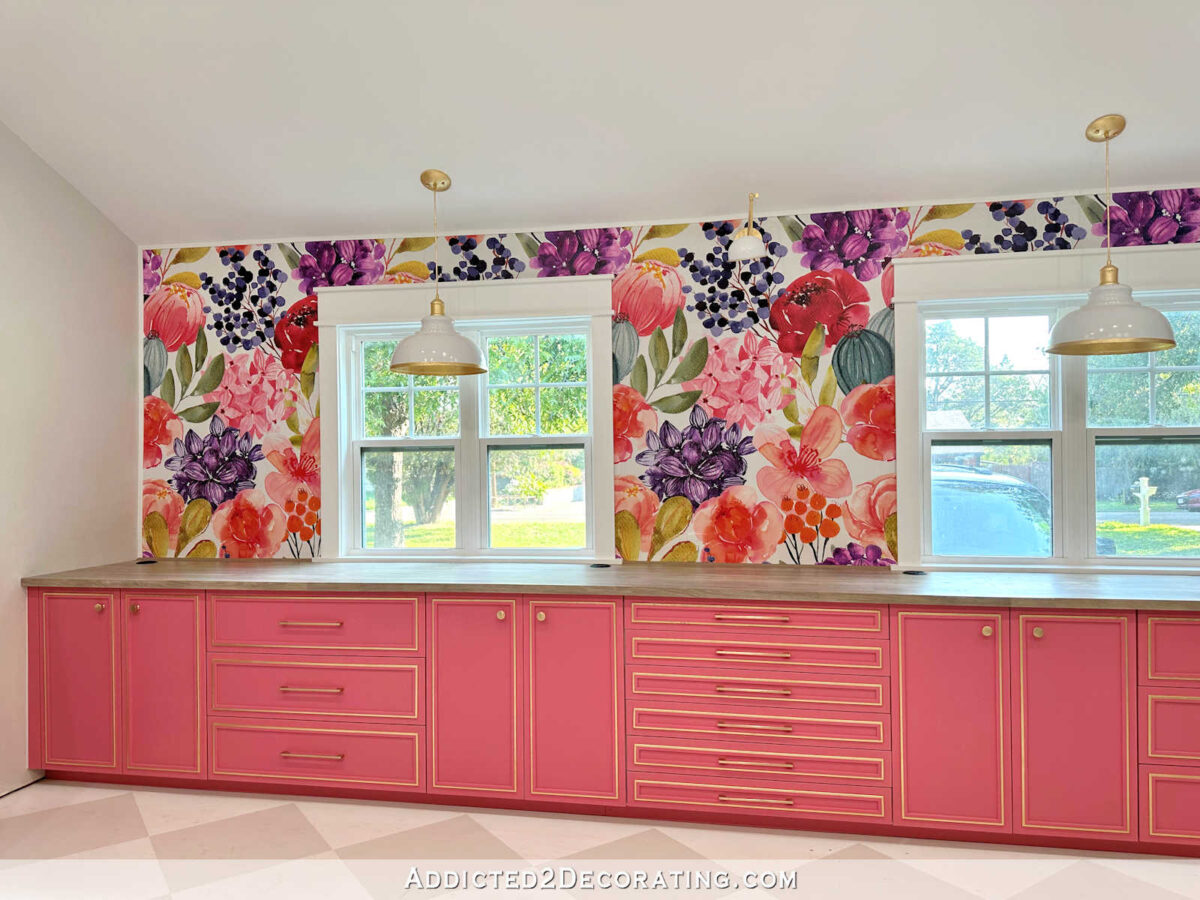
I wasn’t so positive about that middle wall sconce, and I’m nonetheless not 100% positive that it’s going to make the ultimate minimize once I end the entire room. However I made a decision to maintain it for now. I maintain forgetting to get gentle bulbs, so as soon as I get bulbs in these lights and see how properly they gentle up this work area, I’ll make my last resolution on the sconce.
I made a decision to wire all three lights on the identical change with a dimmer. The change is simply above the desktop within the wall space just under the wall sconce. Do you see it? I believe I did a reasonably good job at disguising it! ?

Right here’s a better view. Are you able to see the change now?
I constructed the countertop out of laminate flooring. It was the most affordable manner I might provide you with to get a 20-foot countertop. It ended up costing round $300, which I believed was an incredible worth for a countertop that size. You’ll be able to see how I made it right here.
However be forewarned that the countertop challenge destroyed my pores and skin for about six weeks. So for those who’re going to make your personal laminate flooring countertop, please learn this primary. I don’t know that anybody else would react the identical manner I did, but when I might help anybody else keep away from the weeks of distress that I skilled, I hope to take action.
I do love how the countertop turned out, although! And now that the entire holes have been minimize in it, and the entire mud has been cleaned up, it doesn’t have an effect on me anymore. I’m considering the flooring has one thing like fiberglass in it, and that’s what my pores and skin reacted to. However all is properly now, and I can take pleasure in my completed countertop.

I completely love having all of this storage, and I can’t imagine this was my first time utilizing IKEA Sektion cupboards. I’m a real IKEA cupboard convert now!

This center cupboard with the six shallow drawers is my absolute favourite. I believe this can actually come in useful in a studio.

And I like this one with the hidden drawer inside a drawer as properly.

When it’s closed, it appears to be like like an enormous drawer similar to the opposite two.

And at last, I added 4 countertop grommet retailers for comfort. Every of them is plugged into an in-cabinet outlet.
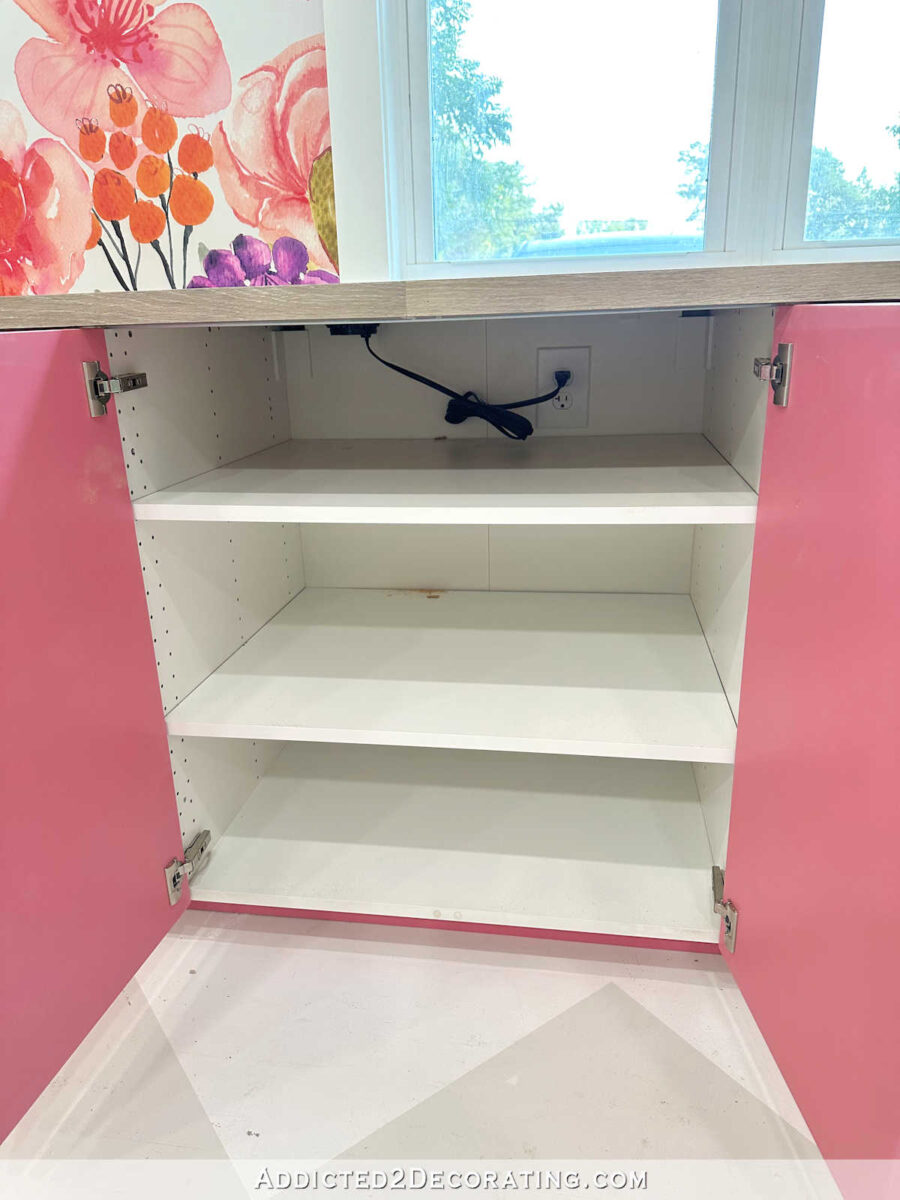
So I’ve handy entry to retailers and USB ports proper on the countertop.

I’m so excited to have this wall carried out! I’ve gone within the studio numerous occasions to simply stare at it. ?
And now I can lastly transfer on to the workplace part of the room, the place there might be extra pink cupboards and extra gold leaf goodness.

Addicted 2 Adorning is the place I share my DIY and adorning journey as I transform and enhance the 1948 fixer higher that my husband, Matt, and I purchased in 2013. Matt has M.S. and is unable to do bodily work, so I do the vast majority of the work on the home on my own. You’ll be able to study extra about me right here.
[ad_2]
Source link
