[ad_1]
As of final night time, all the electrical stuff is completed on the mural wall of the studio. This has been fairly the venture that began with having to take away drywall, take away spray foam insulation, transfer six junction bins, rewire the shops and swap, and fill in spray foam insulation that needed to be eliminated.
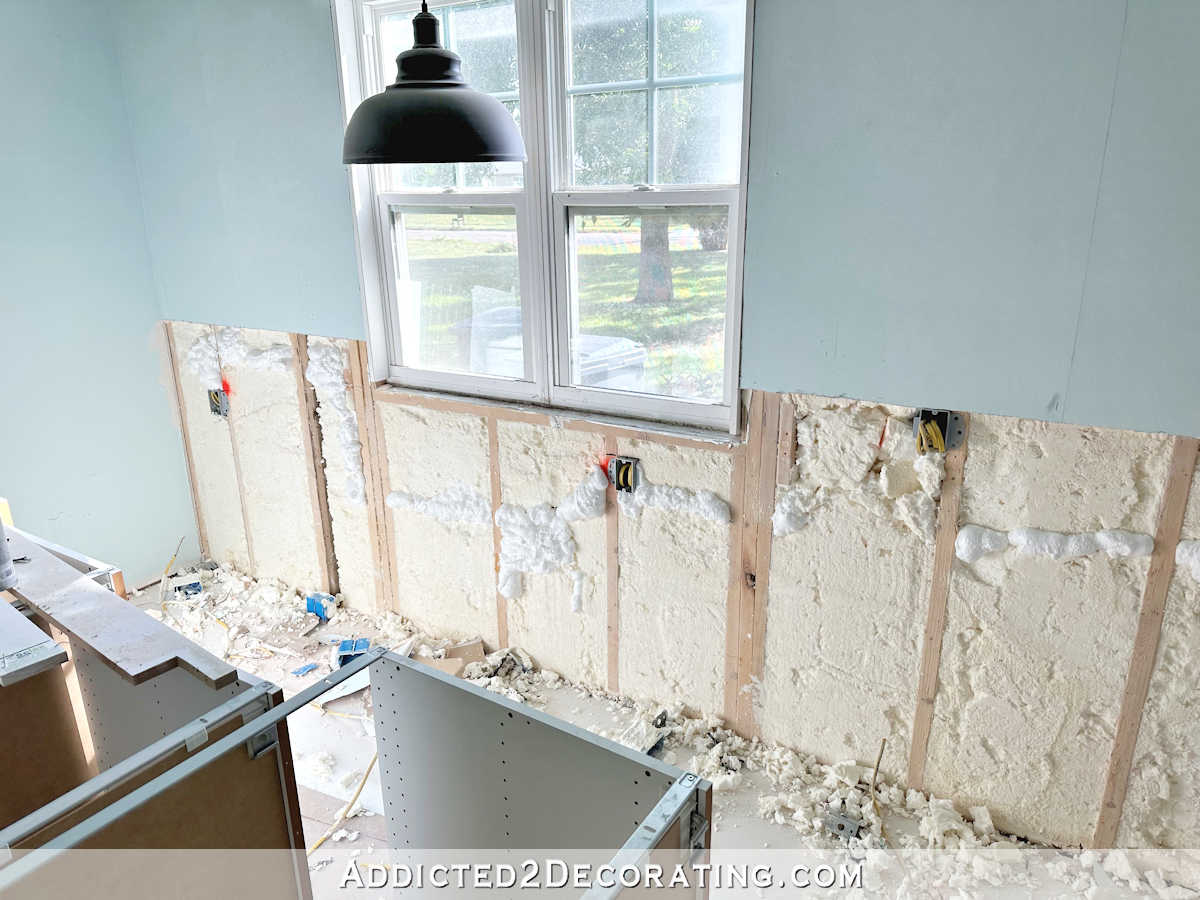
As I’ve defined earlier than, the entire motive I had to do that was as a result of I had initially deliberate to construct my very own cupboards for this room, which might have had a completed top of 30 inches. So I deliberate for the underside of all the shops to be proper at 32 inches on the wall, and I positioned the junction bins accordingly.
However then I made a decision to make use of IKEA Sektion cupboards as a substitute of constructing from scratch, and people cupboard bins alone are 30 inches excessive. So as soon as I raised the bins off of the ground with some little DIY ft (you may see how I did that right here), after which added a countertop (you may see my DIY 20-foot countertop right here), the brand new completed top was 34.25 inches. And instantly, my junction bins that had been within the excellent place for a 30-inch-high countertop had been now too low.
In order that meant all of them needed to be moved. There have been a couple of individuals who had been very confused about why I made a decision to maneuver the shops down on the wall as a substitute of up. Transferring them down meant that they might be behind the cupboards. However I didn’t need all of these shops to indicate on the mural, so I made a decision to maneuver the junction bins down, set up the shops inside the cupboards, after which use countertop grommet shops spaced out on the 20-foot-long countertop.
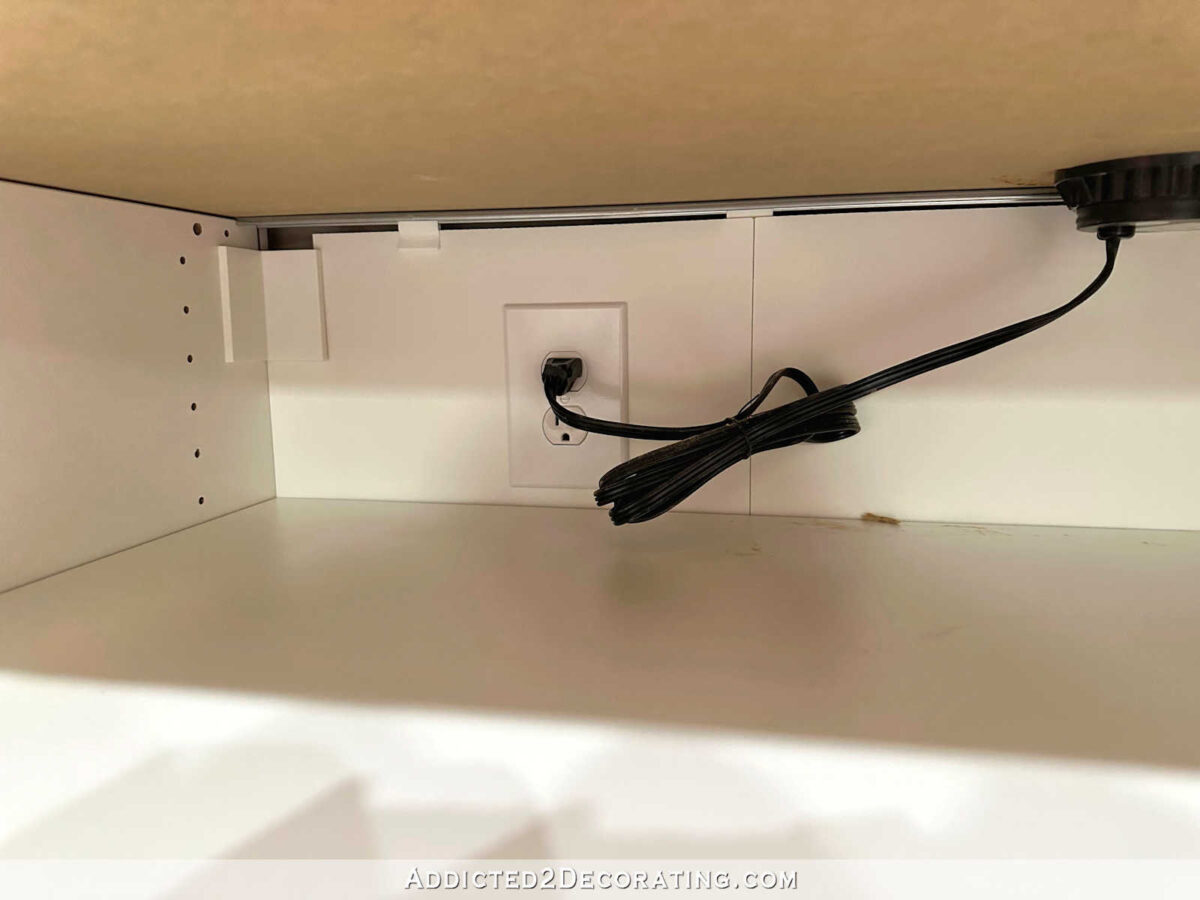
Right here’s how the wall taken care of I moved the junction bins down and re-drywalled the wall (however earlier than I did the taping and mudding). The junction field within the center is a light-weight swap that needed to be above countertop top, however the different two are shops which are under countertop top.
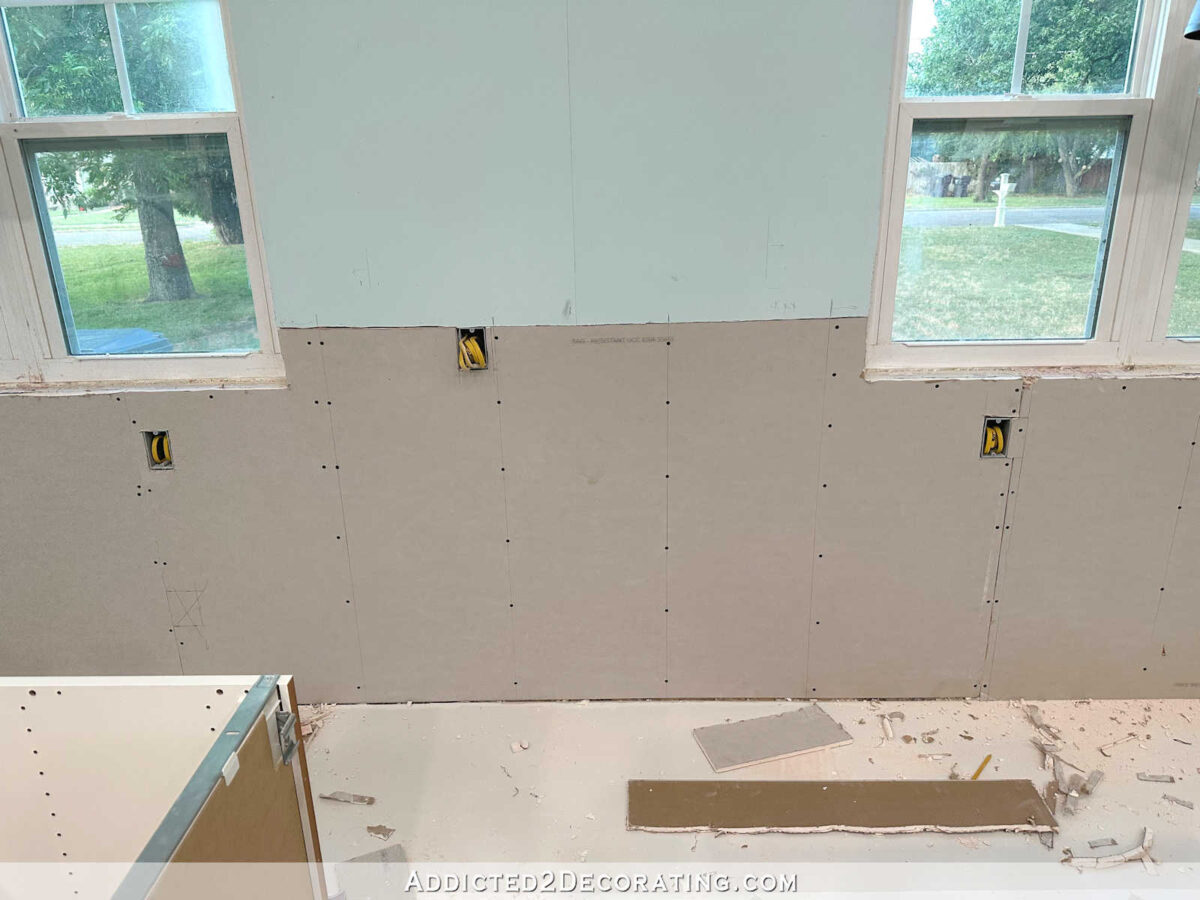
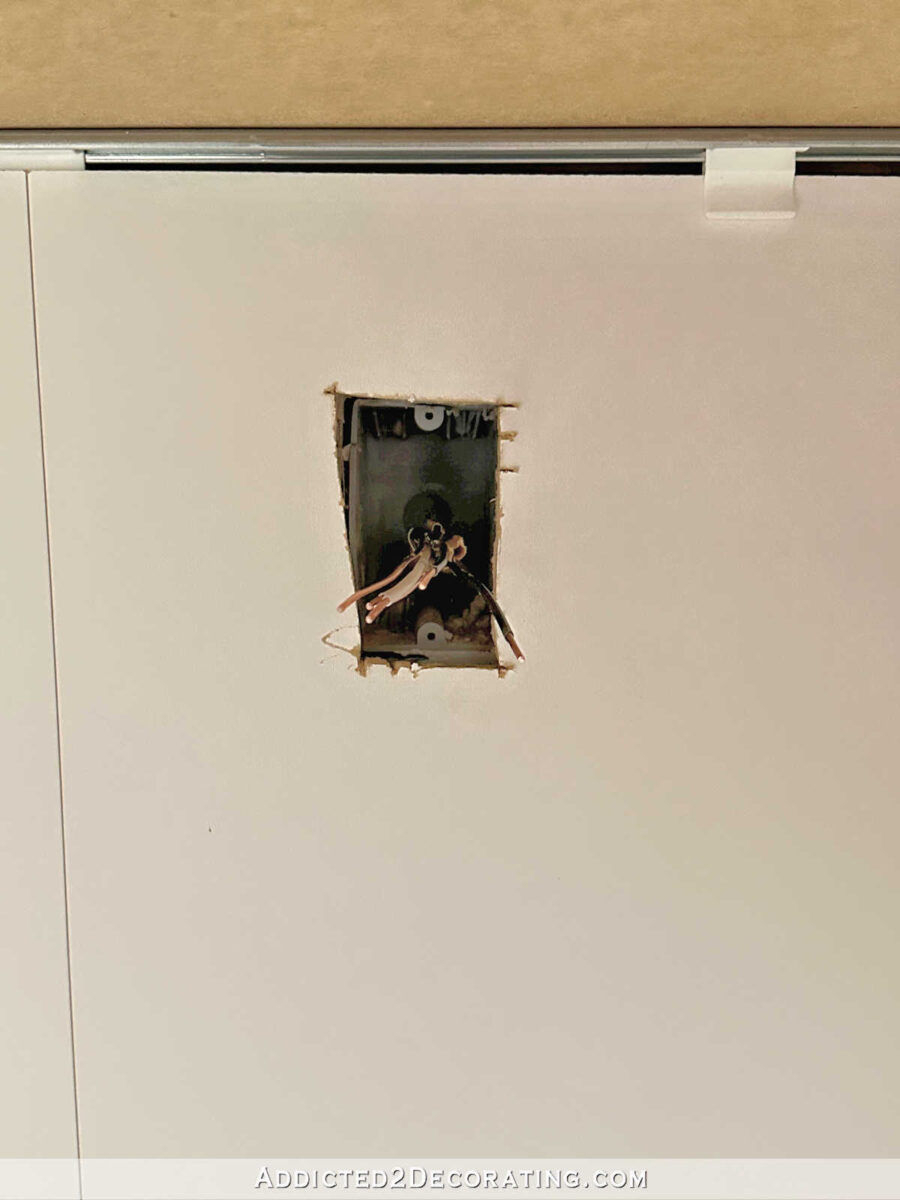
So once I put in the cupboards, I marked and minimize little squares out of the backs of the cupboards the place the junction bins had been. You possibly can see the little minimize out squares in each different cupboard within the picture under. And due to how I put in the cupboards (you may learn extra about that course of right here), the cupboards stood away from the wall about an inch.
To put in the shops, I used my Dremel Multimax (affiliate hyperlink) with a straight slicing blade to chop out the again of the cupboard to suit an outlet. I didn’t do an ideal job, as you may see under, however so long as (1) it strains up with the junction field fairly properly, (2) it isn’t minimize too massive, and (3) the 2 screw holes are accessible, it’s high-quality.
Then I used this single gang junction field extender that I bought at Dwelling Depot…

And I match it into the outlet with the wires coming by means of the middle. It received’t keep in place till it’s screwed into place, however that may’t occur till the outlet is wired.

After wiring up the outlet, the lengthy screws (which include the junction field extender) undergo the outlet, and thru the outlet extender, and into the screw holes within the junction field.

Add an outlet cowl, and it’s completed!

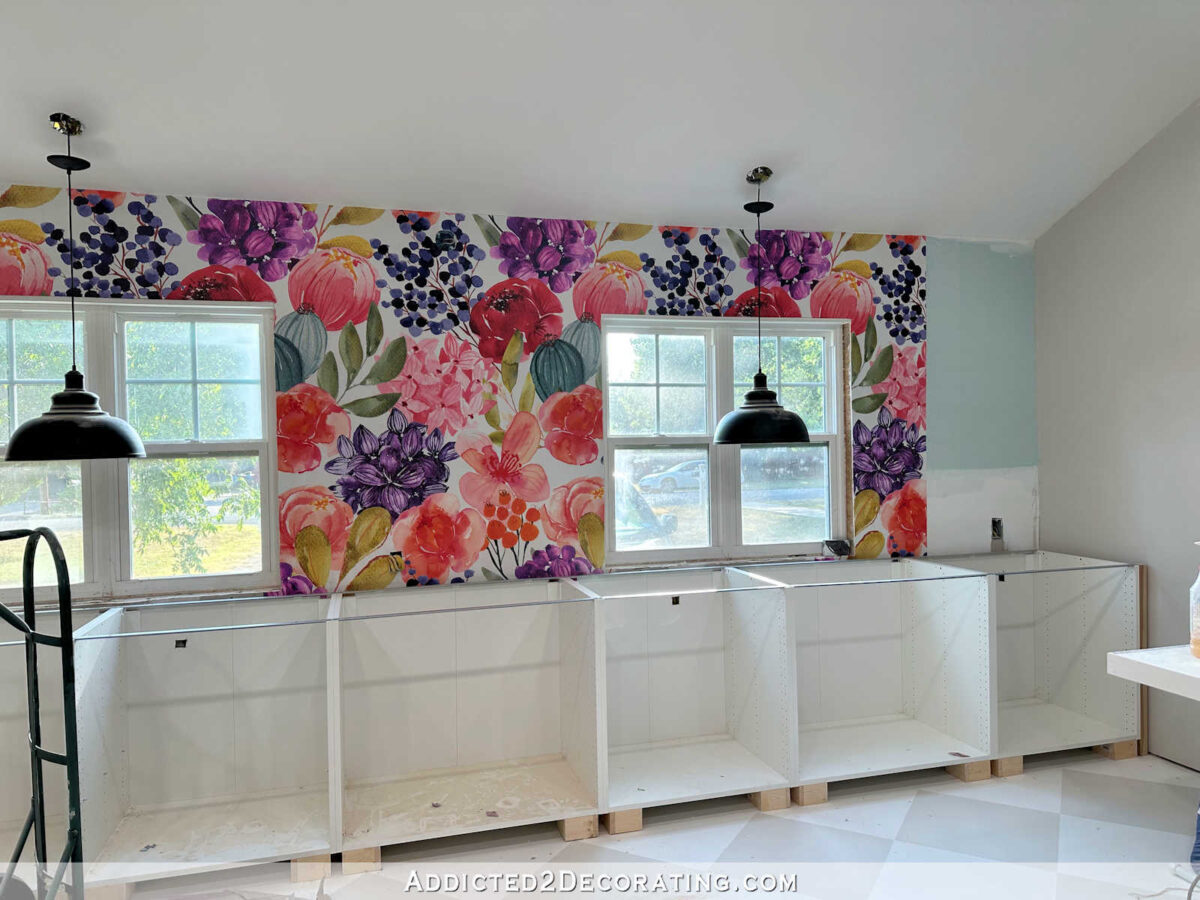
After which I repeated that three extra instances in order that I had 4 in-cabinet shops on this wall.

These in-cabinet shops gave me considerably accessible shops on this wall, however they had been something however handy. So so as to add handy accessibility to shops on this wall, I used these countertop grommet shops (affiliate hyperlink) with two shops, two USB ports, and one mini USB port.

I selected these due to the association of the shops and USB ports, and due to they took up much less area inside the cupboard than others that I discovered. I actually favored a few of the pop up countertop shops that I noticed, however they might have taken up more room inside the cupboard.
To mark the countertop, I unscrewed this piece from the outlet and used it as a sample to mark the place the outlet wanted to be minimize within the countertop.

I used a Sharpie marker to mark the outlet as a result of I discovered in a short time on my first one which the MDF mud from the countertop covers up pencil marks nearly instantly, making them inconceivable to see.

I feel the outlet is a normal measurement in order that you possibly can use a gap noticed, however I hate shopping for instruments for one single venture. Plus, I completely hate utilizing gap saws. So I made a decision to make do with the instruments that I have already got. I drilled a starter gap within the countertop utilizing a 1/2″ drill bit.

After which I used my little palm router with a straight minimize bit to chop the outlet.

Sadly, the bits that match my little palm router aren’t lengthy sufficient to chop by means of each layers (the laminate flooring boards and the MDF base) of the countertop. It was deep sufficient to chop during the laminate flooring boards, nevertheless it solely minimize about 3/4 of the best way by means of the MDF. So then I needed to improvise. Utilizing my hammer and a small flathead screwdriver as a chisel of kinds, I made some perforations across the perimeter of the outlet. After which I used my hammer to whack the center of the remaining MDF piece. With one good whack, the final circle of MDF got here out.

It didn’t look fairly. ? However I may work with it.

At this level, I checked the match of the a part of the outlet that I had routed out with the palm router. I needed to make a few further passes across the circle with the router, nevertheless it lastly match.

There was nonetheless the difficulty of that very tough, chewed up backside layer of MDF that wouldn’t permit the outlet to seat all the best way inside the outlet, although. So to scrub that up, I needed to improvise as soon as once more. I used my drill with a 3/8-inch bit, and principally used it as a sort of poor man’s router. ? Utilizing the drill on the best velocity, I ran the drill bit across the inside the circle a couple of instances, and the drill bit at excessive velocity made fast work of cleansing up all the tough edges of that backside layer of MDF.

I simply saved making passes across the circle with the drill bit at excessive velocity till the underside of the outlet matched the circumference of the highest routed a part of the outlet, and till the grommet outlet would match utterly inside the outlet.

After which from inside the cupboards, I screwed the underside piece into the outlet. That piece additionally has screw holes in it, and it comes with a couple of tiny screws so as to screw the outlet into place, however I made a decision to not use them. It stays in place simply high-quality with out these.

After which the grommet outlet plugs into the in-cabinet outlet.
So the grommet shops are principally simply fancy extension cords. However I do love the comfort they add to this lengthy countertop, and I additionally love that they permit me to have loads of entry to shops with out me having to place shops on the mural.

In reality, do you bear in mind this one outlet on the mural wall that I confirmed y’all yesterday?

Effectively, I ended up placing a grommet outlet on this finish of the countertop as properly. So I’m going to return and take out that wall outlet and use a stable plate to cowl over that junction field.
I had forgotten that that was my unique plan. I needed to have that junction field there as a result of you may’t bury electrical connections behind drywall. However I remembered yesterday that whereas the junction field does must be there, I had by no means meant to place an precise outlet there. So as soon as I exchange that outlet with a stable plate, it’ll disappear much more than it does now, and I’ll have a handy grommet outlet in that space as a substitute.
I’m so glad to lastly have all of this electrical stuff completed! And I’m glad to have that grommet outlet venture in my rearview mirror. I’ve been burdened in regards to the considered slicing holes into the highest of that countertop. A mistake on one thing like that isn’t simple to repair. However I simply made certain that I went very slowly and deliberately as I used to be slicing with the router, and I used to be in a position to get by means of all 4 with no errors.

Addicted 2 Adorning is the place I share my DIY and adorning journey as I transform and beautify the 1948 fixer higher that my husband, Matt, and I purchased in 2013. Matt has M.S. and is unable to do bodily work, so I do the vast majority of the work on the home on my own. You possibly can be taught extra about me right here.
[ad_2]
Source link
