[ad_1]
Wouldn’t or not it’s superior for those who might simply plop some seeds into the soil, add water, and have your self a dozen new orchids?
Sadly, rising orchids from seed isn’t practically that straightforward. It’s what we’ll classify as a complicated rising approach.
We hyperlink to distributors that can assist you discover related merchandise. In case you purchase from one in every of our hyperlinks, we might earn a fee.
If beginning peas is without doubt one of the best house gardening tasks, orchids could be on the other finish of the spectrum.
Mainly, peas are a one by way of problem, and orchids are an 11 on a scale of 1 to 10.
Now, don’t abandon all hope and simply resolve to develop violets as a substitute. I promise, you are able to do it. It simply takes some particular instruments and a few endurance.
Orchid seeds don’t have an endosperm, which is the construction that gives most seeds with vitamins till they germinate. They’re additionally itty-bitty. Working with them is like attempting to sow actually temperamental bits of wheat flour.
To make up for that lack of endosperm, orchid seeds depend on fungi to assist them germinate. It might be terribly troublesome to search out the precise species of fungus that your specific orchid wants, however some sensible of us have discovered a number of workarounds.
That’s what we’re going to speak about on this information. Right here’s the a fast rundown of the approaching points of interest:
How one can Begin Orchids from Seed
In nature, orchids launch tons of their tiny seeds into the wind to land on bushes, the bottom, and different vegetation, the place a few of them kind a mutually useful relationship with mycorrhizal fungi that helps them to germinate.
The fungi assist the orchids receive and transport vitamins, and the orchids assist present the fungi with moisture and vitamins in return.
Scientists can recreate this course of within the lab and you may ship your pods off for what known as flasking, in order for you.
It is a comparable course of to what we’re going to explain right here. The distinction is that they have already got all the flowery gear and expertise to do the job for you.
The common house grower might want to use a a lot easier course of than what’s used within the lab.
As a substitute of inoculating seeds with mycorrhizal fungi in a sterile lab, you’re going to make use of specifically formulated orchid propagating agar, a kind of jelly constituted of algae combined with vitamins and yeasts.
The method takes months and even years earlier than you’ll have little seedlings rising in particular person pots. However on the intense facet, one single pod can lead to hundreds of viable vegetation, so the trouble might repay in an enormous means.
As we soar into this challenge, I need you to determine a mantra: sanitize, sanitize, sanitize.
If any micro organism or the mistaken sort of fungi (and most of them are the mistaken sort) achieve entry to your seeds, the challenge is finished for.
Additionally, don’t overlook, you are able to do this! Right here we go…
Pollinate Your Vegetation
You should purchase seeds, however make completely positive that you simply receive them from an especially respected supply. Orchid seeds can simply be contaminated by unhealthy fungi and micro organism.
In case you can’t discover a dependable supply or if you wish to have management over the entire course of, harvest them your self.
With a view to produce seeds, the orchid flowers have to be pollinated.
Except you’re rising yours outdoors, you’d have to have the best species of bees, wasps, flies, moths, butterflies, gnats, or birds flying round in your own home to pollinate the flowers!
I’m going to guess that’s most likely not the case for you, so that you’ll have to lend the same old pollinators a hand.
You may pollinate a single orchid, however cross-pollinating between two completely different vegetation is healthier, when you’ve got two obtainable which are blooming on the identical time.
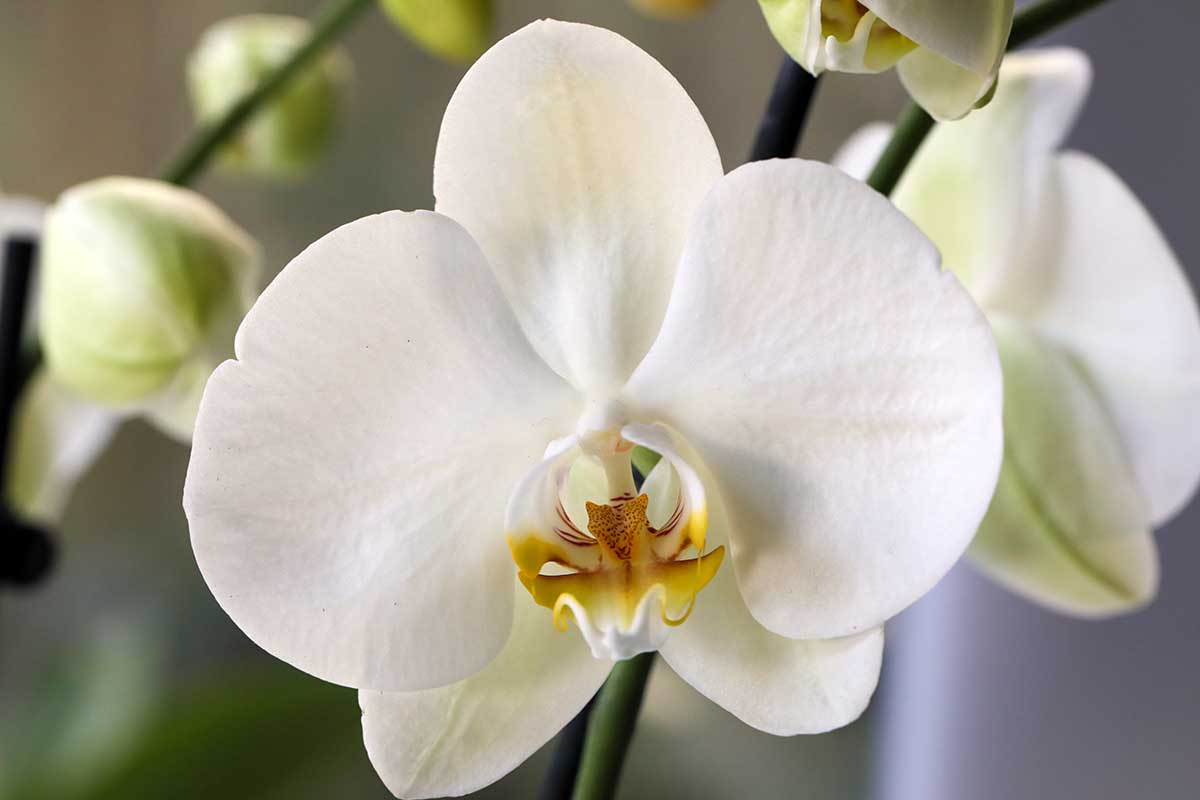
To pollinate, seize a toothpick and take have a look at the flower. There are 5 petals surrounding a protruding central half that accommodates a cap and lip. The cap is on the prime, and the lip sits beneath that.
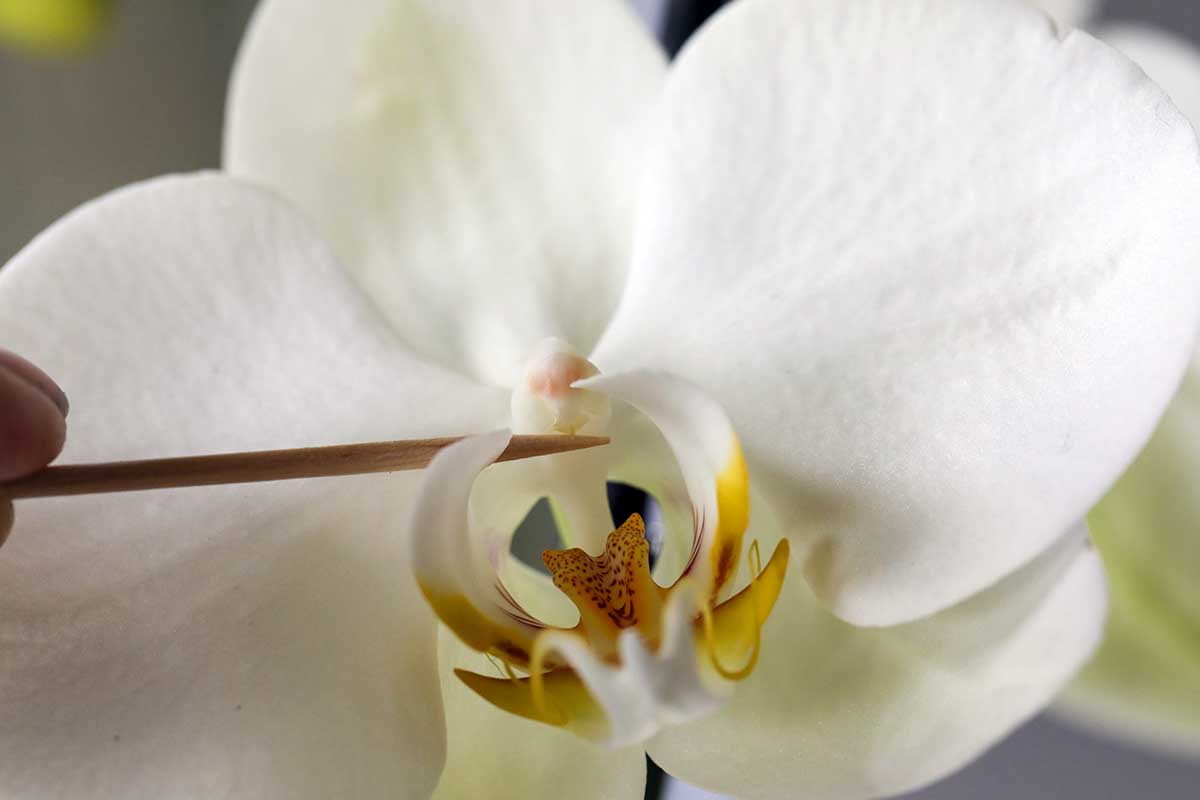
To pollinate, take a clear toothpick and place it slightly below the cap.
Gently pry off the entrance of the anther cap, which holds the pollen. It’s straightforward to fling the pollinia, or the plenty of pollen grains, away as you pry off the cap, so do that slowly and gently.
After you have the cap off, it’s going to carry two little yellow packets, assuming you didn’t fling them off into the wild blue yonder.
Every little packet of pollen is called a pollinium, which is a cluster of pollen fairly than the free powdery stuff widespread on different species.
Pollinia are sticky, which makes it straightforward to pry them off and get them to stay onto the toothpick.
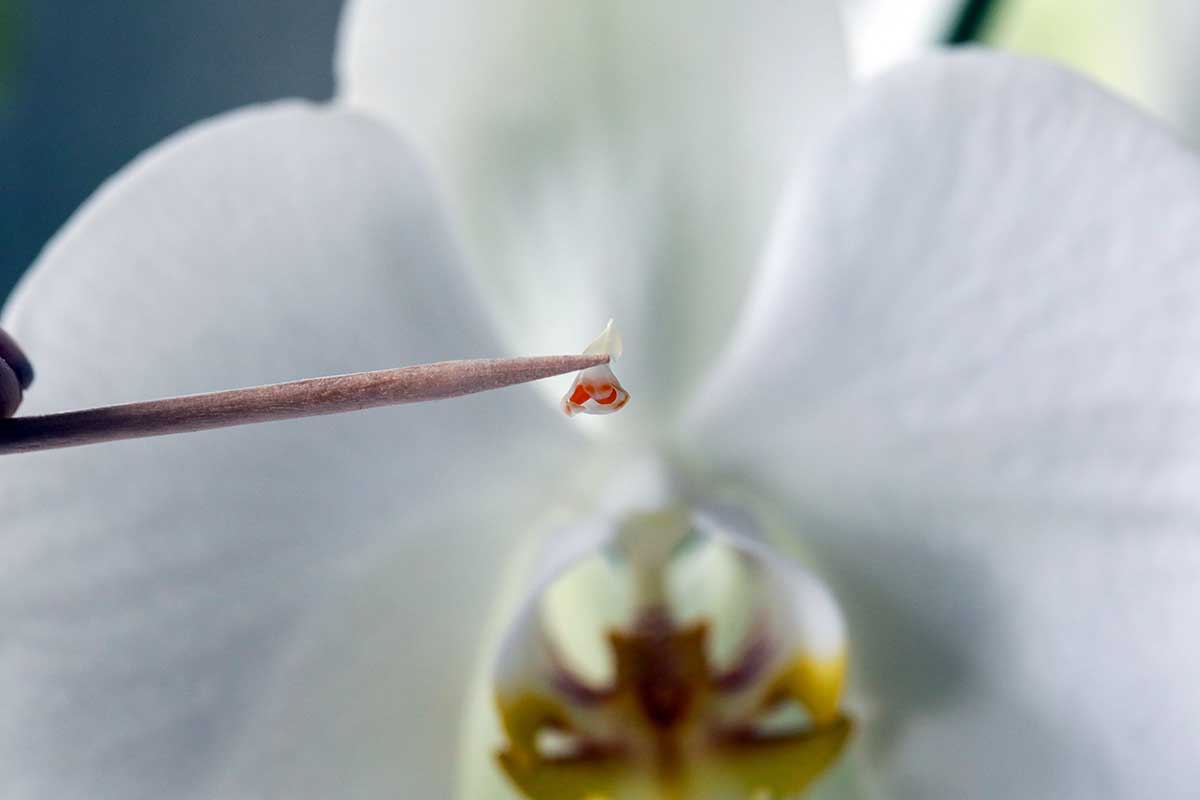
Use tweezers to carry the anther cap away from the pollinia, which ought to nonetheless be hooked up to the toothpick.
Stick the pollinia up into the stigma, both of the identical flower, one on the identical plant, or one in every of one other plant fully, and also you’re finished.
The stigma is the half proper behind the anther that you simply simply pulled the pollen out of.
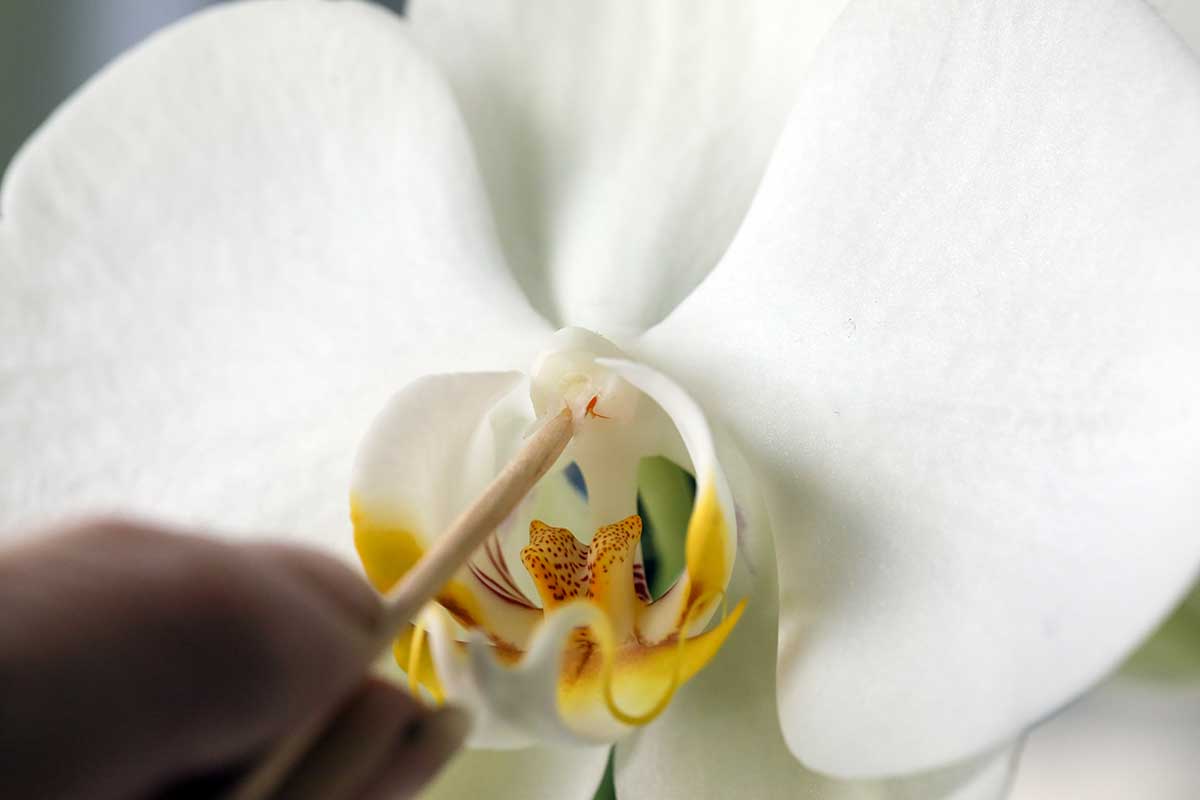
Now that it’s fertilized, the stem on the base of the flower will begin swelling and can finally develop right into a ripe pod full of as much as three million seeds.
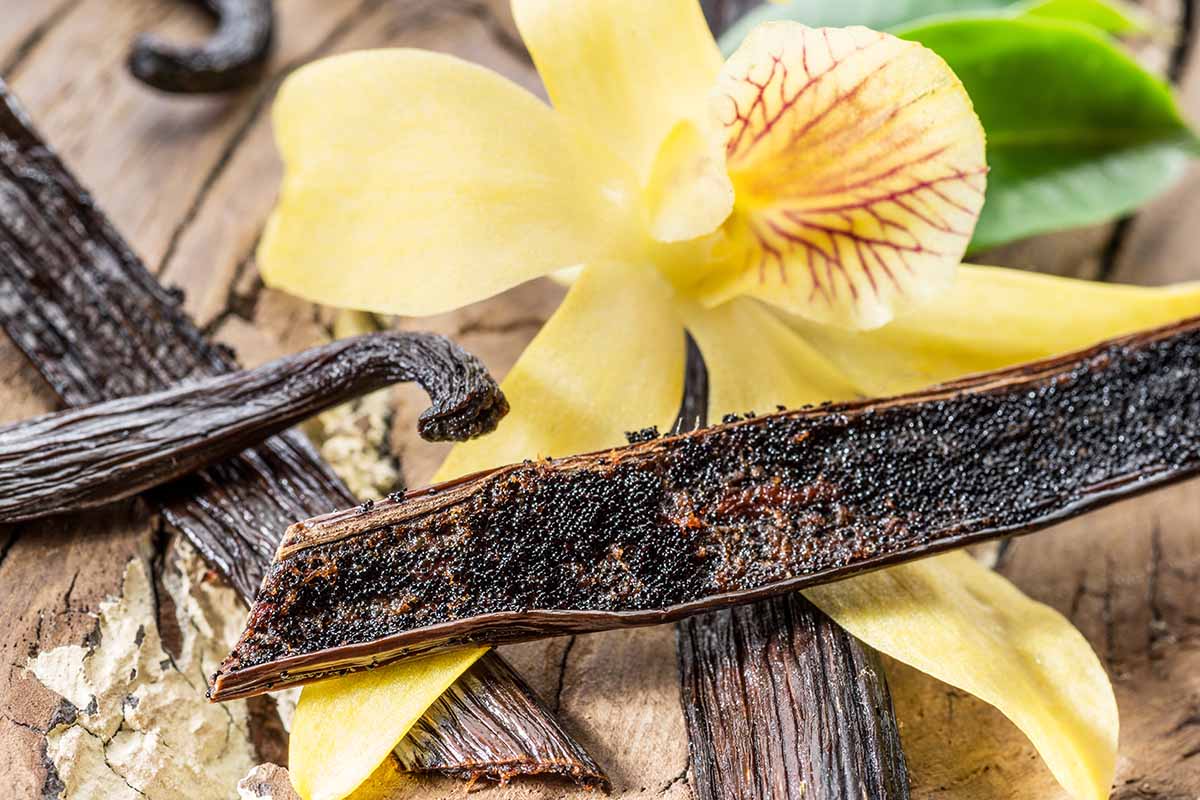
By the way in which, for those who’ve ever slit open a vanilla pod, you’ve already seen what an orchid pod and seeds seem like.
In case you’ve cross-pollinated between a number of completely different flowers, make sure that to label all the pieces so what’s what.
Relying on the species, the pod shall be prepared in wherever from one to 10 months. It’s going to flip brown when it’s prepared.
In case you wait too lengthy, the pod will break up open by itself, so attempt to pluck it simply earlier than this. In case you discover the seam beginning to kind a crack, that’s the right time to reap.
Harvest the Seeds
Snip the pods off the plant and place them in a container. Add some bleach, put a lid on prime, and shake the container to evenly coat the seeds.
Let it sit for at the very least 10 minutes however no more than 30. Take away the pods and lay them out on a clear towel or contemporary paper towel to dry them out. This kills any pathogens on the pod’s pores and skin.
To reap the seeds, use a sanitized scalpel or craft knife to separate the pod. Scrape out the seeds and place them in a small, sanitized container or on contemporary wax paper.
These nearer to the flower finish are likely to germinate higher.
Some folks prefer to rinse the seeds in hydrogen peroxide, however that’s not crucial for those who’re working in a clear setting. It does assist, nevertheless, to make use of a drying agent to protect the seeds except you propose to make use of them immediately.
Subsequent time you open a package deal and a silica packet drops out, put it aside to your orchid seed tasks.
Silica Desiccant Packets
Or you should buy two-gram packets from USPak in packages of 100 on Amazon.
Retailer the seeds in a cool, dry, darkish spot or within the fridge crisper drawer till you’re prepared to make use of them, for as much as a yr.
Set Up Your Rising Spot
When you’re able to sow the seeds, discover an indoor spot the place you’ll be able to keep a temperature between 50 and 85°F with vivid, oblique gentle publicity for at the very least eight hours a day, or for as much as 14 hours. The extra gentle, the higher.
In case you can’t present that – and few of us can in the course of the winter – add some supplemental lighting.
It additionally must be humid within the room when you open up the flasks.
Except the humidity is of course at the very least 60 p.c or above in your house or workspace, you’ll want to make use of a humidifier of some kind.
I’ve a good friend who works in her kitchen and boils a teakettle with the lid open for this, so be at liberty to get inventive. Most of us will simply buy an electrical humidifier since they’re a bit simpler to manage.
Collect Your Provides
In line with our mantra, begin out by amassing your sanitizing and sterilizing gear.
You want some cleaning soap, rubber gloves, isopropyl alcohol, hydrogen peroxide, and bleach. You’ll additionally want a clear pot, and a warmth supply. Plus, you’ll want some rising flasks.
For all components of this course of, use distilled water or faucet water that you simply’ve boiled and allowed to chill. Maintain a sanitizing combination of 1 half bleach and 9 components water helpful for cleansing up spills, together with a clear rag and cotton swabs to do the cleansing.
You’ll additionally want a clear scalpel or craft knife, tweezers, and some syringes or droppers. Some tongs are additionally helpful that can assist you nab stuff out of the recent water or oven.
Your seed-starting container must be clear, tall, and slim. Most individuals choose to make use of flasks with rubber stoppers.
You should purchase a set of flasks which are all the identical dimension, or purchase a set with numerous sizes and see what you want greatest.
I discover Erlenmeyer flasks to have one of the best form as a result of the neck is pretty brief and the floor space of no matter you add to it’s comparatively broad.
Don’t really feel such as you’re restricted, although. Any jar that may be securely sealed is okay.

Corning Pyrex Flasks
If you wish to experiment, Corning Pyrex has a set of clear glass flasks in 5 completely different sizes with slim necks and rubber stoppers obtainable on Amazon.
Boil these and the ends of your tongs for a couple of minutes earlier than you fill them. Rubber stoppers must be steamed for 10 minutes fairly than being submerged. Any time you sterilize one thing, let it cool and dry on a clear towel.
Lastly, you want some agar media and fertilizer, however not simply any outdated agar.
Purchase some agar formulated particularly for propagating orchids as a result of these include the vitamins that orchid seeds have to germinate. You could find one of these agar on-line at specialty provide shops.
Make notice of whether or not you’re rising a terrestrial or epiphytic sort and select the agar medium accordingly. Most orchids are epiphytic, however you need to be certain as a result of they require completely different agar mediums.
If you wish to go all the way in which, use a glove field for the following steps.
Glove containers are enclosed techniques that allow you to slide your palms inside a pair of gloves so you’ll be able to manipulate gadgets contained in the sterile enclosure with out introducing micro organism. Any native or on-line store that sells lab provides will carry these.
They are often costly, however for those who plan to make this a daily factor, it’s value investing in a glove field. They’re helpful for those who’re into rising mushrooms from spores, too. It’s also possible to discover directions on-line to assemble your individual. In any other case, keep in mind: sterilize, sterilize, sterilize.
Earlier than you begin, sterilize all of your instruments with both bleach or warmth.
In case you warmth your instruments within the oven to sterilize them, make sure that the oven reaches a temperature above 350°F and maintain it for quarter-hour.
In any other case, submerge the gear in boiling water for 10 minutes.
Don’t put something within the oven or into water that would soften, although.
Put together the Medium
Comply with the producer’s instructions for prepping the agar. This usually includes including some distilled or coconut water.
Some mediums come pre-sterilized and already combined, so you may get straight to rising, however I discover it’s higher to be protected and put together your individual except you actually, actually belief the supply.
Pour a half-inch of agar into every of the sterilized flasks. If some agar spills on the within or outdoors of the neck of the container, wipe it off with a clear rag or cotton swab soaked in your sanitizing bleach resolution.
It’s a good suggestion to make use of multiple container to extend your odds of success. That means, if one turns into contaminated, you gained’t lose the entire seeds you’ve labored so onerous to develop.
Sterilize your instruments earlier than you pour the agar into the containers so all the pieces is prepared when you’ve completed, however don’t sterilize too far upfront or your instruments threat changing into contaminated.
Sow the Seeds
Work someplace with none wind or breezes. Shut these home windows and switch off these followers. These seeds are tiny they usually’ll fly away.
Put a number of drops of hydrogen peroxide in with the seeds of their sterilized container (or place them in a sterilized container for those who stored them in wax paper) and swish them round for a number of seconds.
Pour some distilled water into the container and use a sterilized dropper or syringe to fill it with water and seeds.
Launch the combination into the flask, distributing them throughout the floor of the agar.
Your objective is to evenly cowl as a lot of the agar as you’ll be able to, so in case your syringe or dropper isn’t lengthy sufficient, chances are you’ll want to softly tilt the container to get issues the place you need them.
Don’t stress an excessive amount of, although. The water will naturally need to redistribute itself throughout the medium, so drop these seeds in, tilt the container round a bit, and it must be wonderful.
If any seeds stick with the within or outdoors neck of the container, wipe them away with a clear material or cotton swab dipped in your bleach resolution.
Seal the flask.
Look after the Seeds
Place the flasks underneath develop lights or close to a north-facing window with at the very least eight hours of vivid, oblique gentle publicity per day.
Most orchid seeds want about 12 to 14 hours of sunshine per day to germinate, so most individuals might want to use develop lights.
Relying on the species, it might take months for the seeds to sprout and develop roots.
Don’t open these flasks. It may be tempting, however you’ll introduce international components regardless of how cautious you’re.
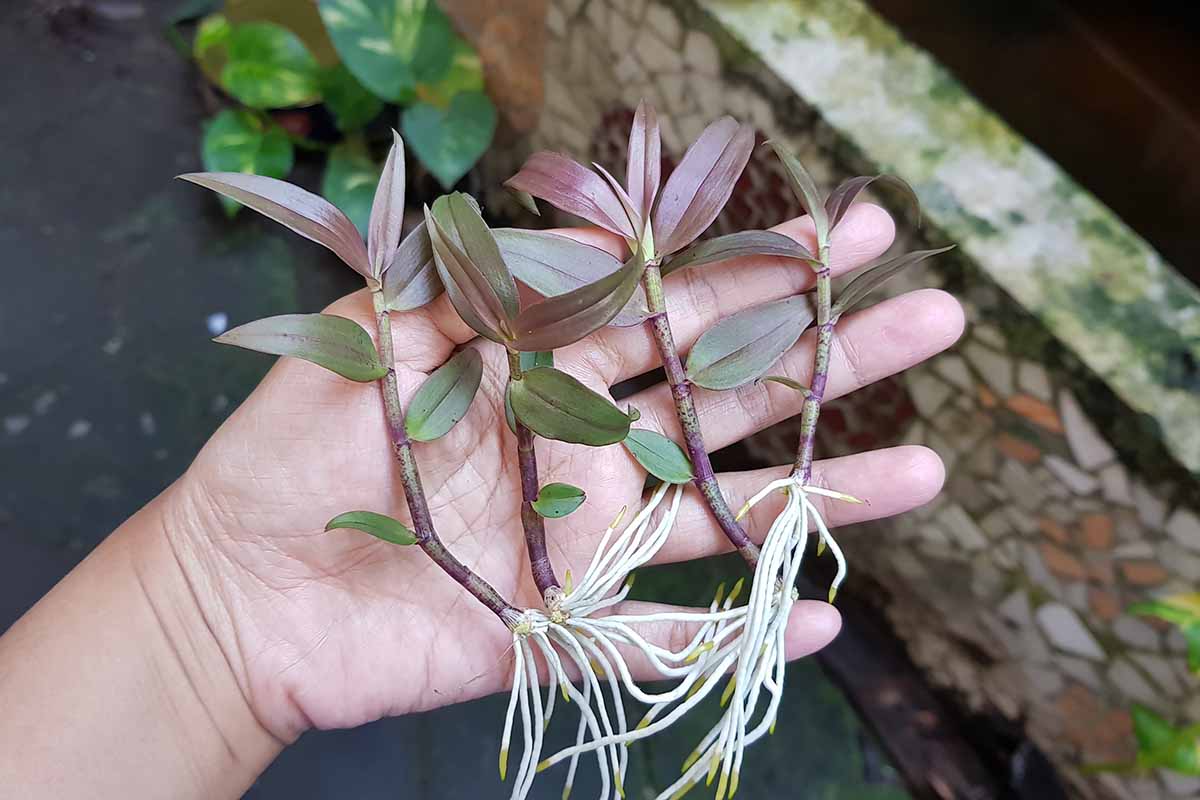
Transplant the Seedlings
When the roots are a 3rd of an inch lengthy, put together by filling a number of small containers with orchid bark. You’re going to need to use tiny pots to assist scale back the probability of root rot.

Two-Inch Plastic Pots
These two-inch plastic pots which are obtainable on Amazon in packs of 100 are good.
Search for an orchid bark combine that’s considerably wonderful. Some bark mediums are chunkier than others, so discover one which specifies that it’s small fairly than utilizing medium or massive chunks.
Natural Orchid Potting Bark
Do this bark from Kitsypartsy, which might be bought at Amazon in four-quart luggage.
Fill the pot to inside about an inch from the highest. Take a sanitized pair of tweezers and gently tease a plant from the agar.
Rinse the roots clear with room-temperature distilled water by swishing them round in a bowl.

Lay the roots of the seedling on prime of the bark. Gently fill the pot up the remainder of the way in which with extra bark. The roots must be coated fully. Repeat with the remaining seedlings.
Water the bark with that good outdated distilled or boiled and cooled water and place the plant someplace with vivid, oblique gentle or synthetic gentle publicity for at the very least 12 hours per day.
Bear in mind, your rising area must be humid, so for those who can’t keep adequate humidity within the room, tent plastic over the vegetation.
After the plant has grown a number of units of leaves, you’ll be able to transfer it to its common spot.
You Can Do It
I do know, it feels like loads, however you need to now really feel assured sufficient to provide propagating your individual orchid seeds a shot.
It’s not a lot that the method is difficult, however you need to be so cautious to keep away from contaminating the seeds and rising medium. Simply keep in mind your mantra (sanitize!) and all shall be wonderful.
Be sure you come again and inform us the way it’s going. Did you run into any hassle? What magical hybrids did you create? Share with us within the feedback.
In case you’d prefer to study extra about orchids when you look ahead to yours to mature, learn these guides subsequent:
[ad_2]
Source link
