[ad_1]
After writing Friday about how I needed to reap the benefits of fairly climate to do some entrance porch upkeep earlier than the climate causes an excessive amount of harm to my porch, I awakened Saturday morning to utterly attractive climate and determined that that was the day to get began. I believed it could be good to start out on the prime and work my method down, in order that meant that the primary venture can be repainting the porch ceiling.
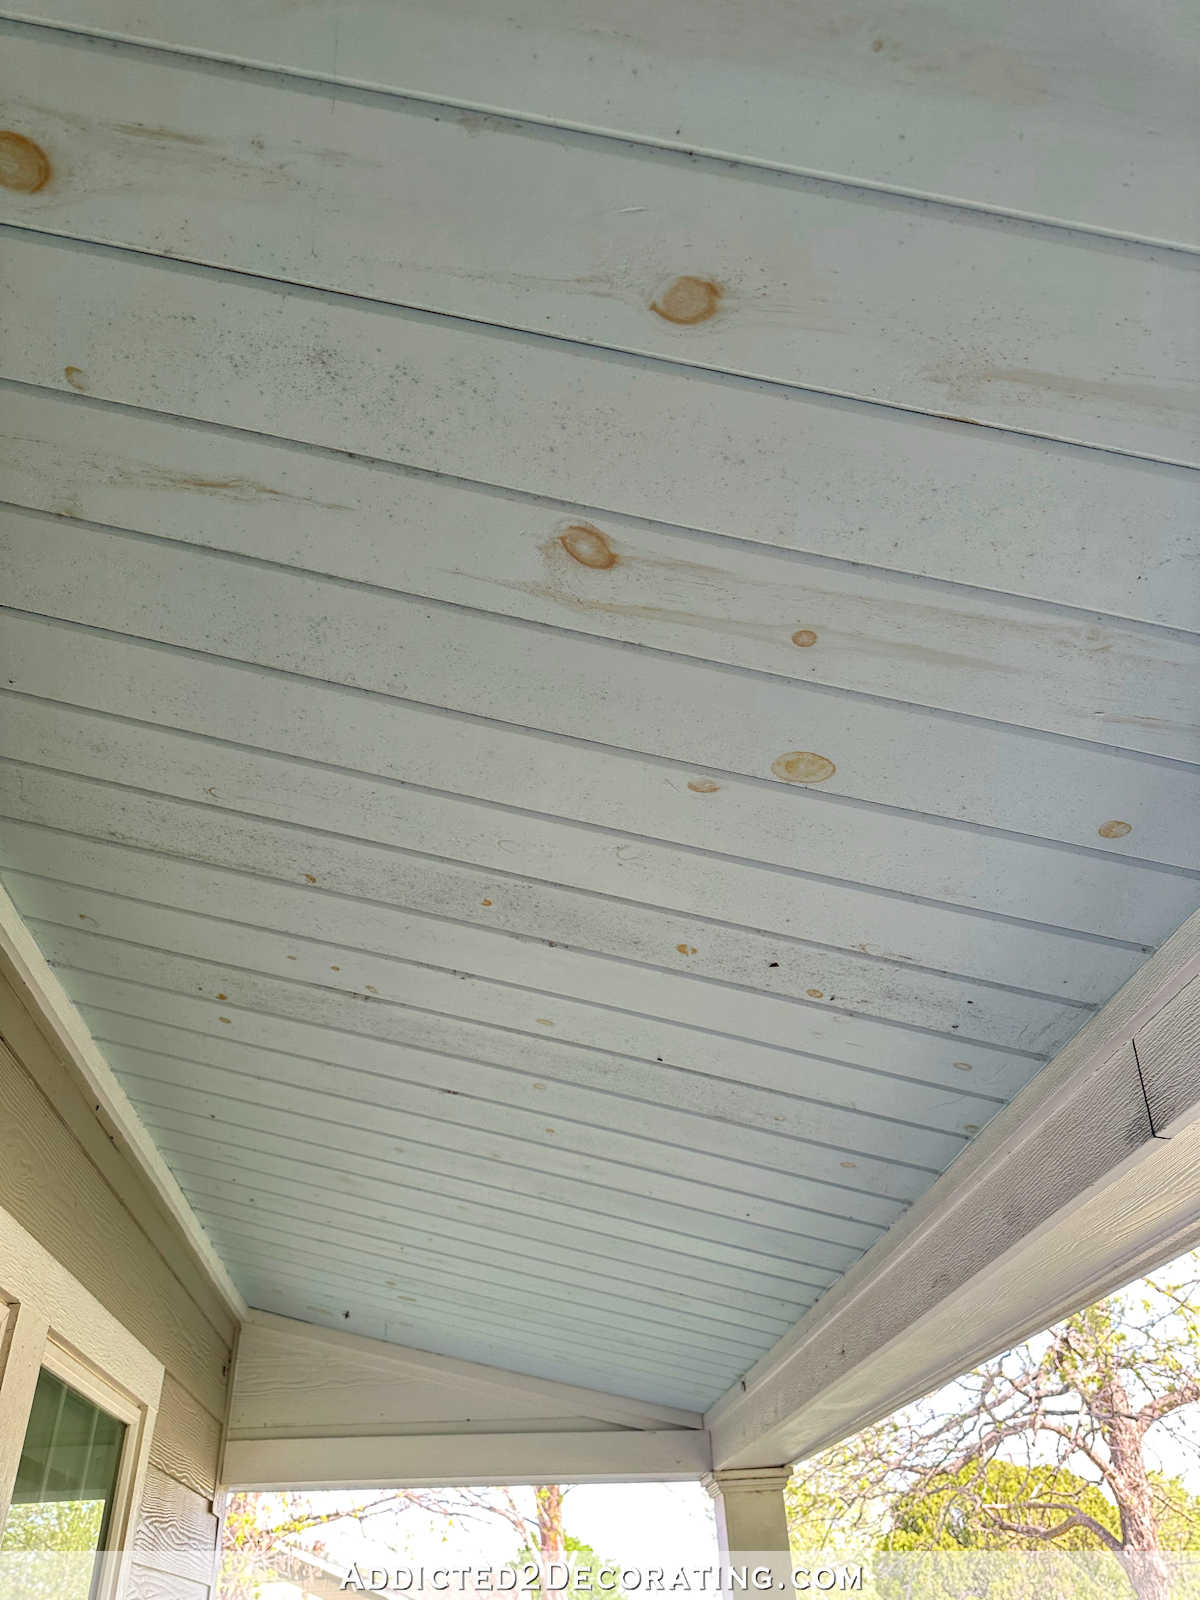
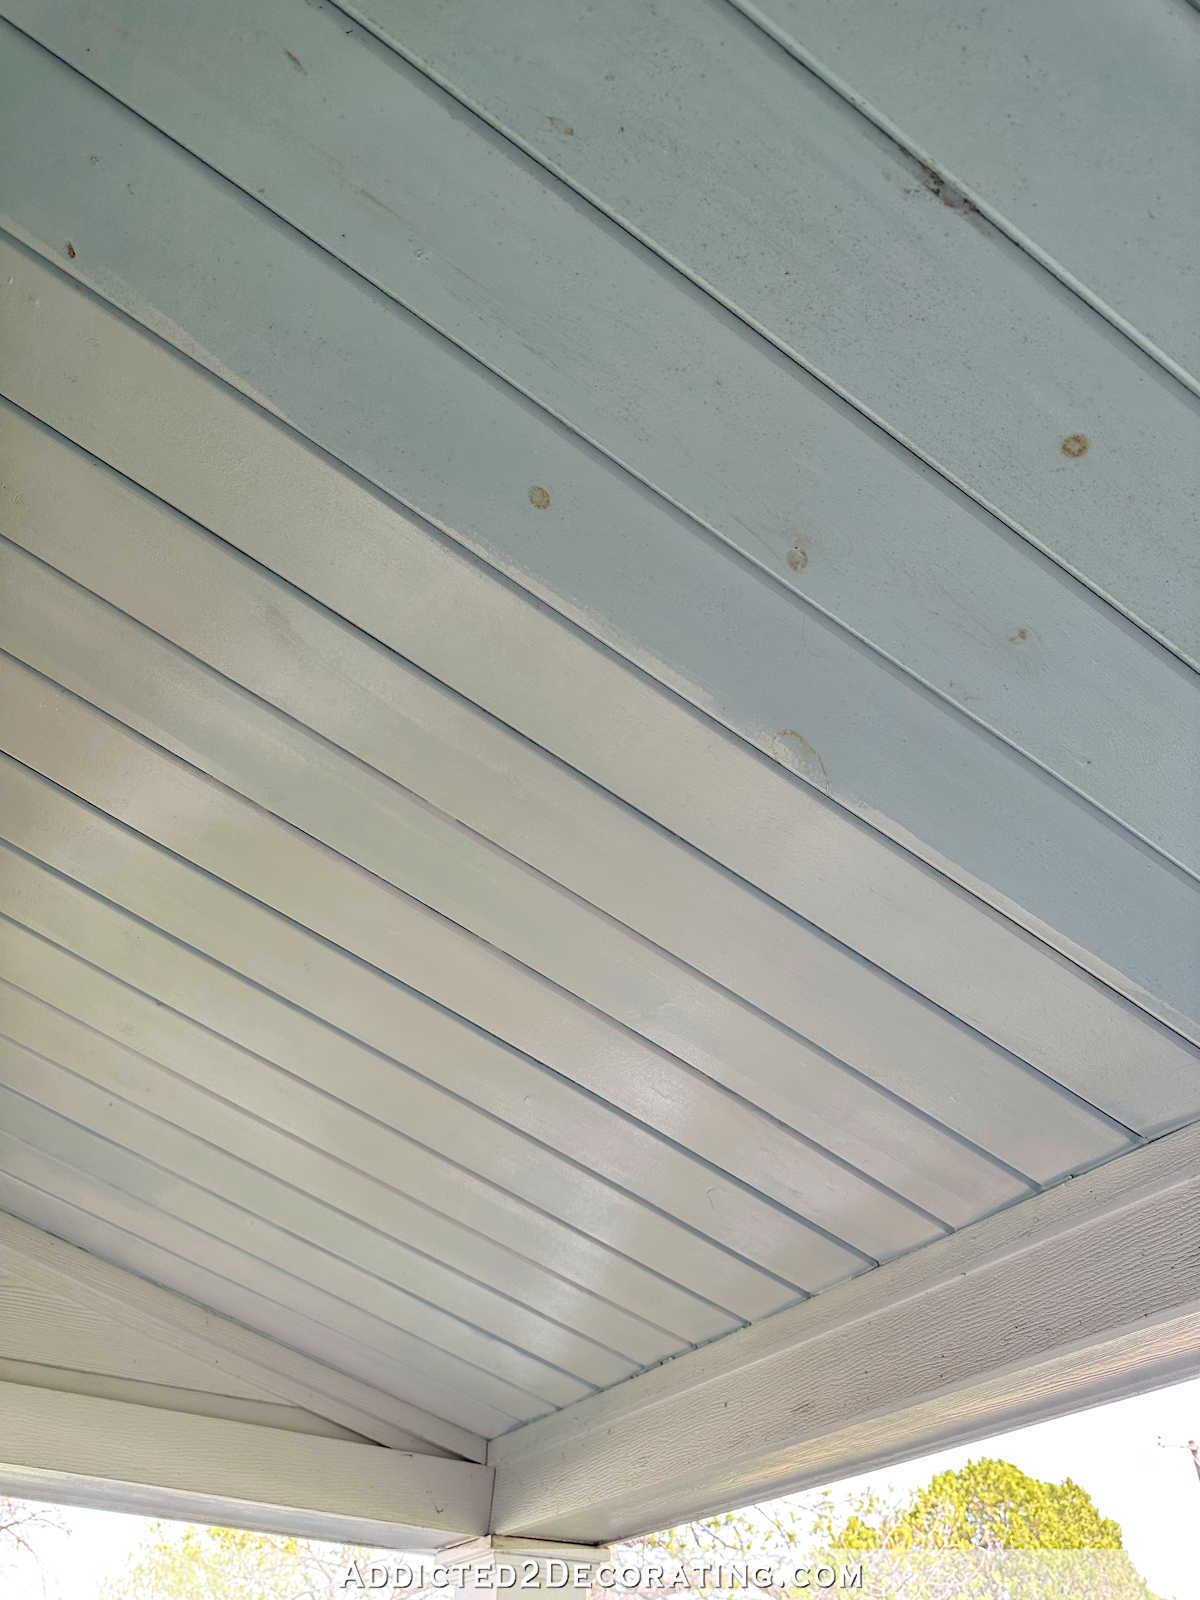
After I painted it again in the summertime of 2018, I didn’t take the time to prime the wooden earlier than portray it. I do know higher than to do this with uncooked wooden, and but, I did it anyway. And inside that first yr, the knot holes began displaying via, and it simply continued to worsen over time. So right here’s what the ceiling seemed like on Saturday earlier than I received began repainting it.
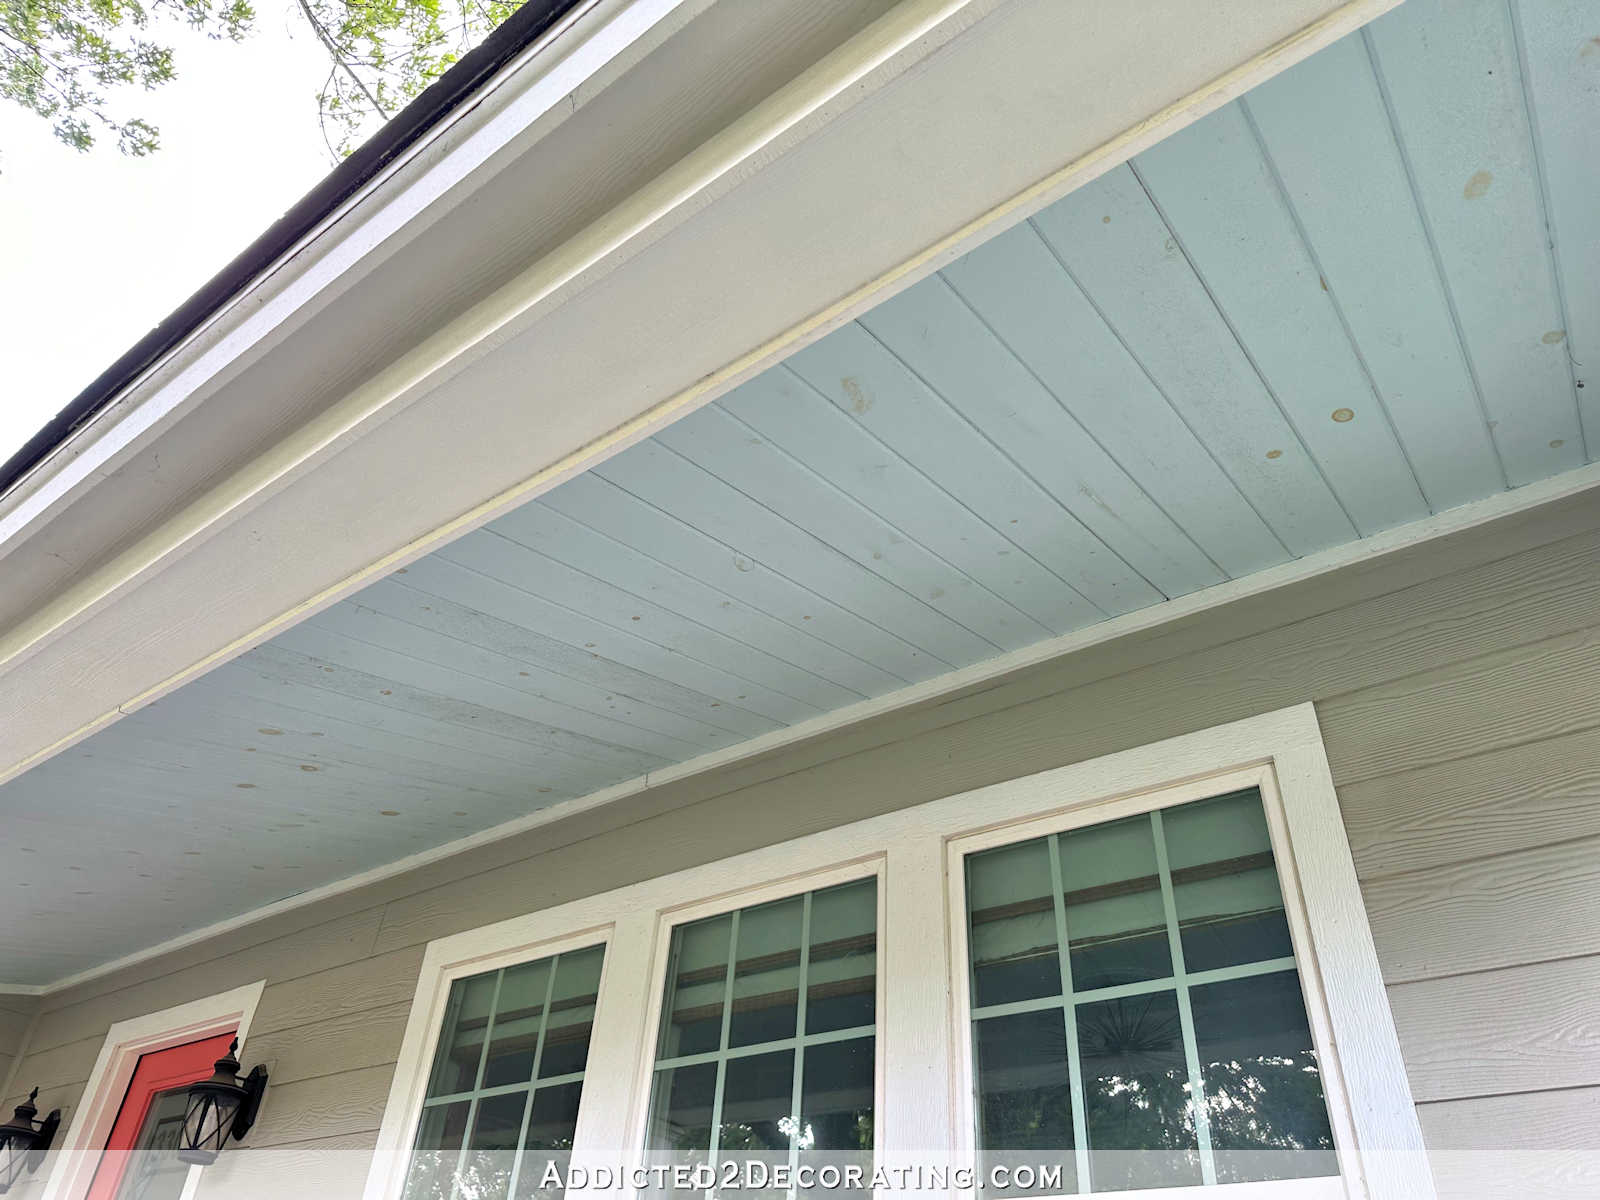
See all these knots and streaks? It was trying fairly dangerous.
So I headed to Dwelling Depot to get some primer and paint, and as an alternative of utilizing my favourite Zinsser oil-based Cowl Stain, I made a decision to check out Zinsser BIN shellac-based primer. I’ve by no means used this earlier than, however I’ve seen different DIYers use it and suggest it particularly for overlaying cussed knots that hold displaying via painted surfaces.
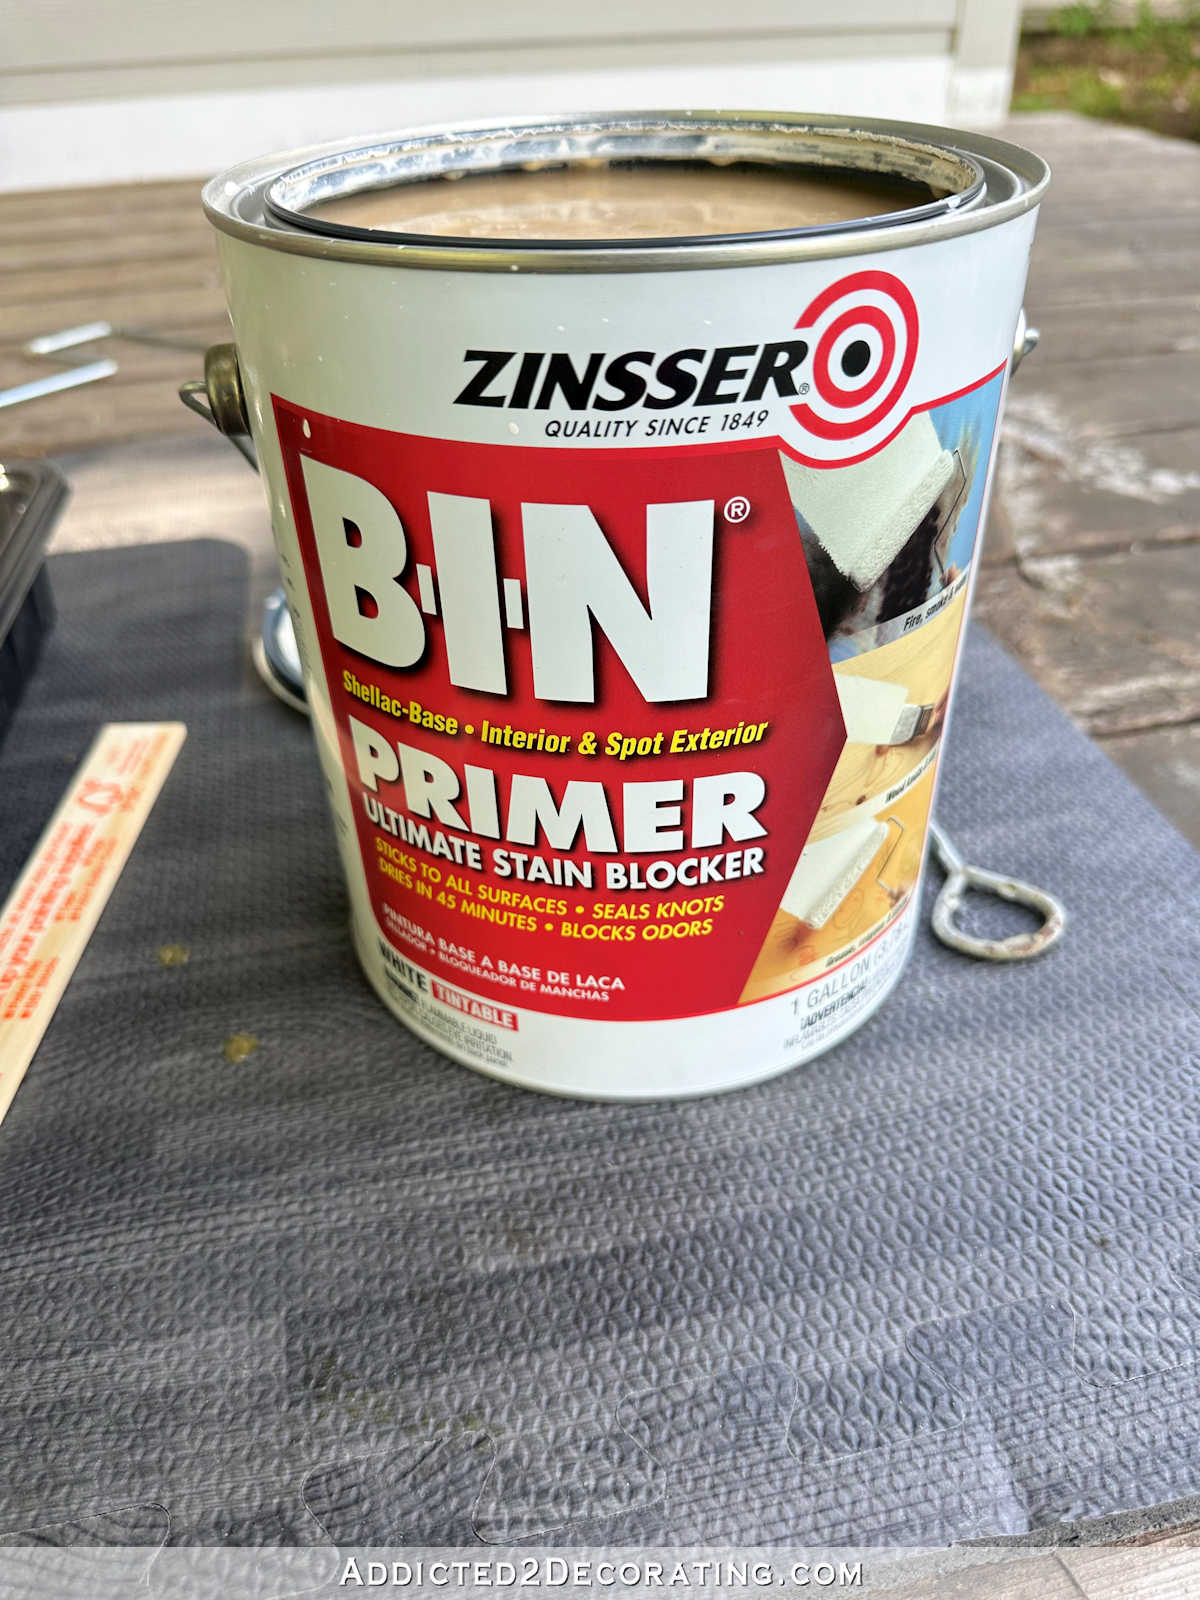
I nearly backed out and simply went with my favourite primer after I noticed the price. This shellac-based primer price about $75 for a gallon, whereas my favourite oil-based primer was $35 for a gallon. So that is greater than double the worth. However after I noticed that the label particularly says “seals knots”, I made a decision to go for it.
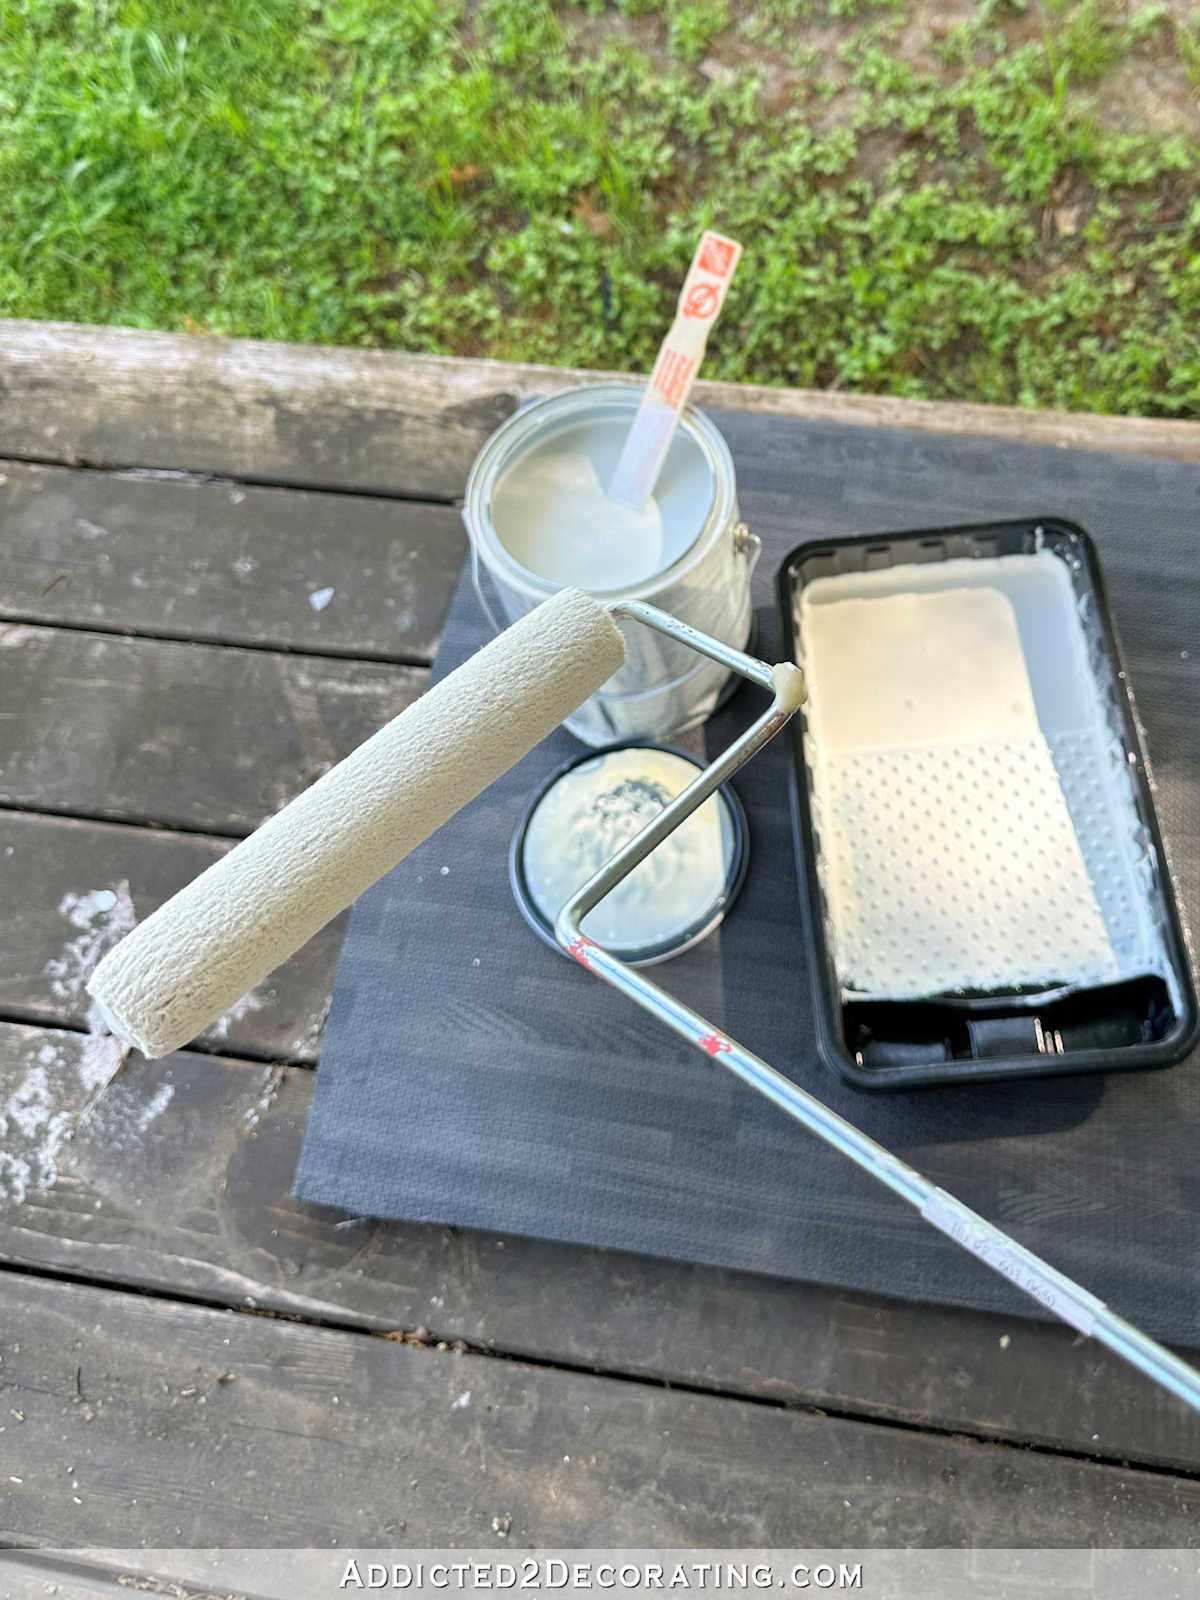
To use the primer, I used a 6-inch curler with a 3/8-inch nap.
I’ll be sincere right here. Initially, I used to be not impressed with this primer in any respect. I had hoped to simply prime proper over the ceiling, after which paint it. However as quickly as I rolled that primer onto the primary board, I watched because the primer began to separate over the knot holes. That was irritating.
So I received up on the ladder and felt the knots, and so they have been all easy, arduous, and glossy, like a tough sweet. So mainly, I used to be priming over hardened sap, and the primer didn’t wish to stick with these hardened shiny sap. I used to be irritated, as a result of this was particularly labeled for priming over knots, and right here it was, separating over the knots. I’m about 99% certain that my favourite oil-based primer wouldn’t have separated over the knots like that.
I debated taking the primer again and exchanging it for the oil-based, however I made a decision to press on. But it surely wasn’t going to stay to these knots with out some prep work first. So I needed to sand each single knot on the ceiling (and there have been loads of them!) earlier than priming.
As soon as I did that, the primer went on simply high quality. It’s very completely different from what I’m used to, although. The oil-based primer that I really like is the consistency of paint. This shellac-based primer is the consistency of complete milk, which appeared very unusual to me. However after sanding the knots, it did go on very properly, and it coated the knots simply high quality.
I did two coats of the primer, after which let it dry for about an hour earlier than portray. After I painted the ceiling in 2018, I ended up mixing my very own blue to get it excellent. And sadly, I didn’t have any left over to take for a colour match. So I simply had to take a look at the paint swatches and use my greatest judgment.
I ended up choosing Behr Air Blue, however I feel it’s a little bit too darkish.
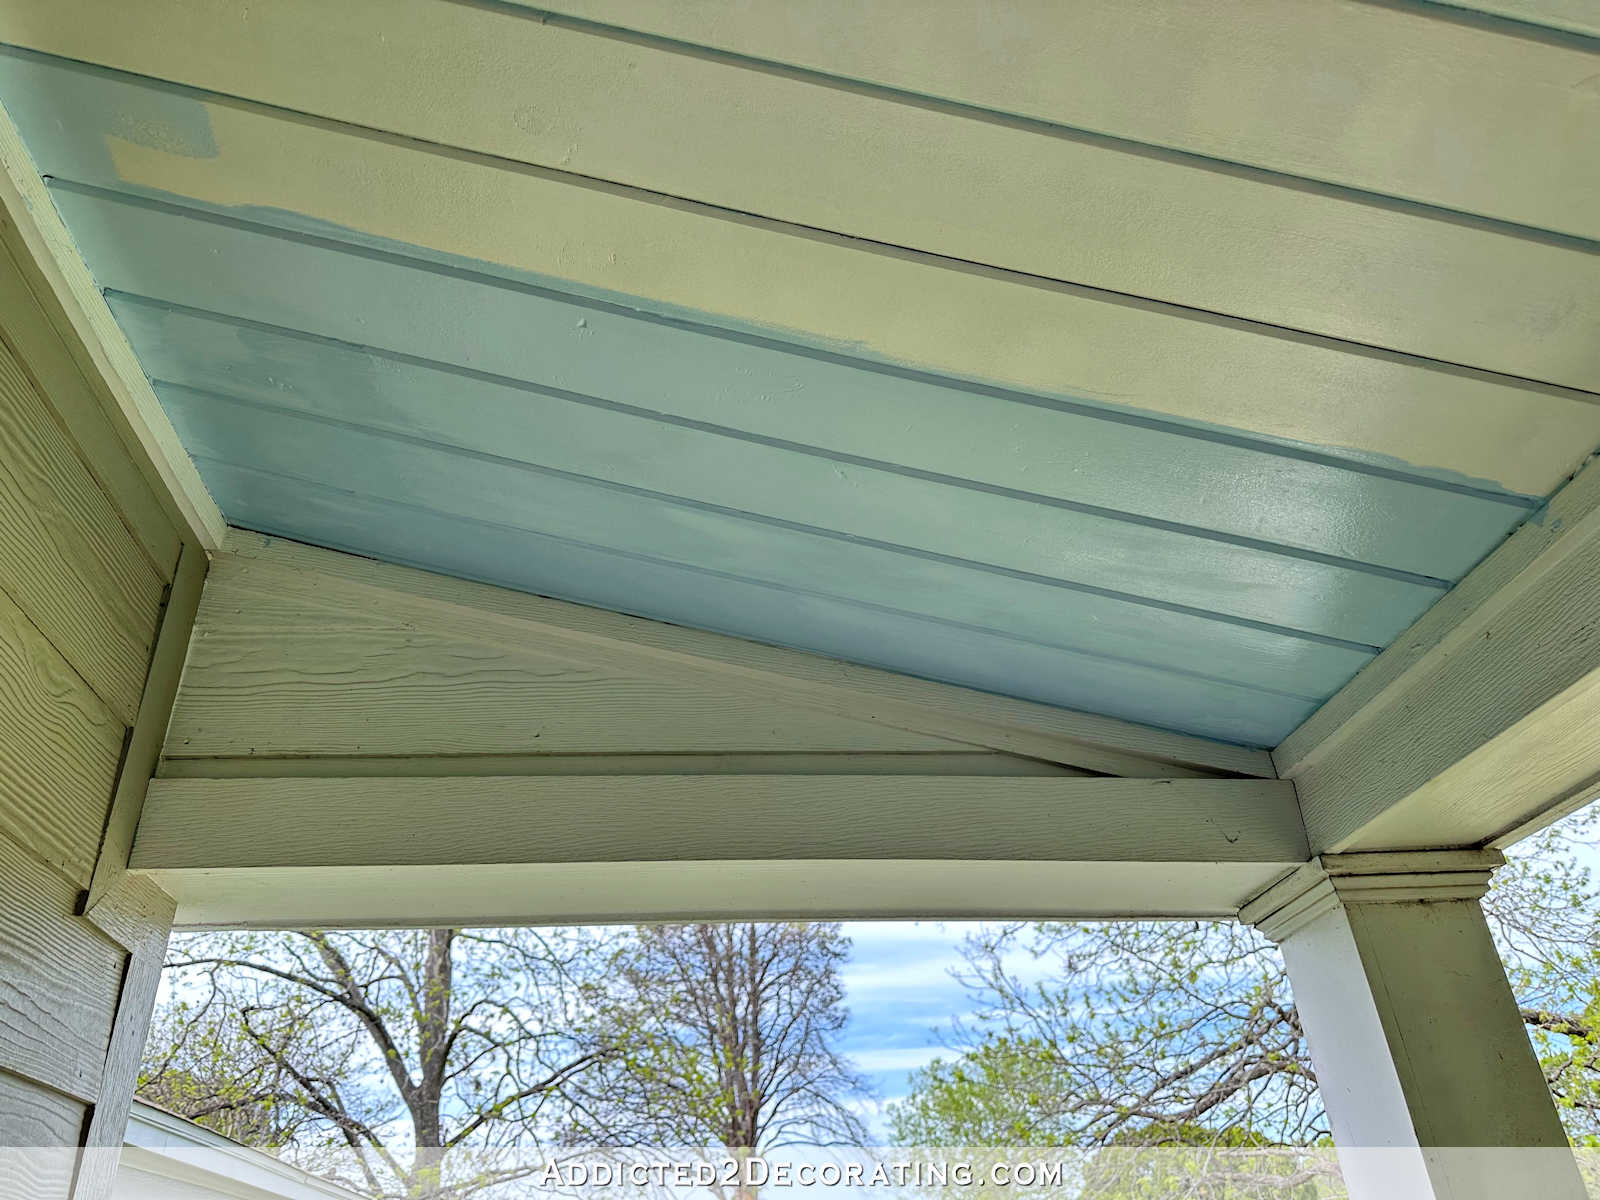
Right here’s the way it taken care of I completed the primary coat.
I didn’t get to the second coat as a result of I made a decision to do an entire lot of caulking earlier than doing the second coat, and that caulking took me the remainder of the day (and I’m nonetheless not completed with it). However earlier than I do the second coat, I feel I’m going so as to add some white to lighten the colour only a bit.
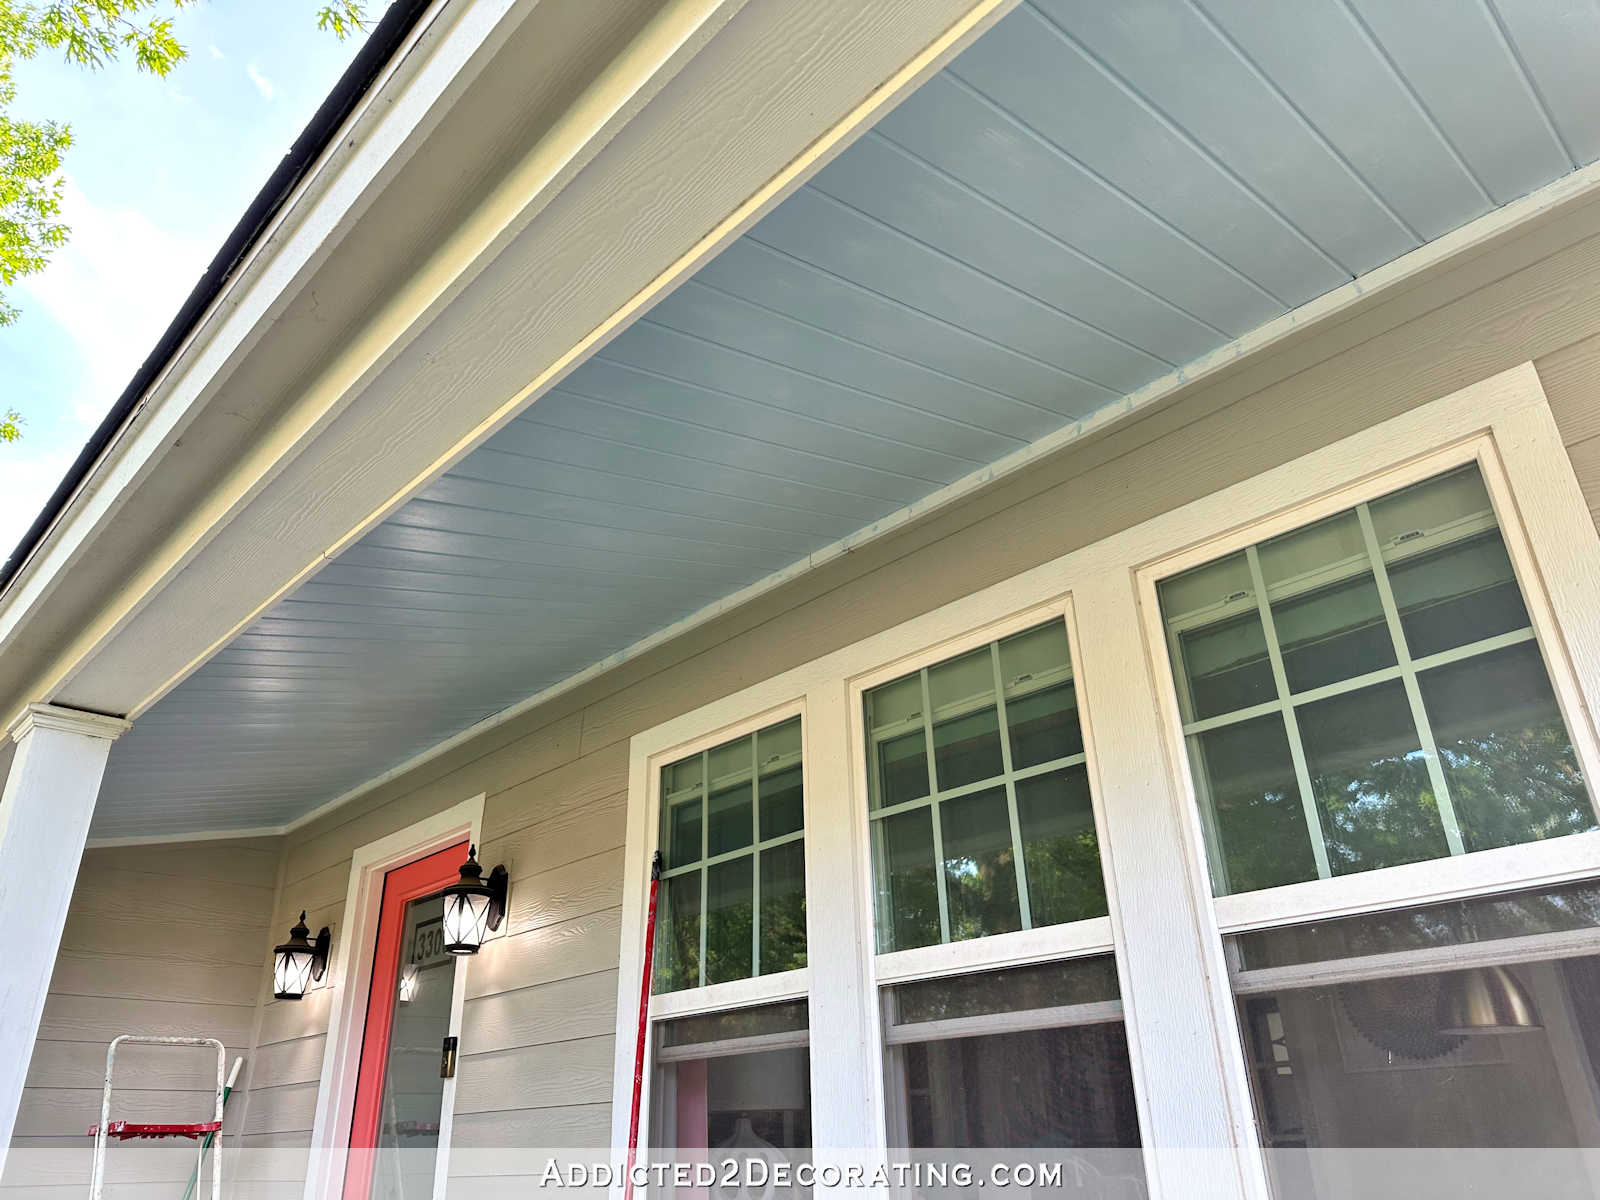
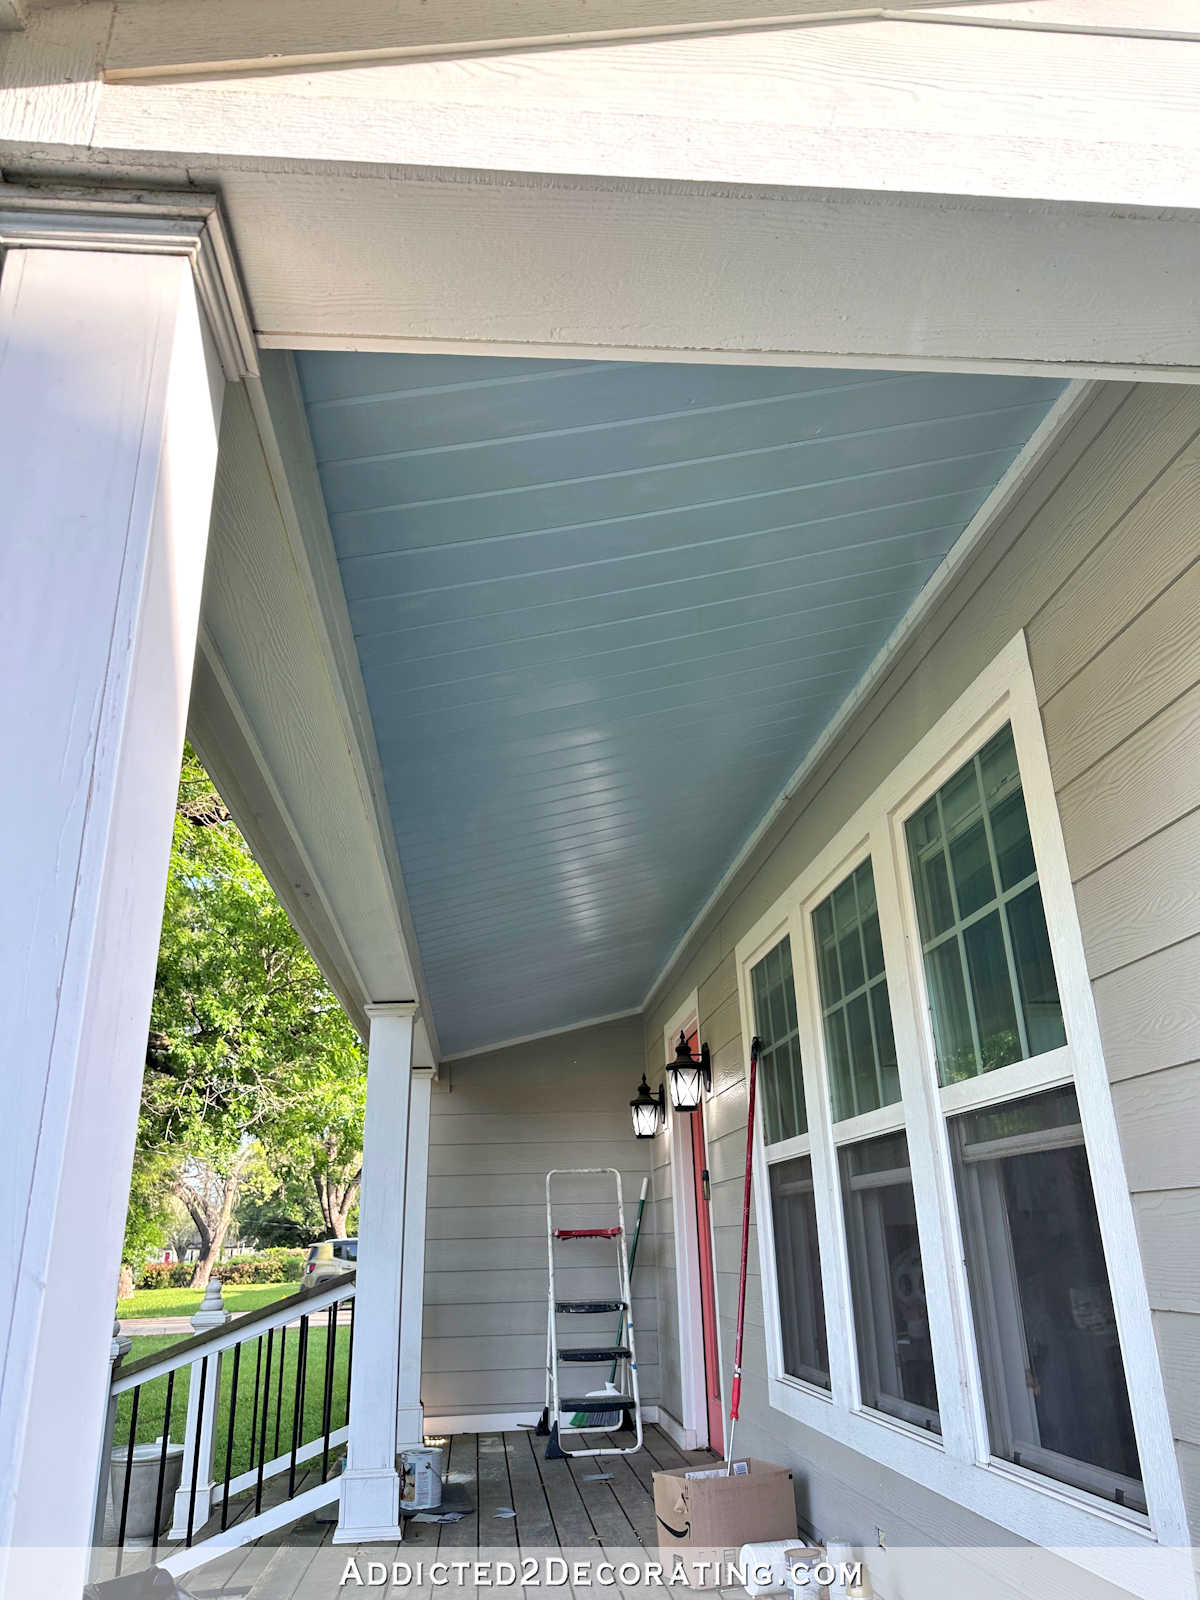
That’s the place the ceiling refresh stands as of this morning. In the present day goes to be one other lovely day, so I’ll get the ceiling completed in the present day and transfer on to another porch tasks.
Now let’s speak about “haint blue” ceilings for a second. Do you’ve got a blue porch ceiling? It’s a convention within the southern a part of america (the area referred to as the Deep South) to color a porch ceiling “haint blue”, and the unique objective was for superstitious causes. The colour was stated to keep at bay evil spirits. However over time, folks have seen that blue ceilings on a entrance porch appear to keep at bay spiders and wasps.
So is that this true? Do “haint blue” ceilings actually work for this objective?
Properly, I haven’t carried out any precise scientific research on it. ? And in accordance with Wikipedia, there’s no proof that blue porch ceilings keep at bay spiders and wasps. Wikipedia says:
The usage of haint blue has misplaced a few of its superstitious significance, however fashionable proponents additionally cite the colour as a spider and wasp-deterrent. Nevertheless, the colour has not really been scientifically proven to stave off bugs. The related repellent impact could stem from using milk paint containing lye, which does act as an insect repellent.
Properly, I don’t have any scientific information, however I do have my very own private expertise with it. Earlier than I painted our porch ceiling blue, we had wasps on our entrance porch continuously. I’d take away one wasp nest, solely to have one other one present up a number of days later. I used to be continuously having to , run, duck, and weave to keep away from wasps diving at me as I’d attempt to get into the entrance door.
I can fortunately report that ever since I painted the ceiling blue, we haven’t had one single wasp nest on our entrance porch. Not one. And I didn’t use milk paint with lye. I simply used common ole latex paint.
So from my very own private expertise, I do assume there’s one thing to the concept “haint blue” porch ceilings keep at bay wasps. And now that I give it some thought, I don’t keep in mind seeing any spider webs on our entrance porch, both.
I don’t know if it’s simply coincidence that we used to have wasps and the occasional large spider internet earlier than the blue ceiling, after which after the blue ceiling, there haven’t been any in any respect. Perhaps, presumably, it’s as a consequence of another issue. However simply from my very own expertise, I can let you know that I’m a giant believer in “haint blue” porch ceilings to maintain spiders and wasps away. I’d like to know your expertise with it.
Anyway, again to the entrance porch progress. Yesterday, I made a decision that earlier than I transfer on with extra portray, I actually wanted to simply get every part clear. The porch hasn’t had a very good cleansing in years, and every part was coated with filth and dirt. So I received out my stress washer and cleaned all the partitions, columns, trim, home windows, door, sidewalk across the steps, and so forth.
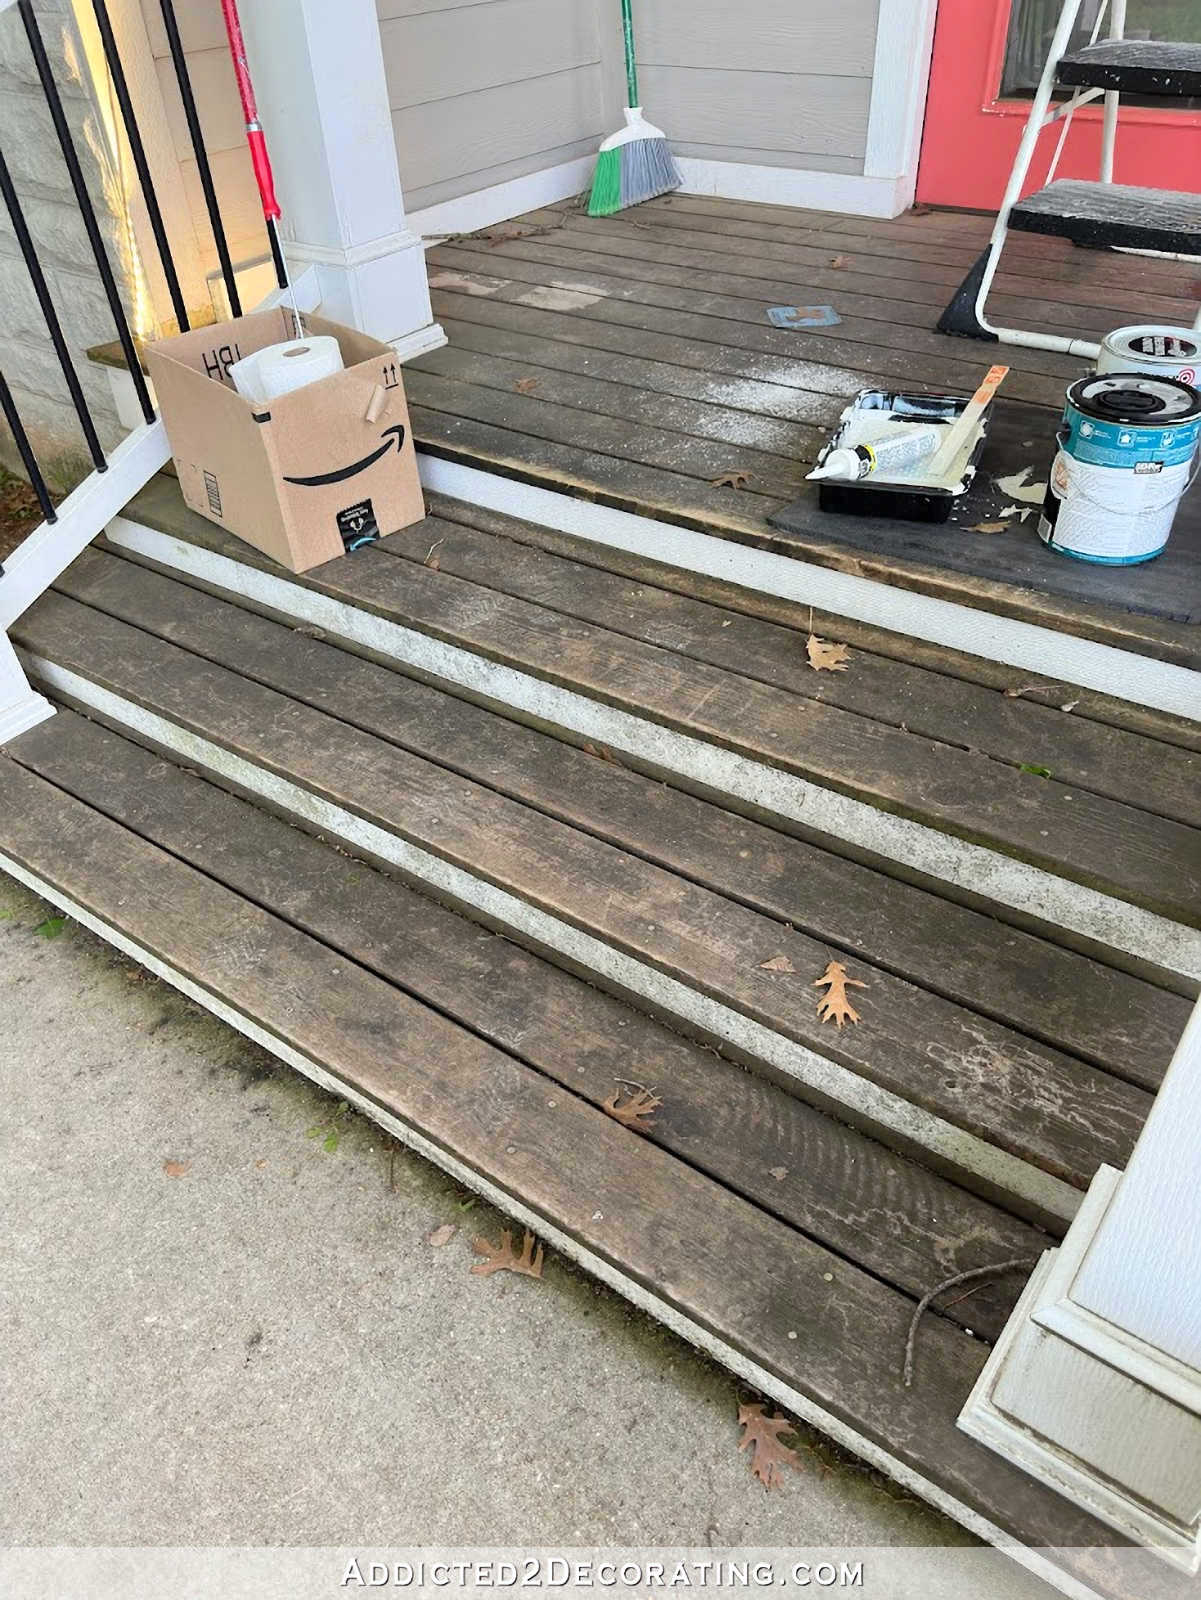
I additionally determined to see if the stress washer would work to take away the prevailing end on the porch and steps to prep them for the brand new stain/sealer that I’ll be utilizing. And it labored splendidly! Right here’s a take a look at how the steps and porch seemed earlier than with the very worn and ugly end…
And right here’s what it seems like as of this morning after stress washing yesterday night. It nonetheless wasn’t fully dry by this morning, however it seems so significantly better already!
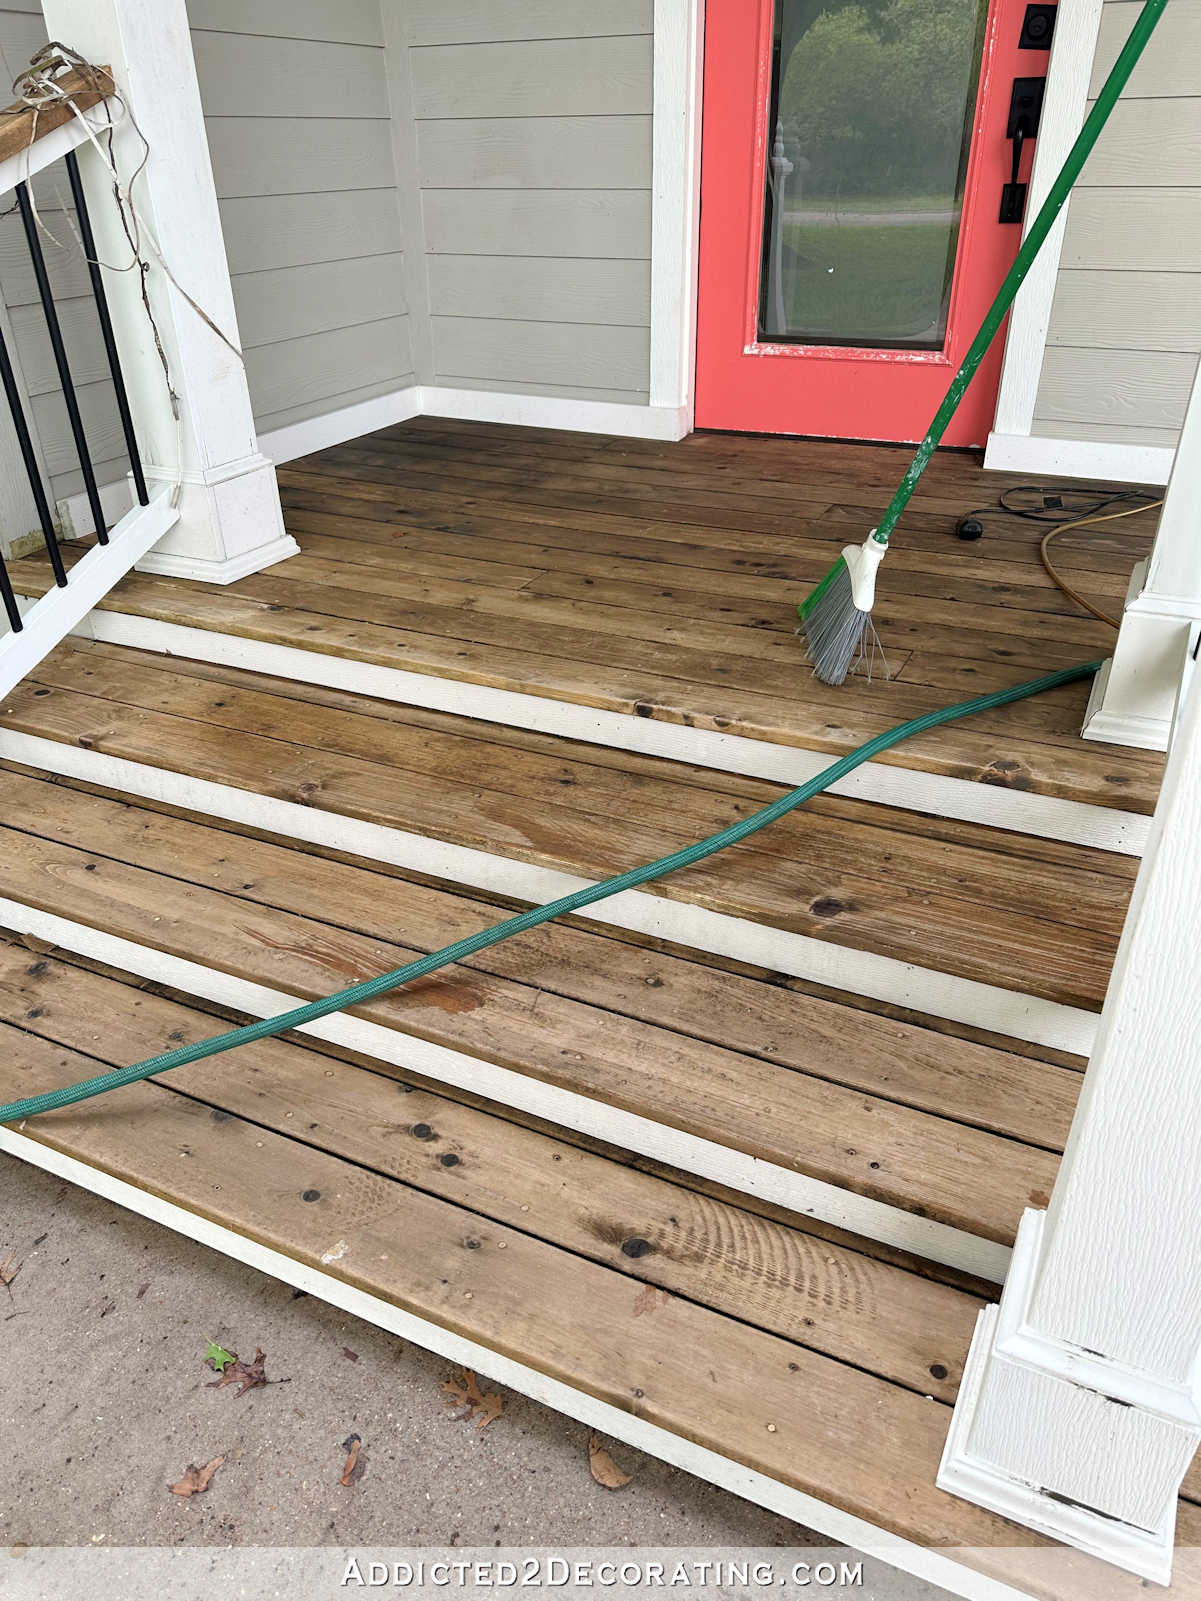
The truth is, I actually love this mild, extra pure colour. I had bought Darkish Walnut stain and sealer to make use of, however now I’m unsure if I need it that darkish. Though I do love the darkish contrasting with the white trim, so I don’t know. Perhaps I’ll persist with the Darkish Walnut. Ugh! I can’t resolve! ?
I really feel just like the stress washing saved me an enormous quantity of sanding. And I’d a lot fairly use a stress washer than a sander! It’s a lot extra satisfying and enjoyable to stress wash.
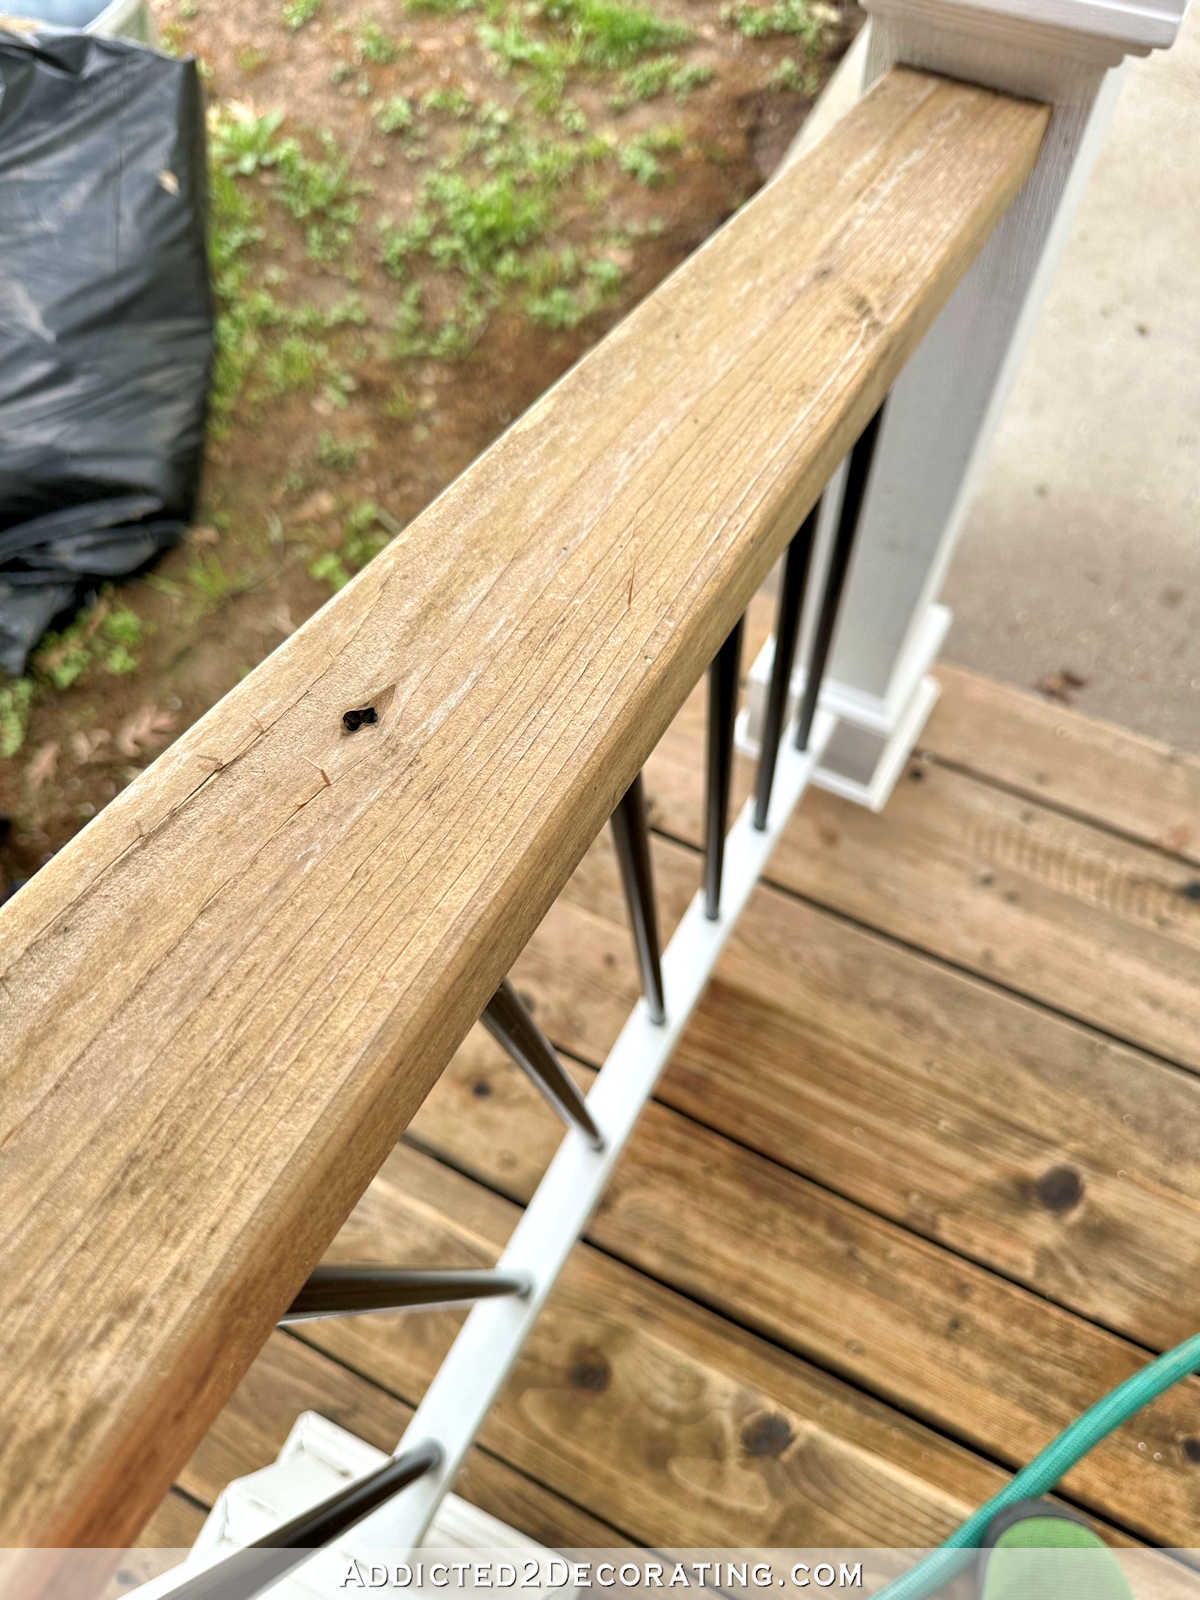
I’ll nonetheless should do some sanding, although. The stress washer did an ideal job at eradicating the filth and what was left of the unique end, however it raised an entire lot of the wooden fibers, which you’ll be able to see right here…
And it’s also possible to see it under. However sanding every part to take away these needs to be fast and straightforward.
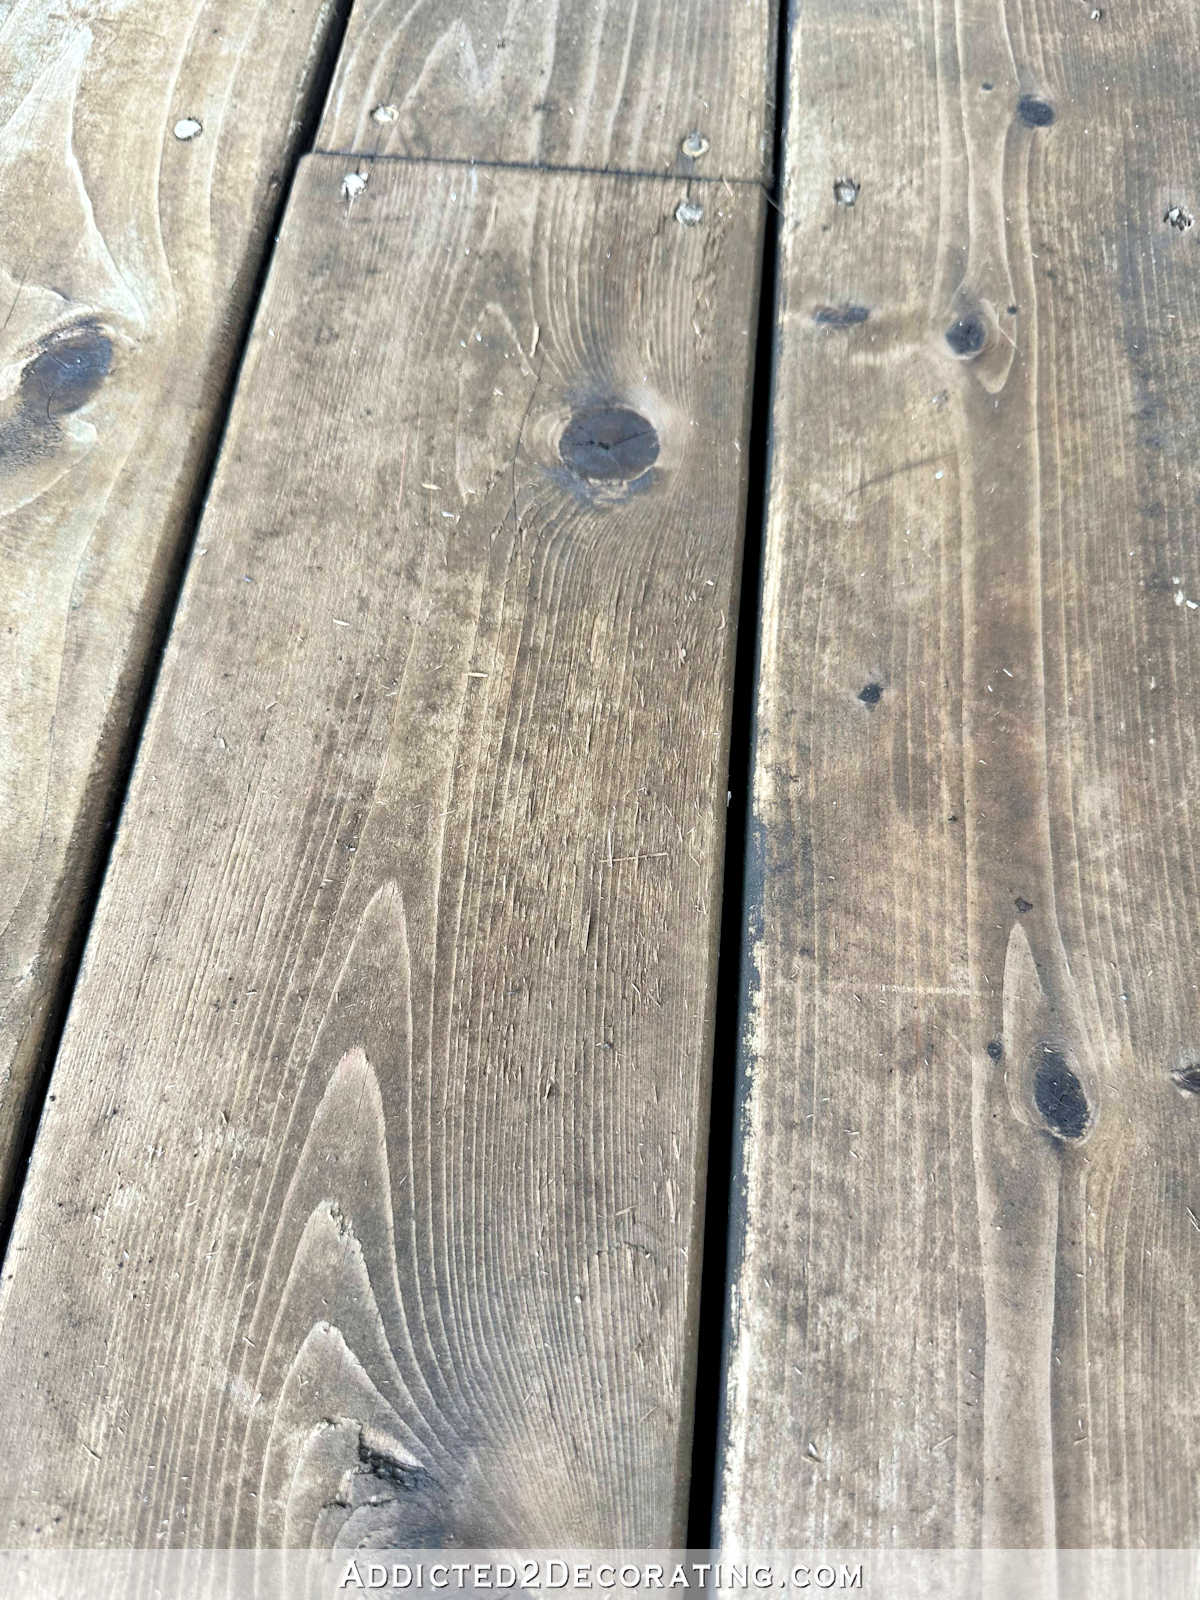
After which it’ll be prepared for a contemporary, new coat of stain and sealer. However first, I would like to complete up the portray. I’m nonetheless working from the highest down, so it’s going to have a pair extra days to dry earlier than I stain. I simply hope we don’t get any rain within the meantime!

Addicted 2 Adorning is the place I share my DIY and adorning journey as I transform and enhance the 1948 fixer higher that my husband, Matt, and I purchased in 2013. Matt has M.S. and is unable to do bodily work, so I do the vast majority of the work on the home on my own. You may study extra about me right here.
I hope you’ll be a part of me on my DIY and adorning journey! If you wish to comply with my tasks and progress, you possibly can subscribe under and have every new put up delivered to your e-mail inbox. That method you’ll by no means miss a factor!
[ad_2]
Source link
