[ad_1]
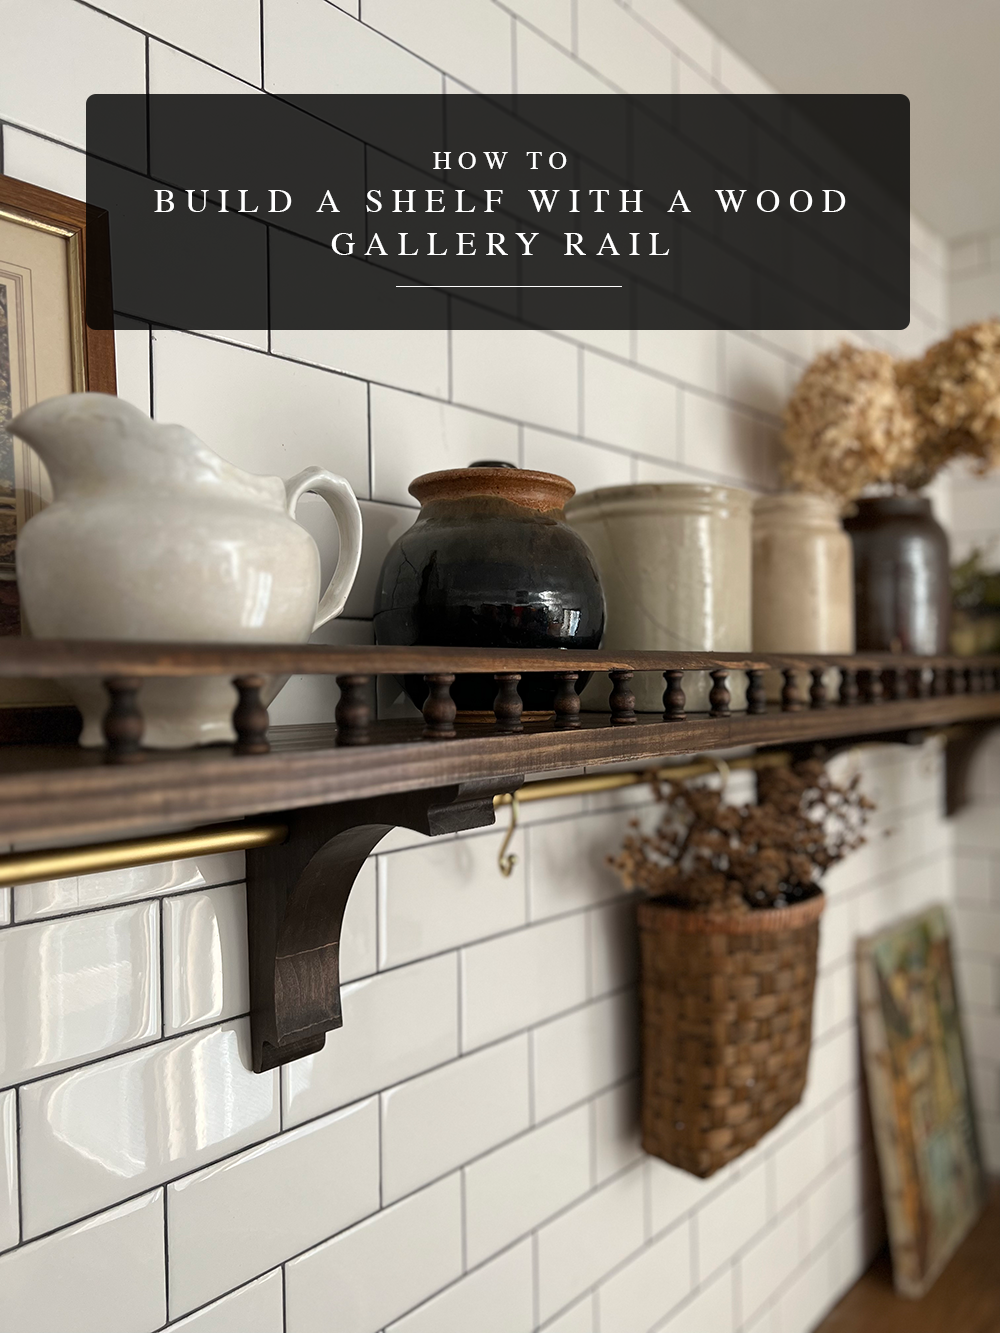
We’re within the midst of somewhat laundry room refresh and I’ve been slowly finishing initiatives to replace this house. We completed it nearly 7 years in the past and it’s probably the most used rooms in our residence (after the kitchen). However now that we’ve got 3 kiddos and my type has developed it’s time for some adjustments! My most up-to-date challenge was constructing a shelf with a wooden gallery rail and I’m right here to share all the small print with you!
After we first accomplished the laundry room, we put a shelf on the wall above the washer and dryer that was round 5′ lengthy. I do not know why I made a decision on that size or why I didn’t prolong all of it the way in which throughout the wall. It was early in my design journey and the laundry room was the primary room I ever designed from prime to backside!
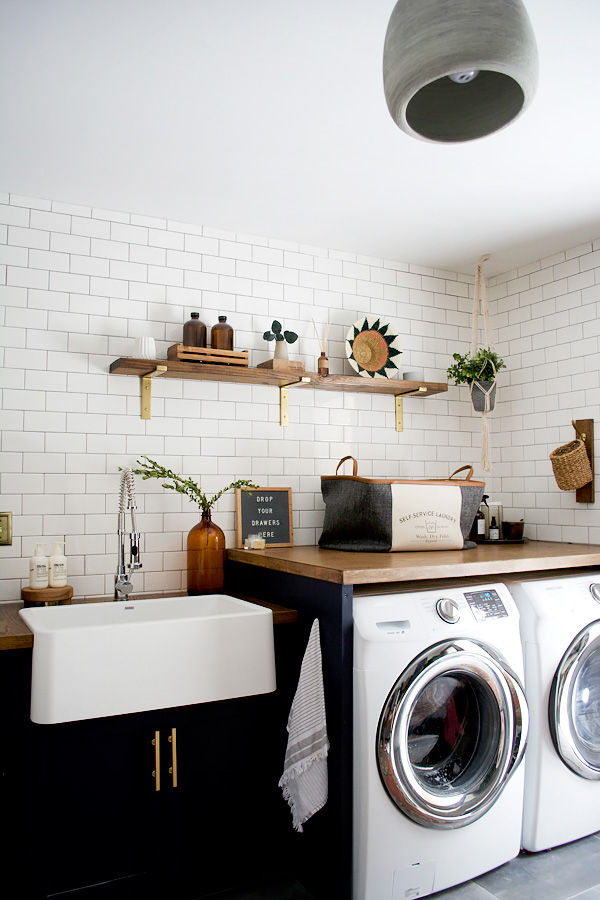
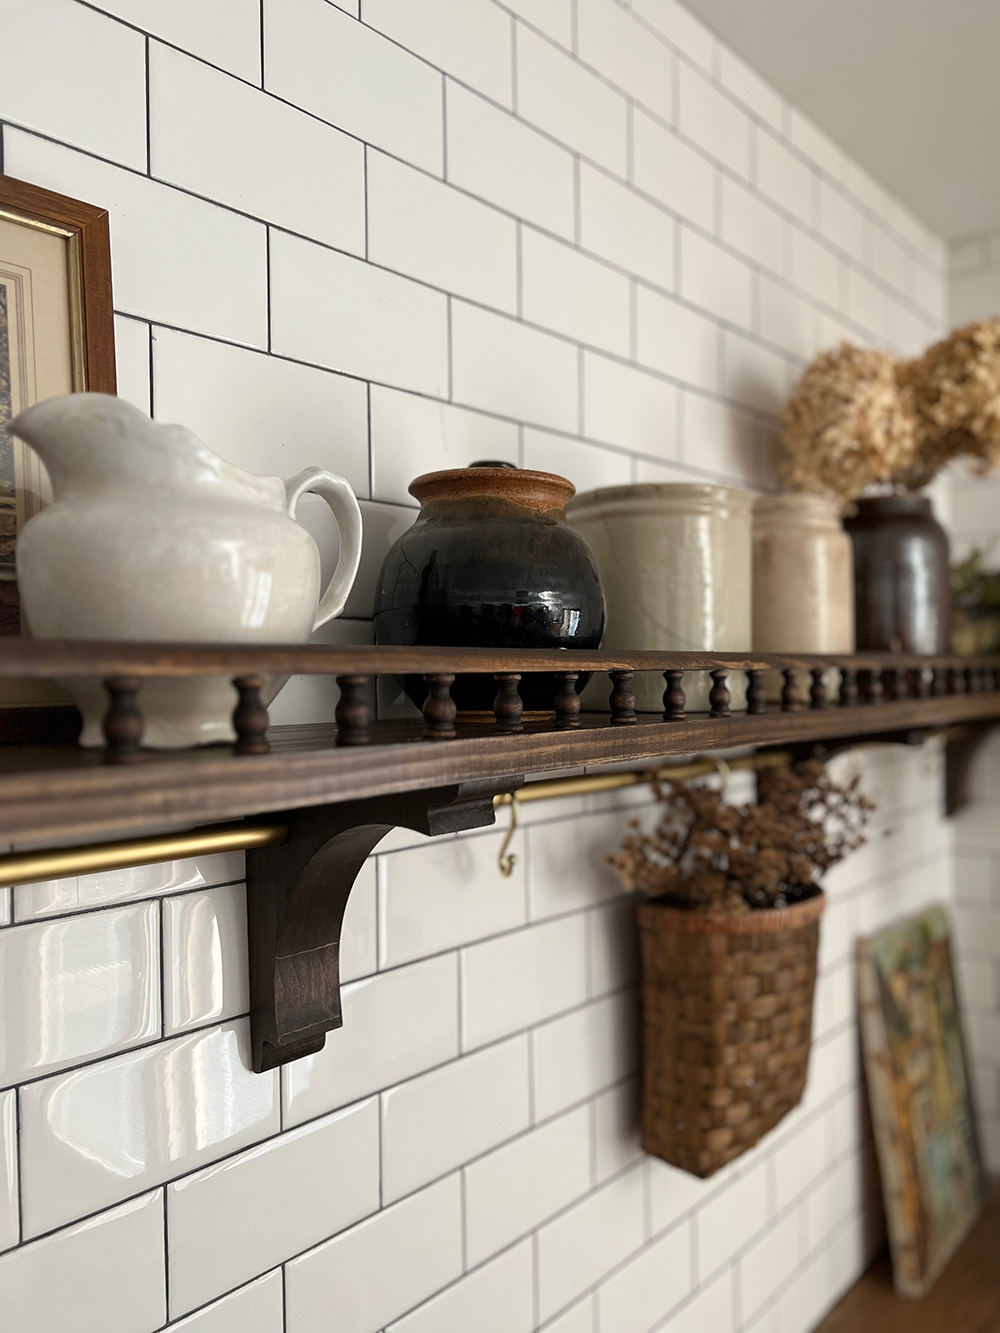
The extra I checked out it, it simply appeared unbalanced and there was extra room for extra storage and performance. So I got here up with the thought to create a shelf with a wooden gallery rail on prime and a dangling brass rail on the underside.
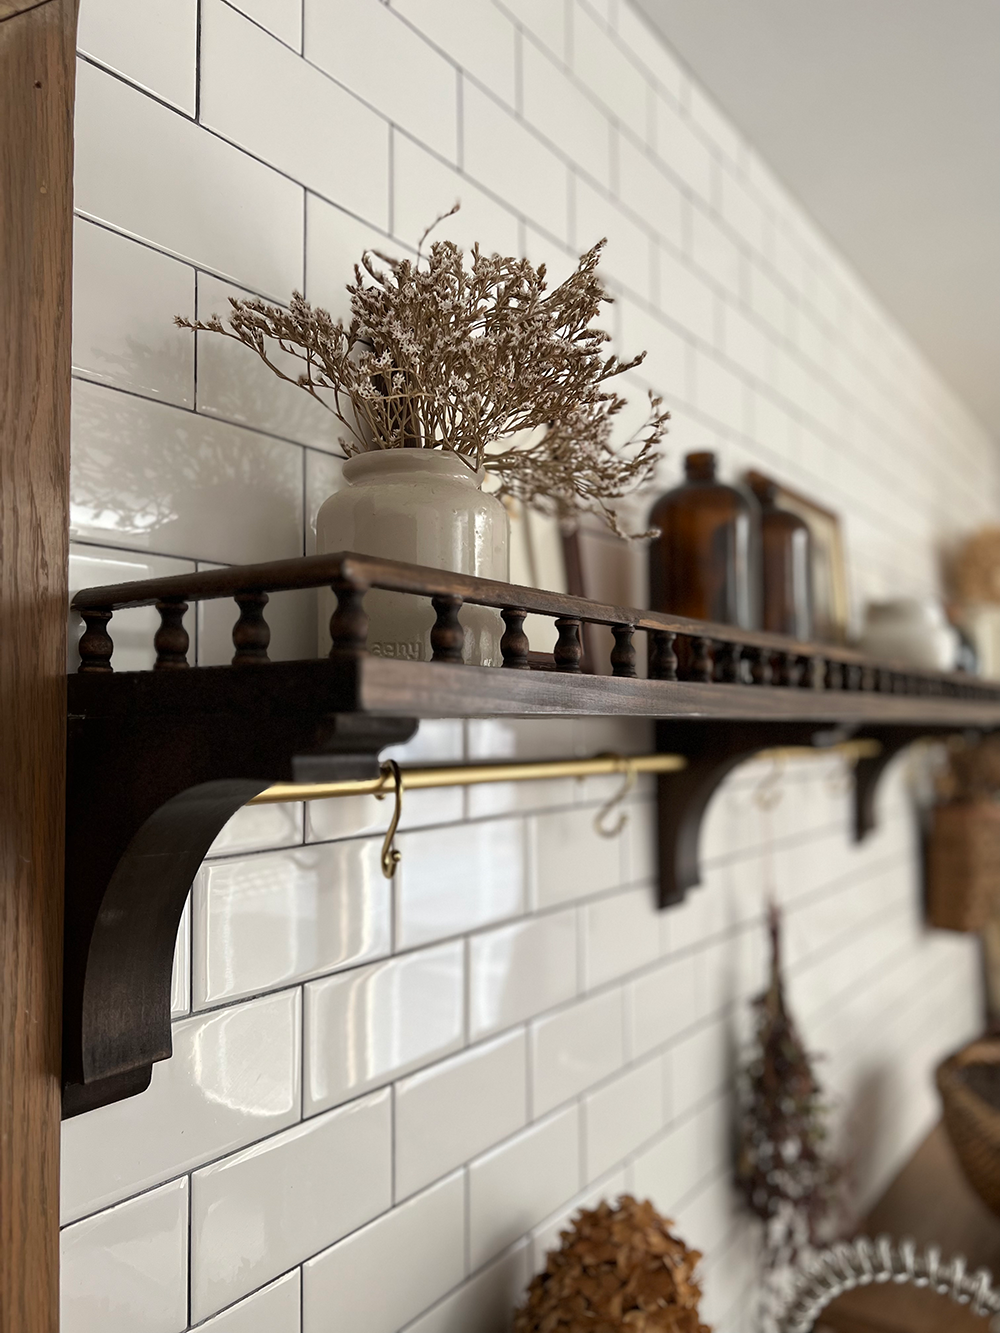
I used to be impressed to create the wooden gallery rail after making a pet food holder for Oakley out of bigger wooden spindles. Brass gallery rails have change into tremendous common in design – we’ve got one in our kitchen and I like it – however I wished to place a distinct spin on it. A whole lot of older antiques have this factor which is such a lovely element, and I wished to do it in a extra trendy method that match my type higher.
SUPPLIES FOR SHELF WITH A WOOD GALLERY RAIL
STEP 1
Drill the holes to your finials. You’ll need to measure out your spacing first – I spaced mine 2.5″ aside from each other however you are able to do no matter seems to be greatest to you! I positioned them about 1/2″ from the entrance fringe of the board.
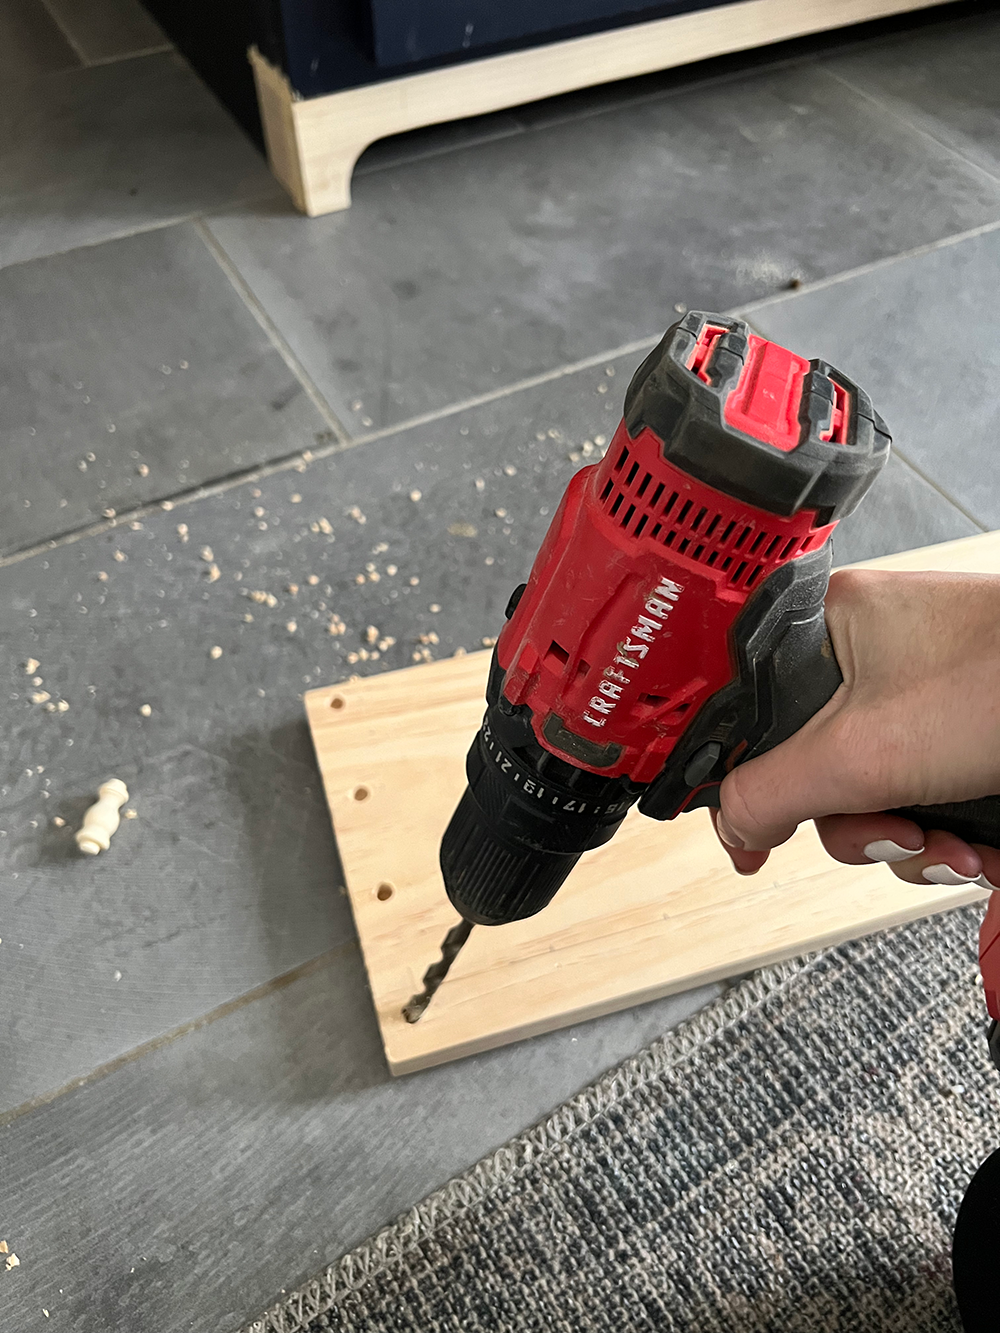
To drill the holes I used a 5/8″ drill bit. You would additionally use a spade bit however since these have a sharp finish, I didn’t need to danger drilling via the wooden!
STEP 2
Trim the highest a part of the finials off. It was pretty straightforward to drill into the shelf board, however drilling into the nook spherical could be actually tough. So to keep away from this, I simply trimmed off the highest a part of the finials in order that the nook spherical may sit flat.
I used the band noticed to do that and it was so fast and simple! If wanted, you’ll be able to then sand down the tops for a very clean floor.
STEP 3
Minimize and miter your nook spherical. It helps to put your finials within the holes to get a greater thought of the place the nook spherical will sit. Then you should utilize your mitre noticed set at a forty five° to chop every bit.
STEP 4
Drill the holes in your corbels. When you’ve got a drill press that’s the simplest method to do that, however we don’t so I used some clamps and my common drill. The copper pipe I used for the “brass rail” is 1/2″ and I used a 5/16 spade bit for the holes.
I stained my corbels first, however I recommend drilling first after which staining!
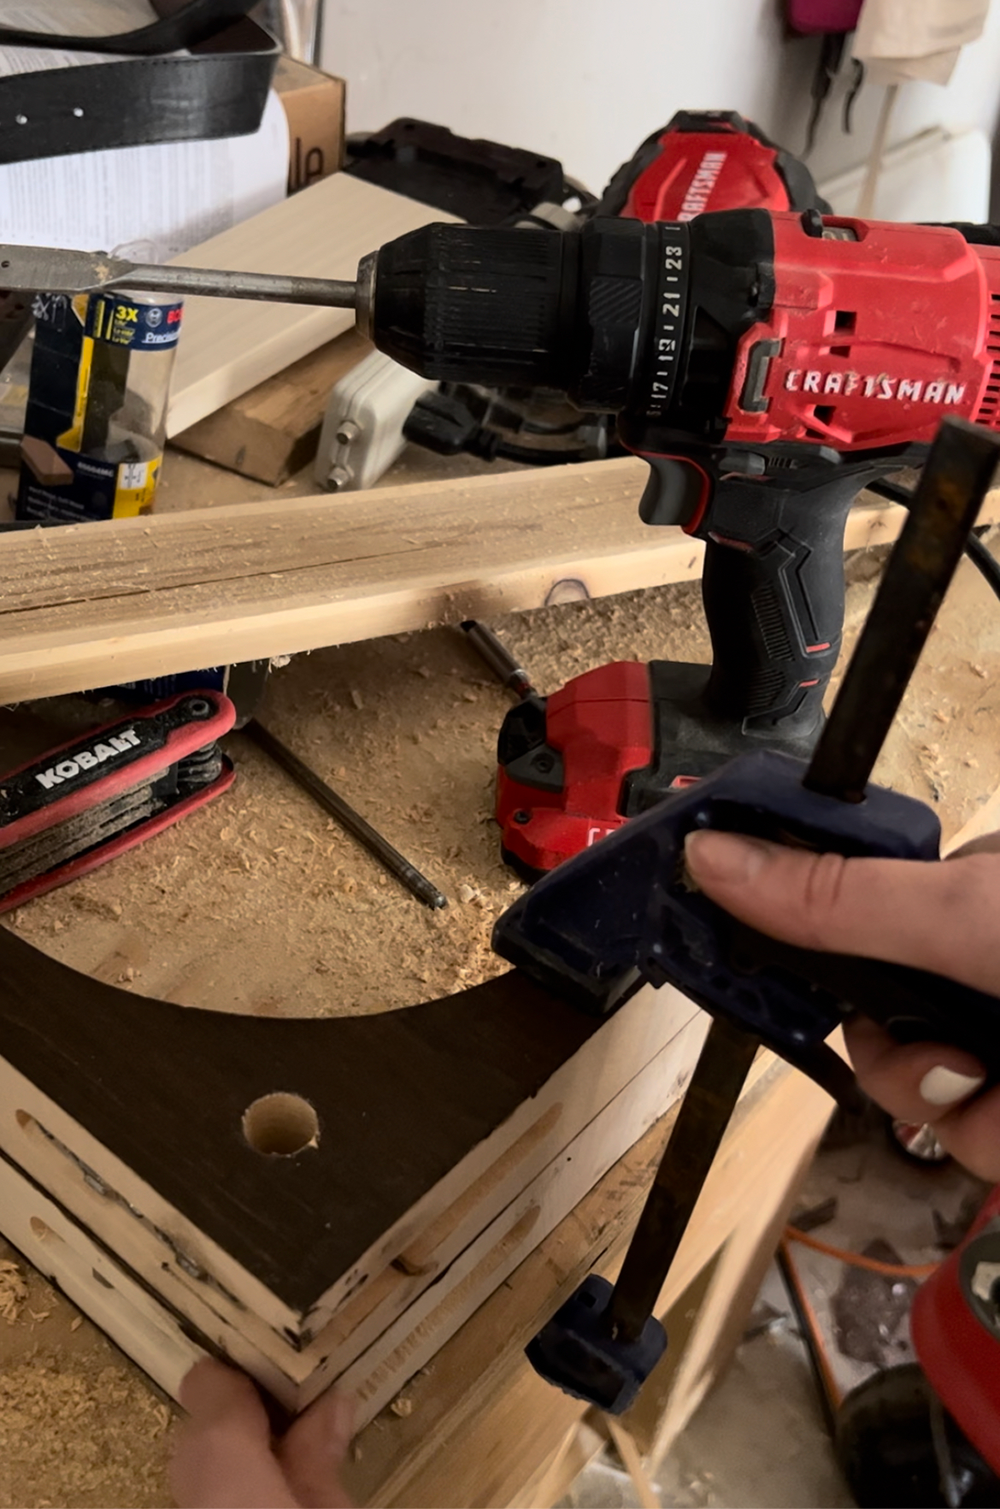
Begin by clamping two corbels collectively. Be sure they’re aligned the right method (ie. the brackets on the again are going through the identical method). Eye ball the middle space of your corbel the place you need the pipe to go and drill down as straight as you’ll be able to via each corbels.
When you’ve achieved the primary two, take considered one of them and place it on prime of a non drilled corbel. Use this as a template to drill into the one beneath. Repeat till all corbels have been drilled via.
STEP 5
Now that every one your wooden is lower and prepared it’s time to stain. I used a wooden conditioner first which helps to eradicate splotching and offers you a pleasant even end. You may apply this with a black foam brush.
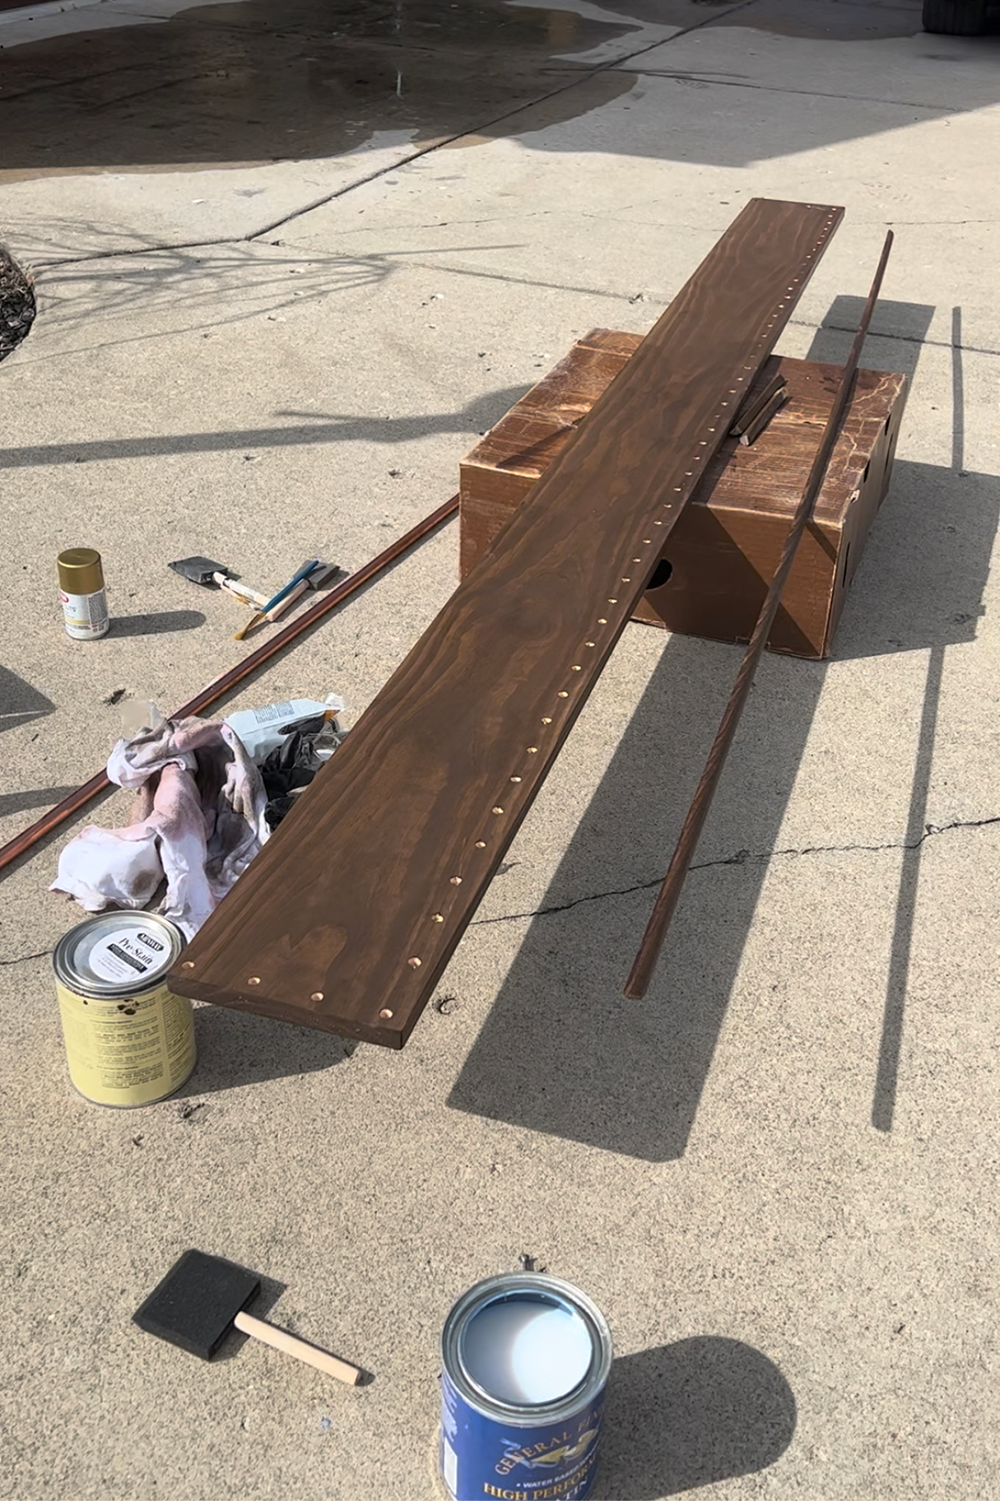
Then I used my favourite Darkish Walnut Gel Stain to stain the whole lot. I used a staining pad for the precise shelf and corbels after which used a small craft paint brush for the finials. Then I wiped the finials off on a rag to take away the surplus.
STEP 6
As soon as the stain is dry, apply a prime coat. I used Common Finishes Excessive Efficiency Prime Coat in Satin and solely did one coat since this isn’t going to get loads of motion ?
STEP 7
Minimize your copper pipe. Earlier than you narrow, measure out the size you want by inserting the 2 finish corbels on the wall. This gives you a extra exact measurement however you do have some wiggle room because the pipe will sit an inch or so into the corbels.
We determined to have the pipe go right through all 5 corbels in a single piece however you possibly can additionally lower the pipe into sections and have the seams be hidden throughout the corbels.
Slicing copper pipe is tremendous straightforward with this little pipe cutter you will get on the residence enchancment retailer.
STEP 8
Spray paint your pipe. I used this gold leaf spray paint after which this clear coat on prime of that.

STEP 9
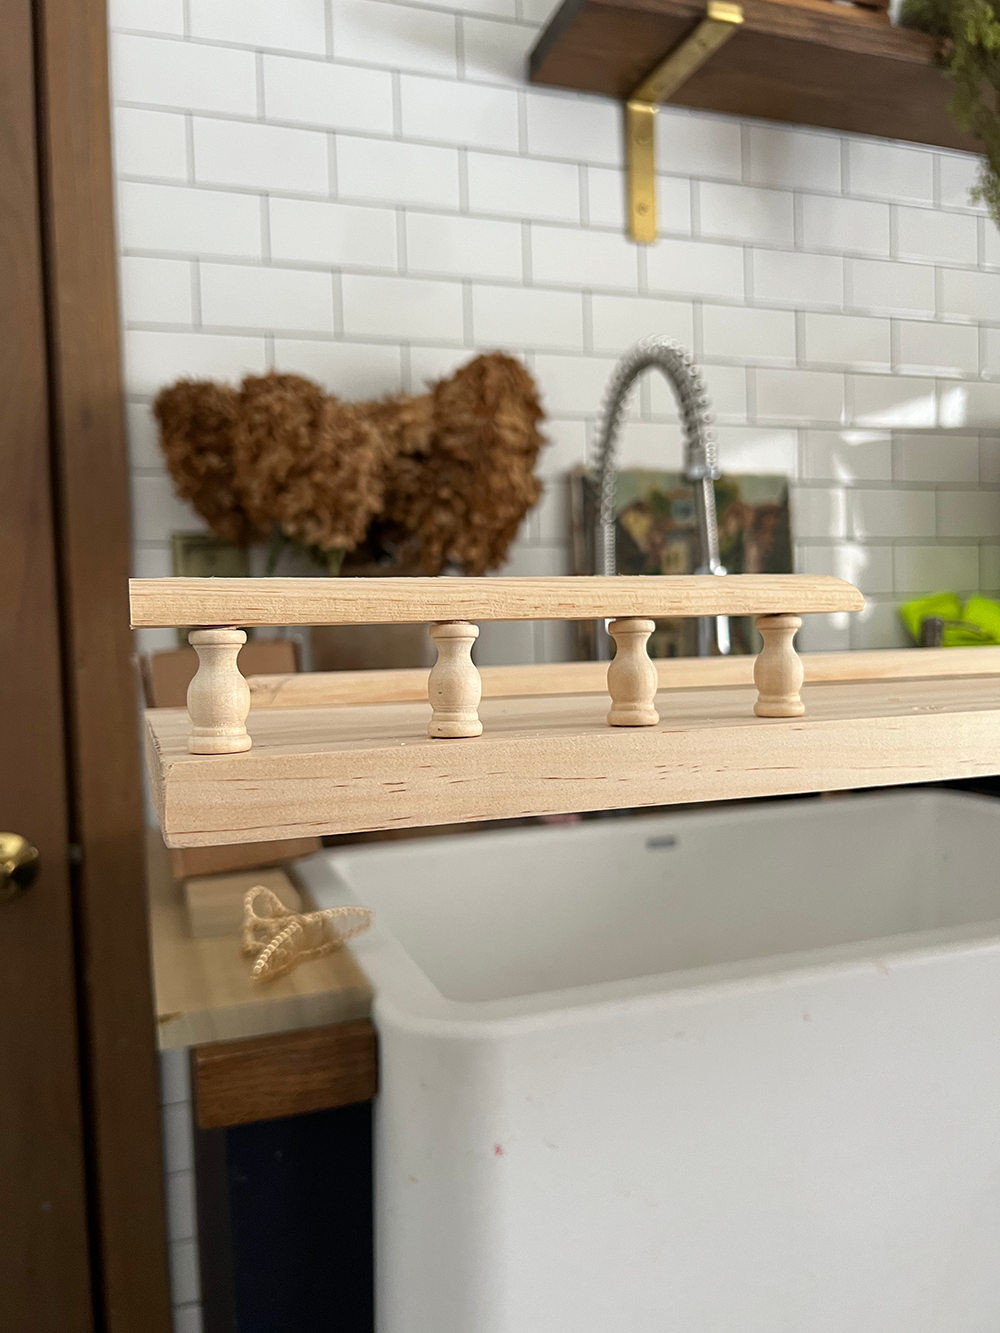
Create your wooden gallery rail! Glue your finials into the holes you drilled after which glue the nook spherical on prime. This DAP Speedy Fuse glue is my favourite. It dries tremendous fast and is so sturdy!
STEP 10
Dangle your shelf! Pull the pipe via the corbels and hook the corbels onto the screws within the wall. We had been ready to make use of among the present holes that had been there already after which needed to drill new holes on both finish. To drill into tile, simply ensure you use a masonry bit!
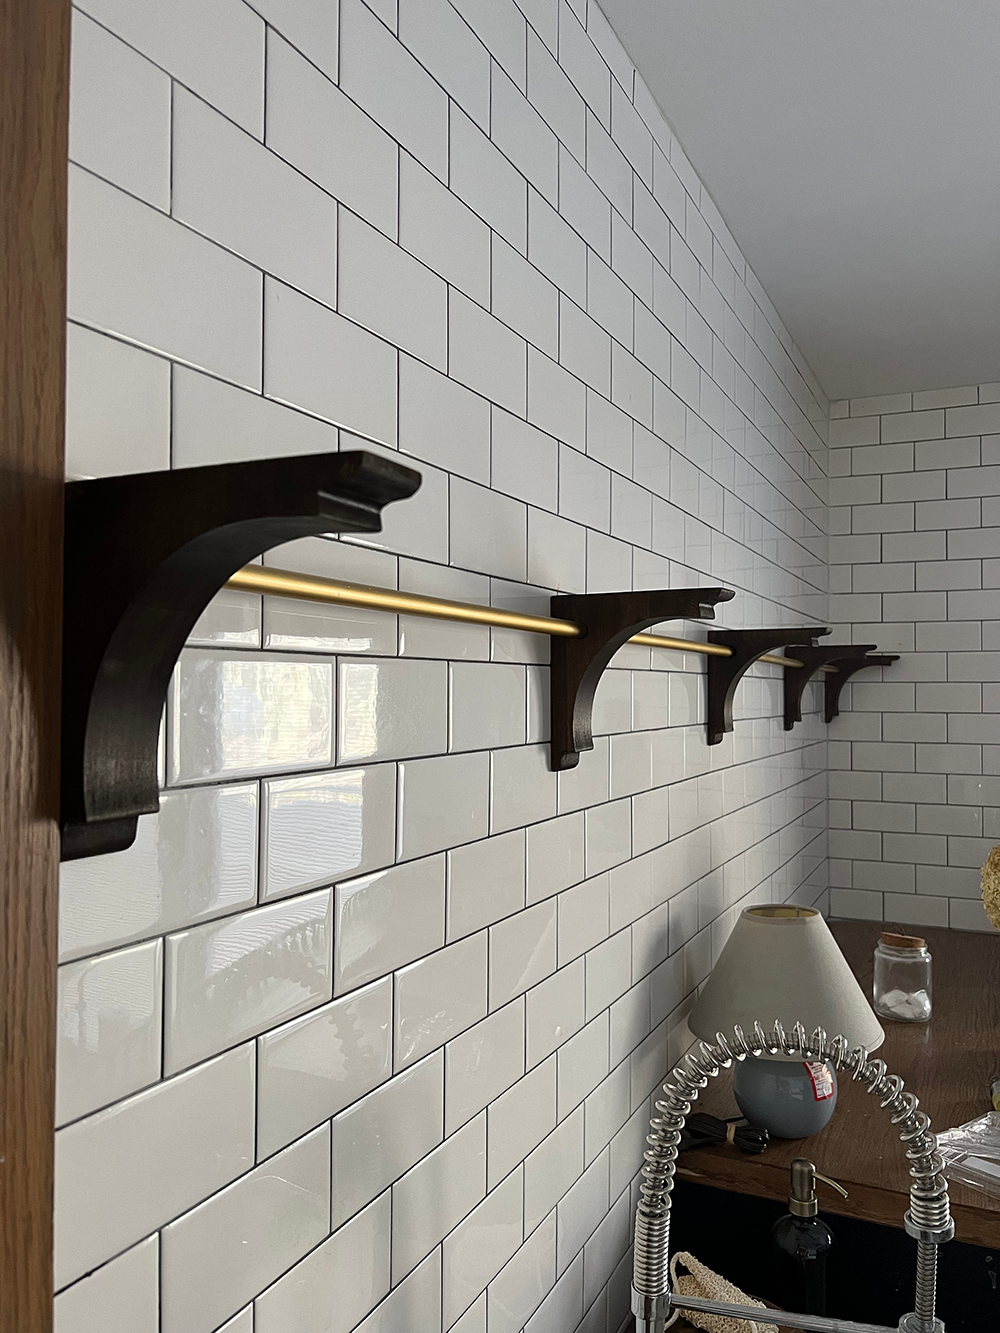
We had somewhat hassle getting all 5 corbels to slip into BOTH screws for each so we ended up solely utilizing one screw per corbel and it was nonetheless tremendous sturdy.
STEP 11
Spray paint your hooks to match the pipe. No matter coloration you spray your pipe, ensure you use the identical to your hooks in the event that they aren’t a superb match. I used these bathe hooks and love the little ball element they’ve.
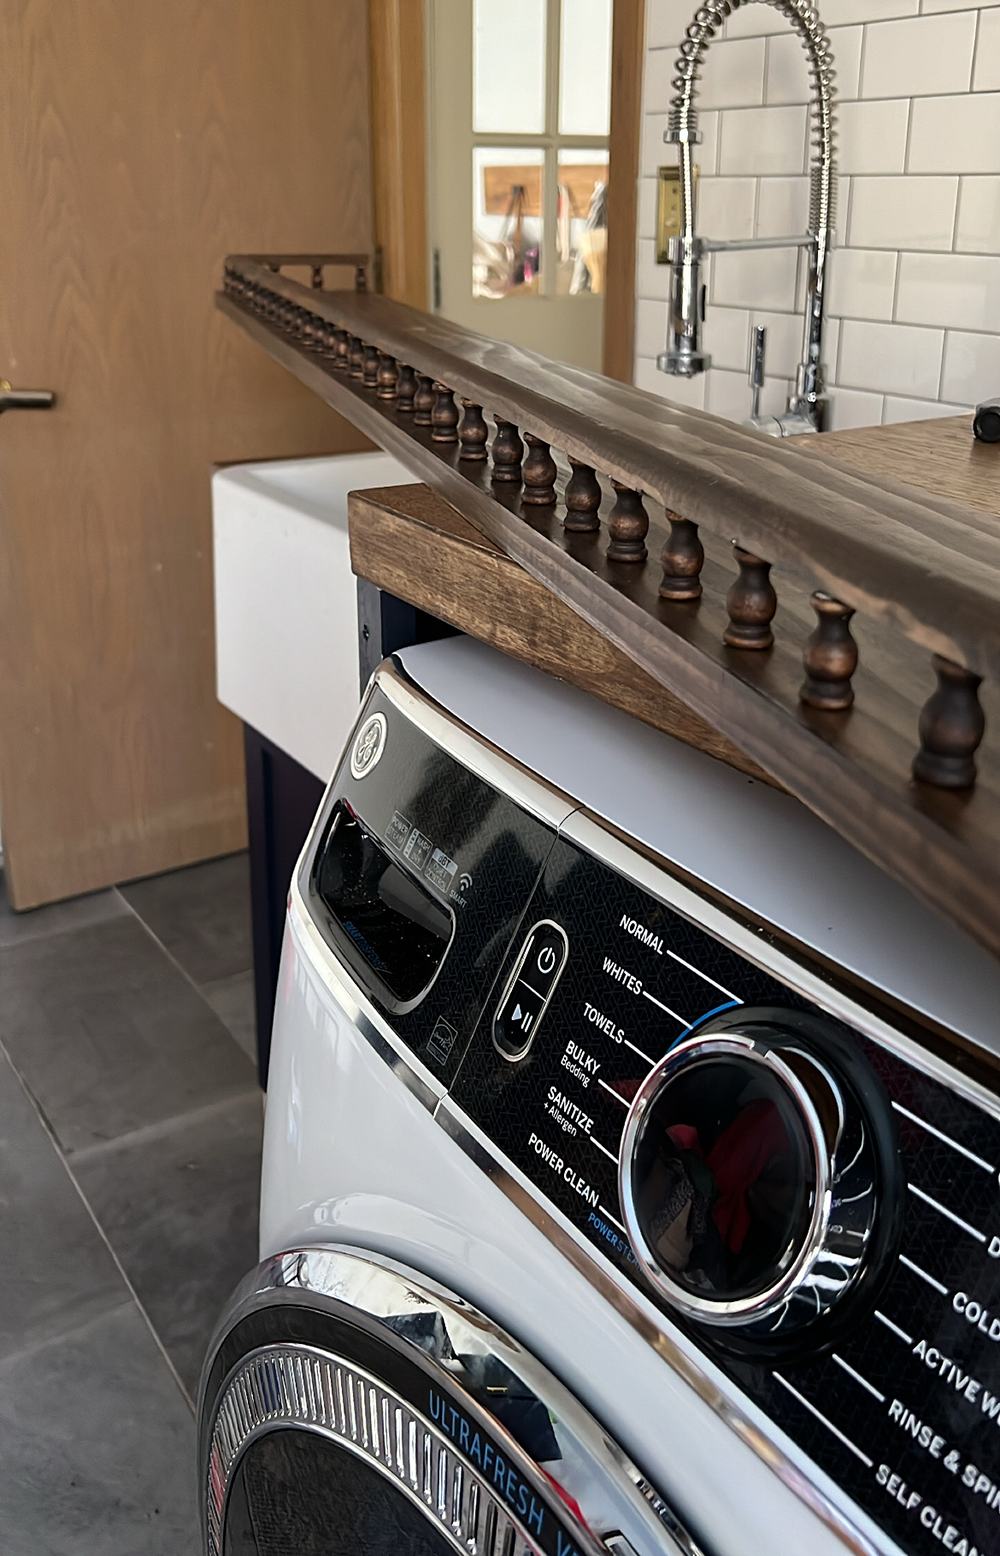
Now it’s the enjoyable half – time to brighten and revel in your shelf!
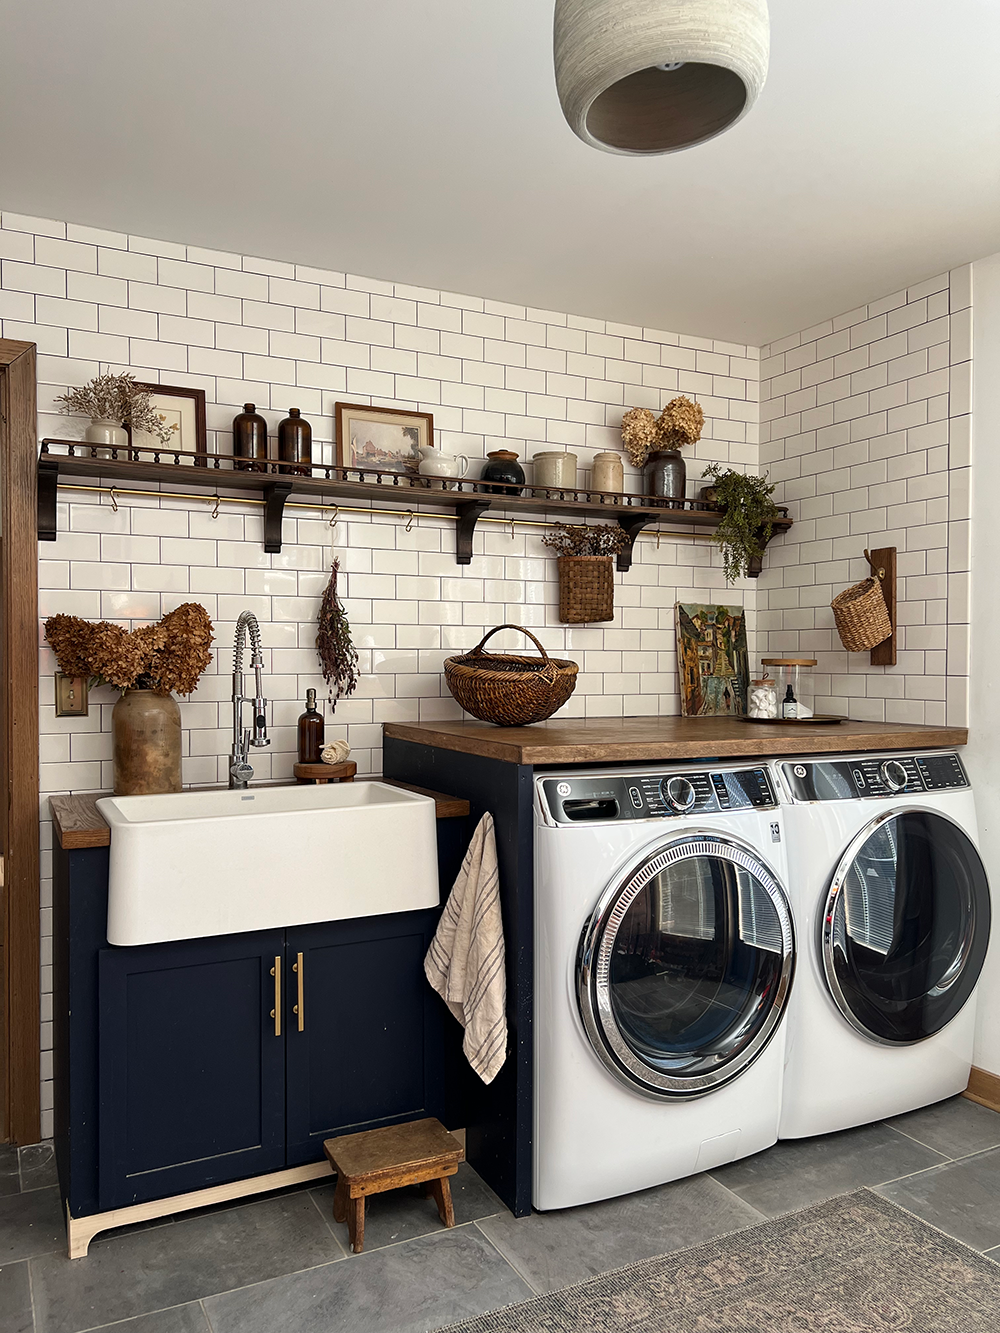
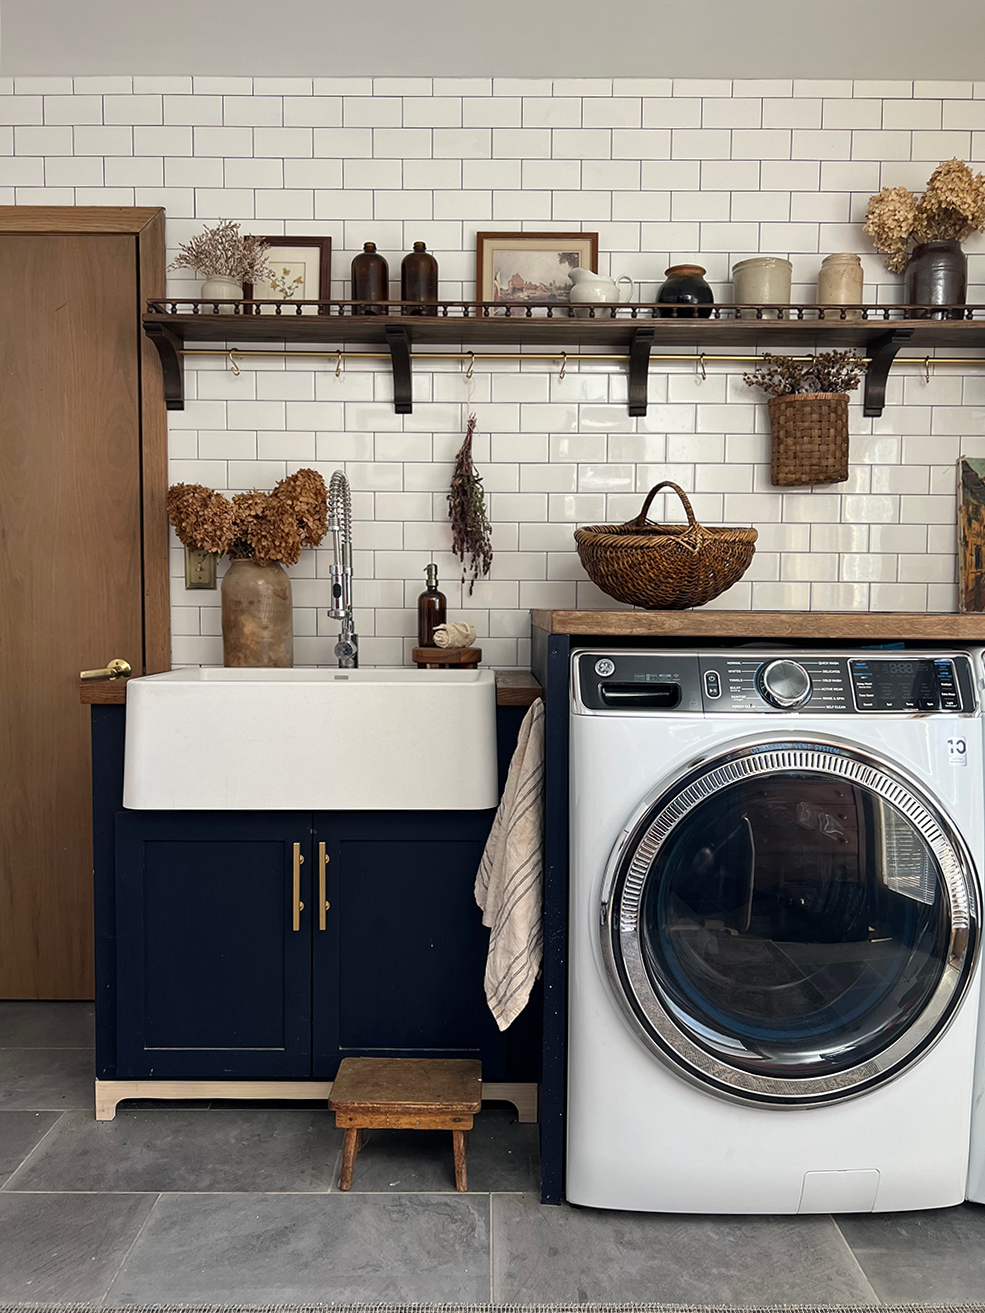
This wooden gallery rail shelf feels SO a lot better than the unique one did on this house. I really like that it fills up the entire size of the wall and has the extra brass rail beneath to hold issues from. It’s additionally so much prettier and added a stunning contact of appeal and character to our laundry room.
What do you suppose? Would you construct your personal shelf with a wooden gallery rail?
Associated
[ad_2]
Source link
